FRAME ASSEMBLY
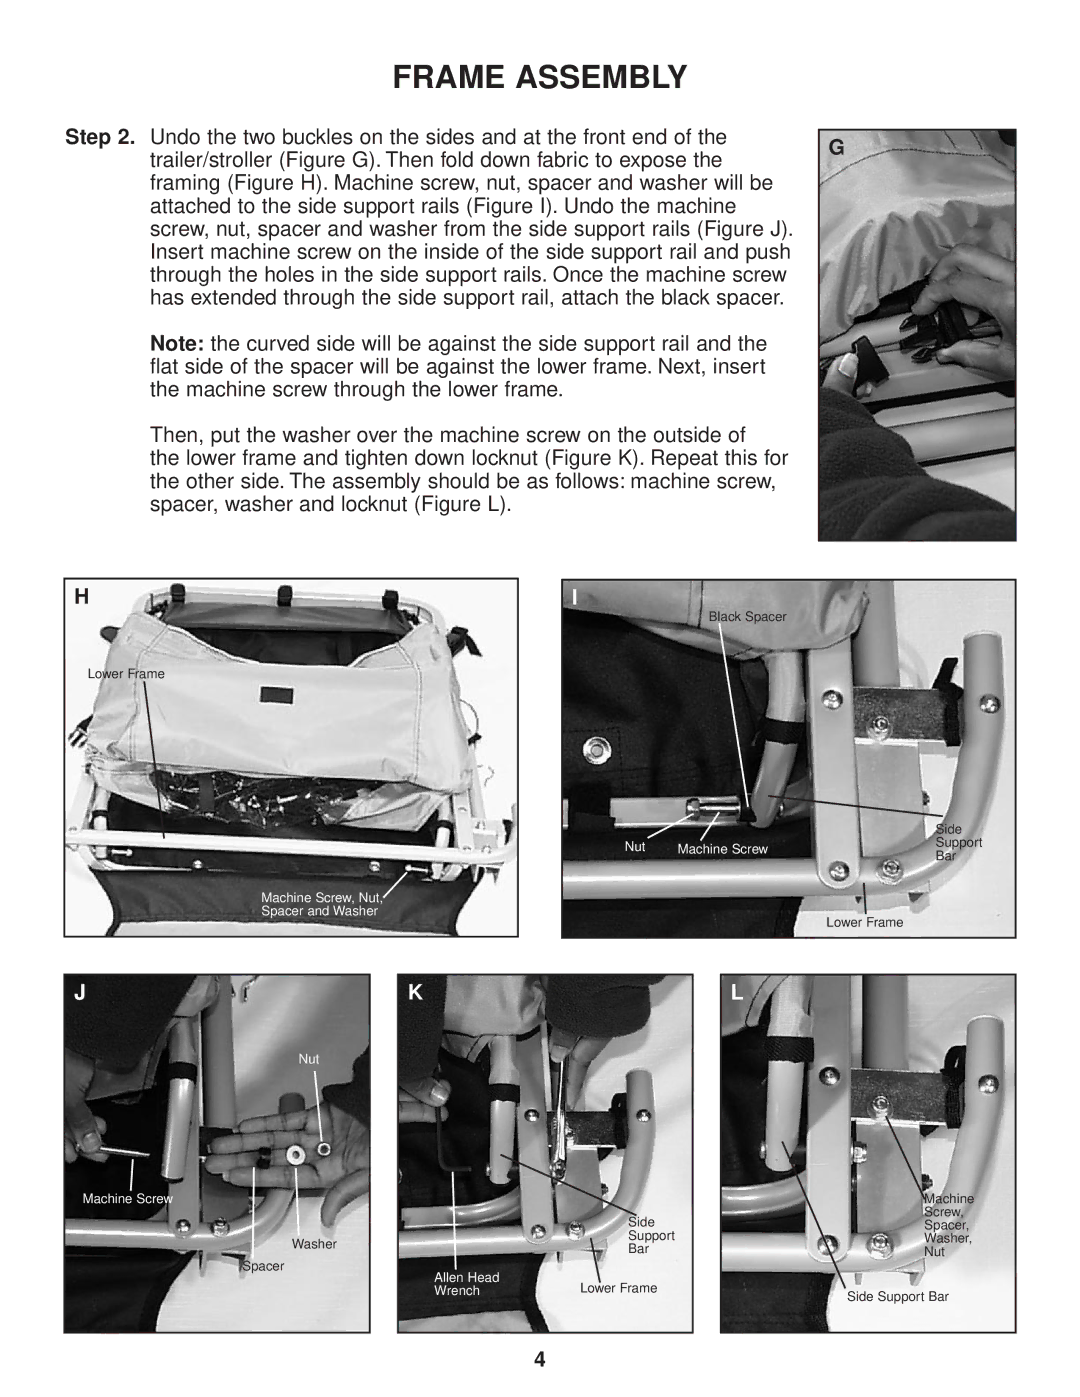
Step 2. Undo the two buckles on the sides and at the front end of the trailer/stroller (Figure G). Then fold down fabric to expose the framing (Figure H). Machine screw, nut, spacer and washer will be attached to the side support rails (Figure I). Undo the machine screw, nut, spacer and washer from the side support rails (Figure J). Insert machine screw on the inside of the side support rail and push through the holes in the side support rails. Once the machine screw has extended through the side support rail, attach the black spacer.
Note: the curved side will be against the side support rail and the flat side of the spacer will be against the lower frame. Next, insert the machine screw through the lower frame.
Then, put the washer over the machine screw on the outside of
the lower frame and tighten down locknut (Figure K). Repeat this for the other side. The assembly should be as follows: machine screw, spacer, washer and locknut (Figure L).
G
H
Lower Frame
Machine Screw, Nut,![]()
Spacer and Washer
I
Black Spacer
|
| Side | |
Nut | Machine Screw | Support | |
Bar | |||
|
| ||
|
| Lower Frame |
J
Nut
Machine Screw
Washer
Spacer
K
| Side |
| Support |
| Bar |
Allen Head | Lower Frame |
Wrench |
L
Machine
Screw,
Spacer,
Washer,
Nut
Side Support Bar
4
