MOUNTING THE CONSOLE IN A VEHICLE
There are two approved mounting methods for the
BEFORE DRILLING ANY HOLES IN THE VEHICLE VERIFY THAT THE DRILL BIT WILL NOT ENTER INTO THE FRAME RAIL(S) OF THE VEHICLE OR DAMAGE ELECTRICAL WIRES, FUEL LINES, BRAKE LINES, HOSES, EXHAUST SYSTEM COMPONENTS OR ANY OTHER ITEMS THAT WILL IMPAIR THE OPERATION OF THE VEHICLE. THE
CAUTION: BEFORE WORKING UNDER THE VEHICLE BLOCK THE WHEELS TO PREVENT ACCIDENTAL INJURY.
Permanent mounting of the E-Z FIT floor console.
•Set the console on the floor of the vehicle and mark where the holes are to be drilled. (Make sure that you have checked under the vehicle and in the vehicle floor (under the carpet) for obstructions).
•Remove the console from the vehicle.
•Using the utility knife, score the carpet over the marks with an ‘X’ so that the drill bit does not ‘grab’ and unravel the carpet.
•Drill four small 1/8” pilot holes to verify that the holes are in the proper locations.
•After verifying that the 1/8” pilot holes are in the proper locations, use the ¼” drill bit to enlarge the pilot holes.
•Set the console on the floor over the holes.
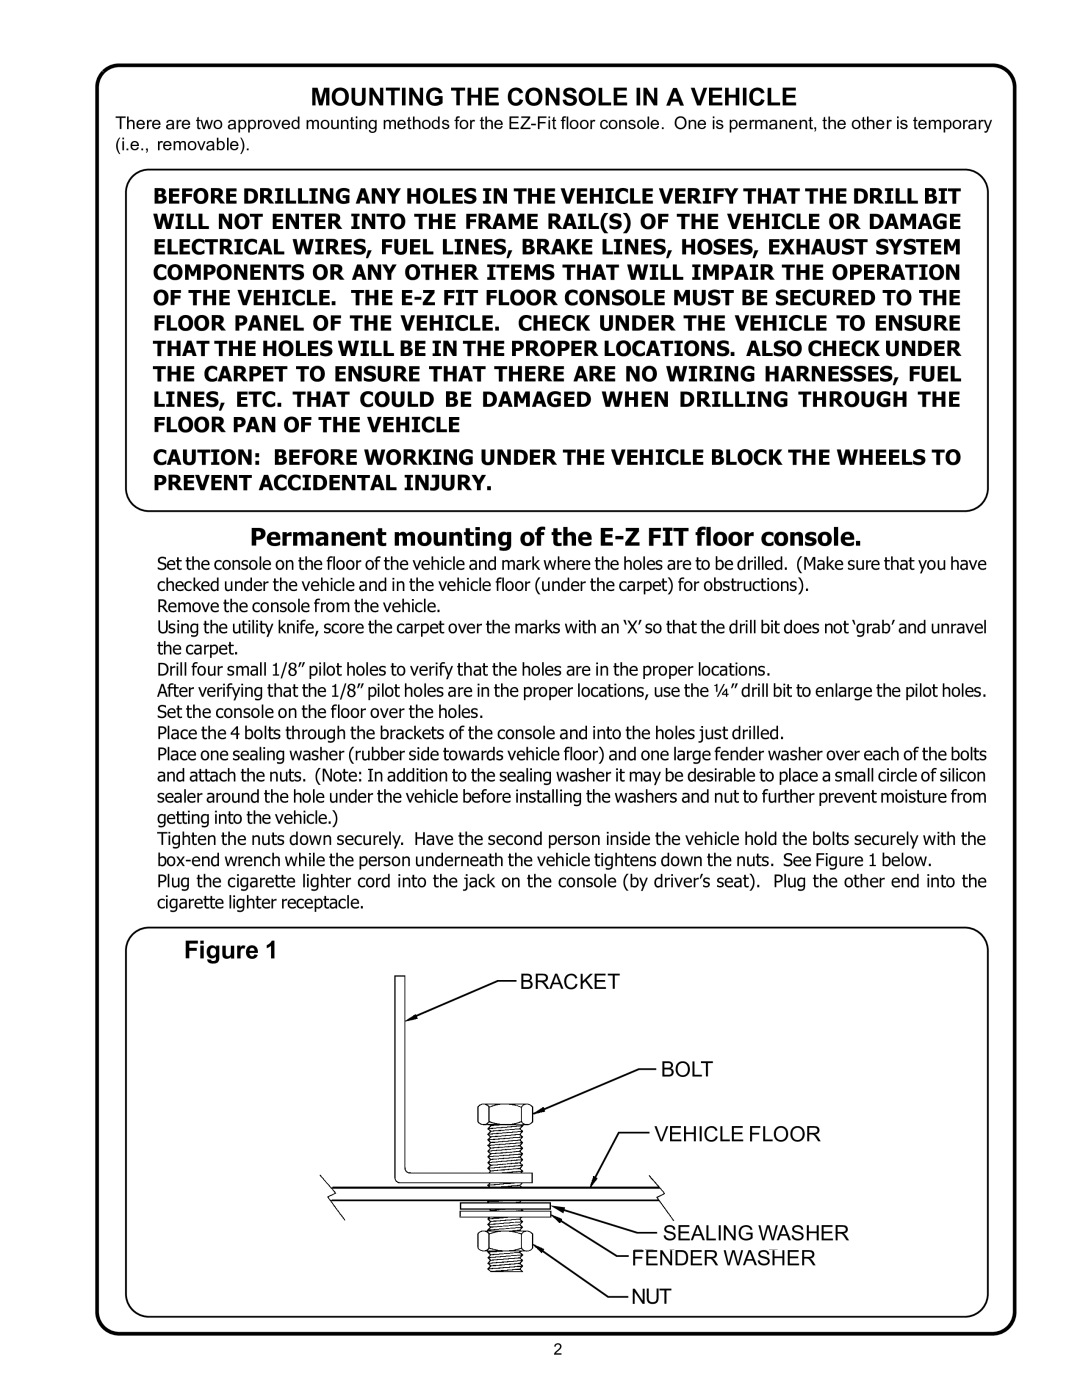
•Place the 4 bolts through the brackets of the console and into the holes just drilled.
•Place one sealing washer (rubber side towards vehicle floor) and one large fender washer over each of the bolts and attach the nuts. (Note: In addition to the sealing washer it may be desirable to place a small circle of silicon sealer around the hole under the vehicle before installing the washers and nut to further prevent moisture from getting into the vehicle.)
•Tighten the nuts down securely. Have the second person inside the vehicle hold the bolts securely with the
•Plug the cigarette lighter cord into the jack on the console (by driver’s seat). Plug the other end into the cigarette lighter receptacle.
Figure 1
BRACKET
BOLT
VEHICLE FLOOR
SEALING WASHER
FENDER WASHER
NUT
2