FOLDING THE WALKER (FIGURE 2)
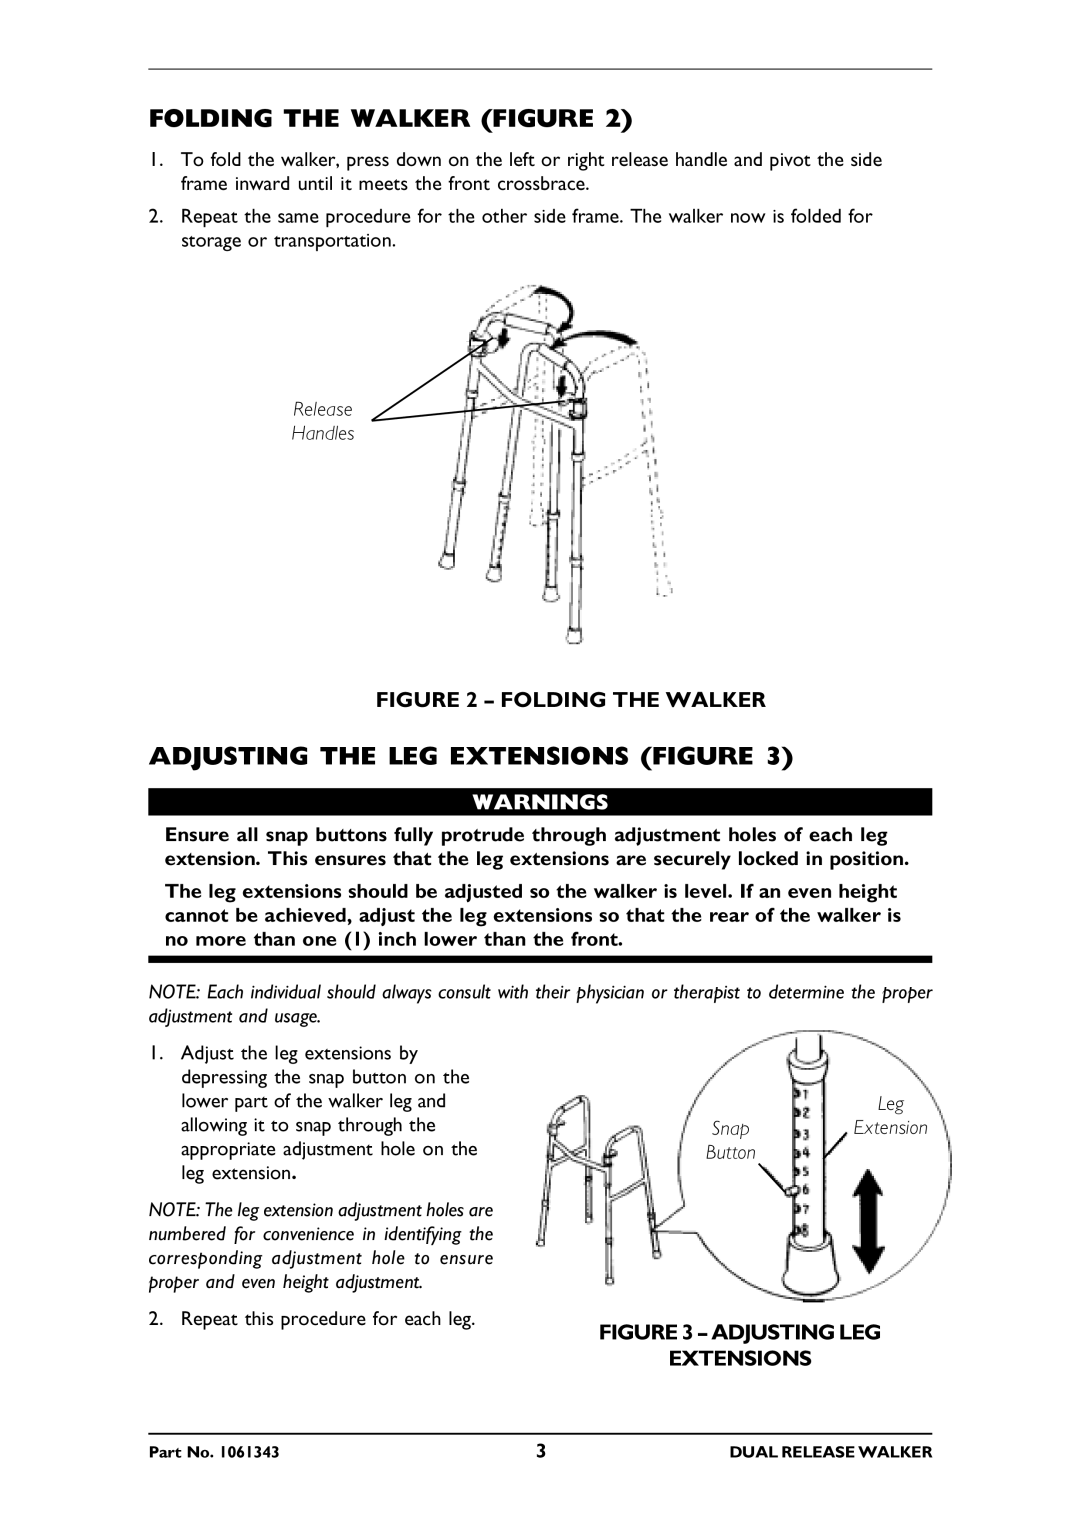
1.To fold the walker, press down on the left or right release handle and pivot the side frame inward until it meets the front crossbrace.
2.Repeat the same procedure for the other side frame. The walker now is folded for storage or transportation.
Release
Handles
FIGURE 2 – FOLDING THE WALKER
ADJUSTING THE LEG EXTENSIONS (FIGURE 3)
WARNINGS
Ensure all snap buttons fully protrude through adjustment holes of each leg extension. This ensures that the leg extensions are securely locked in position.
The leg extensions should be adjusted so the walker is level. If an even height cannot be achieved, adjust the leg extensions so that the rear of the walker is no more than one (1) inch lower than the front.
NOTE: Each individual should always consult with their physician or therapist to determine the proper adjustment and usage.
1.Adjust the leg extensions by depressing the snap button on the lower part of the walker leg and allowing it to snap through the appropriate adjustment hole on the leg extension.
NOTE: The leg extension adjustment holes are numbered for convenience in identifying the corresponding adjustment hole to ensure proper and even height adjustment.
2. Repeat this procedure for each leg.
Leg
SnapExtension
Button
FIGURE 3 – ADJUSTING LEG
EXTENSIONS
Part No. 1061343 | 3 | DUAL RELEASE WALKER |
