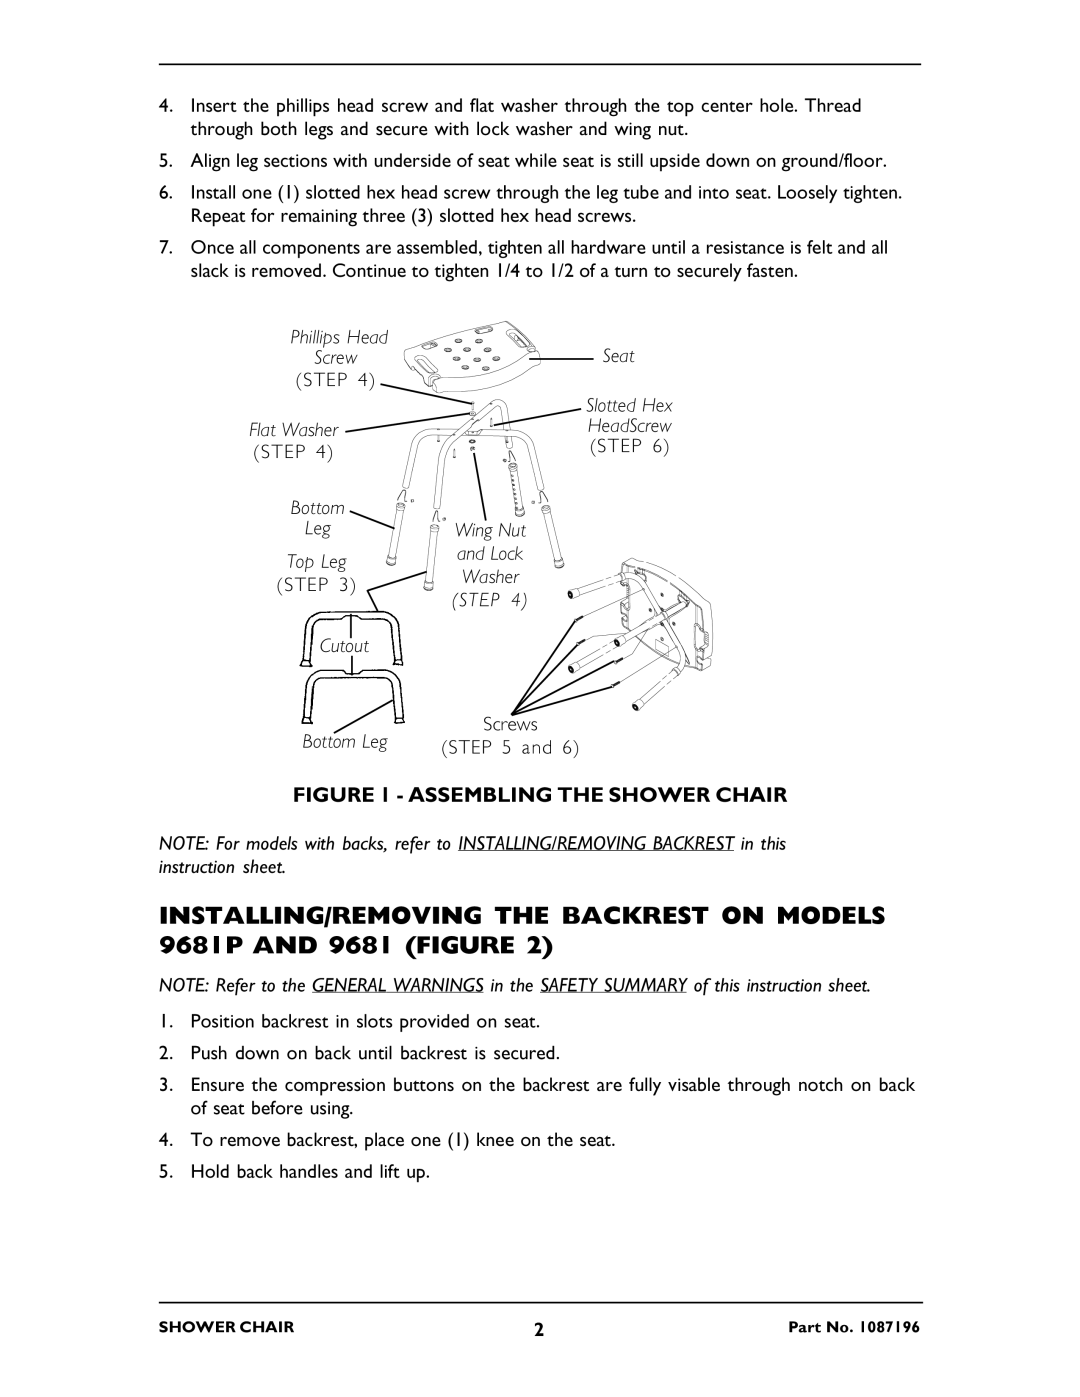
4.Insert the phillips head screw and flat washer through the top center hole. Thread through both legs and secure with lock washer and wing nut.
5.Align leg sections with underside of seat while seat is still upside down on ground/floor.
6.Install one (1) slotted hex head screw through the leg tube and into seat. Loosely tighten. Repeat for remaining three (3) slotted hex head screws.
7.Once all components are assembled, tighten all hardware until a resistance is felt and all slack is removed. Continue to tighten 1/4 to 1/2 of a turn to securely fasten.
Phillips Head | Seat | |
Screw | ||
(STEP 4) |
| |
| Slotted Hex | |
Flat Washer | HeadScrew | |
(STEP 4) | (STEP 6) | |
| ||
Bottom |
| |
Leg | Wing Nut | |
Top Leg | and Lock | |
Washer | ||
(STEP 3) | ||
(STEP 4) | ||
| ||
Cutout |
| |
Bottom Leg | Screws | |
(STEP 5 and 6) |
FIGURE 1 - ASSEMBLING THE SHOWER CHAIR
NOTE: For models with backs, refer to INSTALLING/REMOVING BACKREST in this instruction sheet.
INSTALLING/REMOVING THE BACKREST ON MODELS 9681P AND 9681 (FIGURE 2)
NOTE: Refer to the GENERAL WARNINGS in the SAFETY SUMMARY of this instruction sheet.
1.Position backrest in slots provided on seat.
2.Push down on back until backrest is secured.
3.Ensure the compression buttons on the backrest are fully visable through notch on back of seat before using.
4.To remove backrest, place one (1) knee on the seat.
5.Hold back handles and lift up.
SHOWER CHAIR | 2 | Part No. 1087196 |
