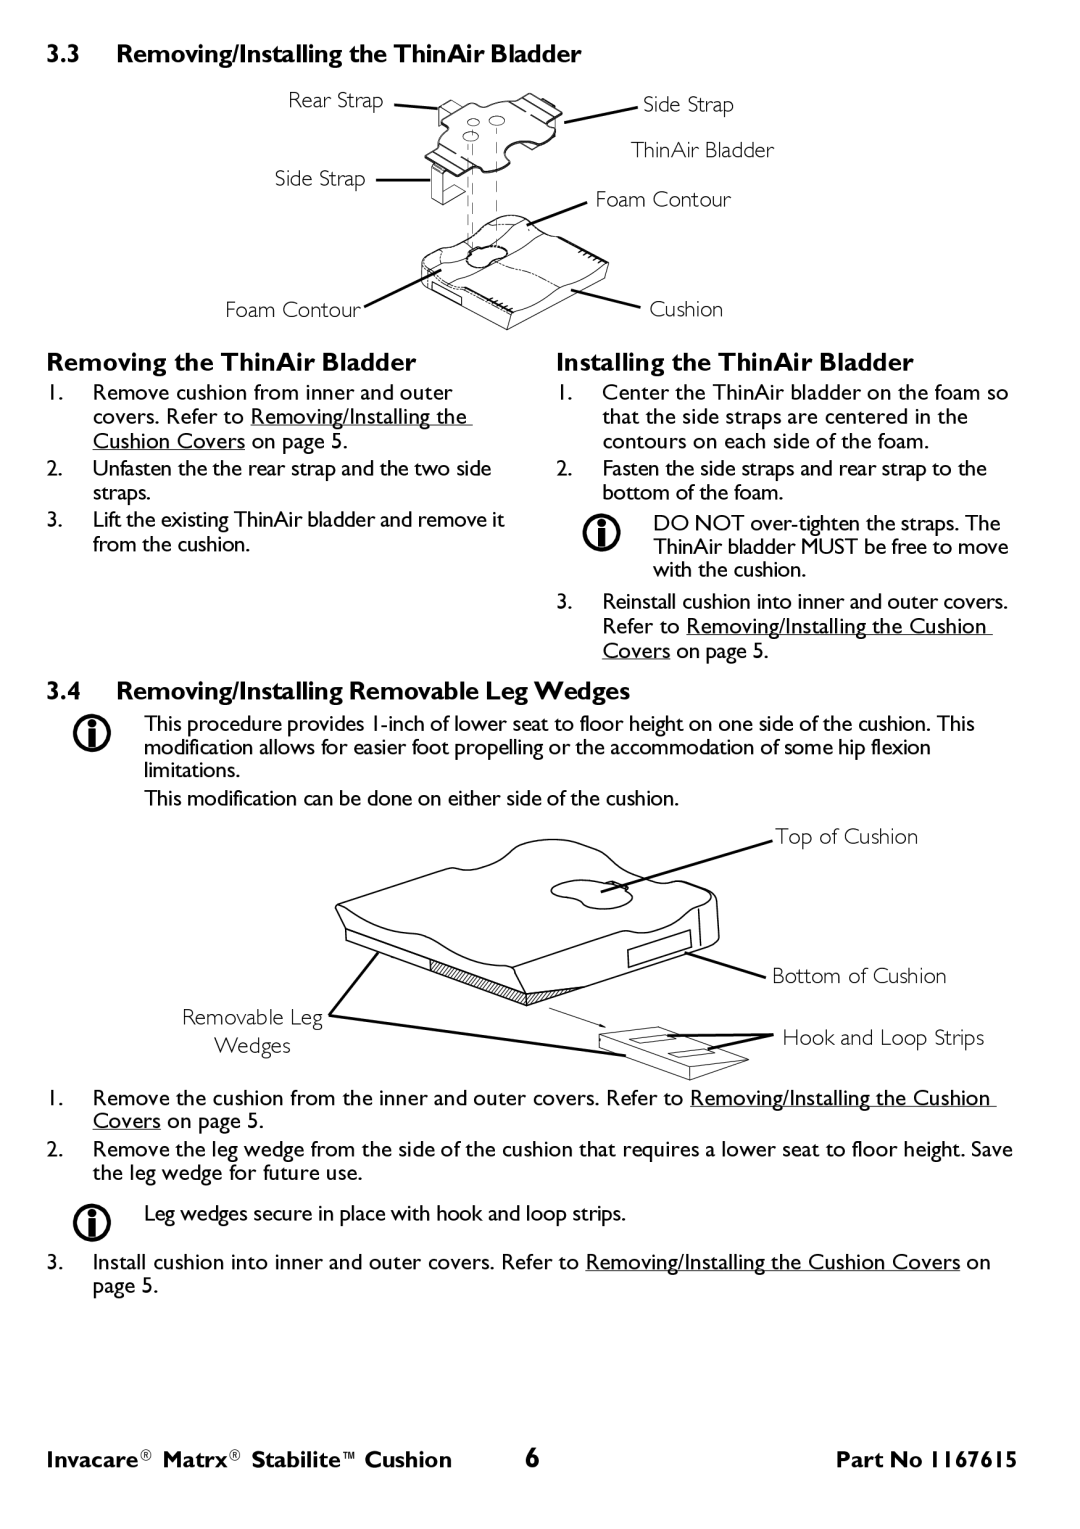
3.3Removing/Installing the ThinAir Bladder
Rear Strap | Side Strap |
| ThinAir Bladder |
Side Strap | Foam Contour |
|
Foam Contour ![]()
![]()
![]()
![]()
![]()
![]()
![]()
![]()
![]() Cushion
Cushion
Removing the ThinAir Bladder
1.Remove cushion from inner and outer covers. Refer to Removing/Installing the Cushion Covers on page 5.
2.Unfasten the the rear strap and the two side straps.
3.Lift the existing ThinAir bladder and remove it from the cushion.
Installing the ThinAir Bladder
1.Center the ThinAir bladder on the foam so that the side straps are centered in the contours on each side of the foam.
2.Fasten the side straps and rear strap to the bottom of the foam.
DO NOT
3.Reinstall cushion into inner and outer covers. Refer to Removing/Installing the Cushion Covers on page 5.
3.4Removing/Installing Removable Leg Wedges
This procedure provides
This modification can be done on either side of the cushion.
Top of Cushion
| Bottom of Cushion | |
Removable Leg | Hook and Loop Strips | |
Wedges | ||
|
1.Remove the cushion from the inner and outer covers. Refer to Removing/Installing the Cushion Covers on page 5.
2.Remove the leg wedge from the side of the cushion that requires a lower seat to floor height. Save the leg wedge for future use.
Leg wedges secure in place with hook and loop strips.
3.Install cushion into inner and outer covers. Refer to Removing/Installing the Cushion Covers on page 5.
Invacare® Matrx® Stabilite™Cushion | 6 | Part No 1167615 |