Assembly
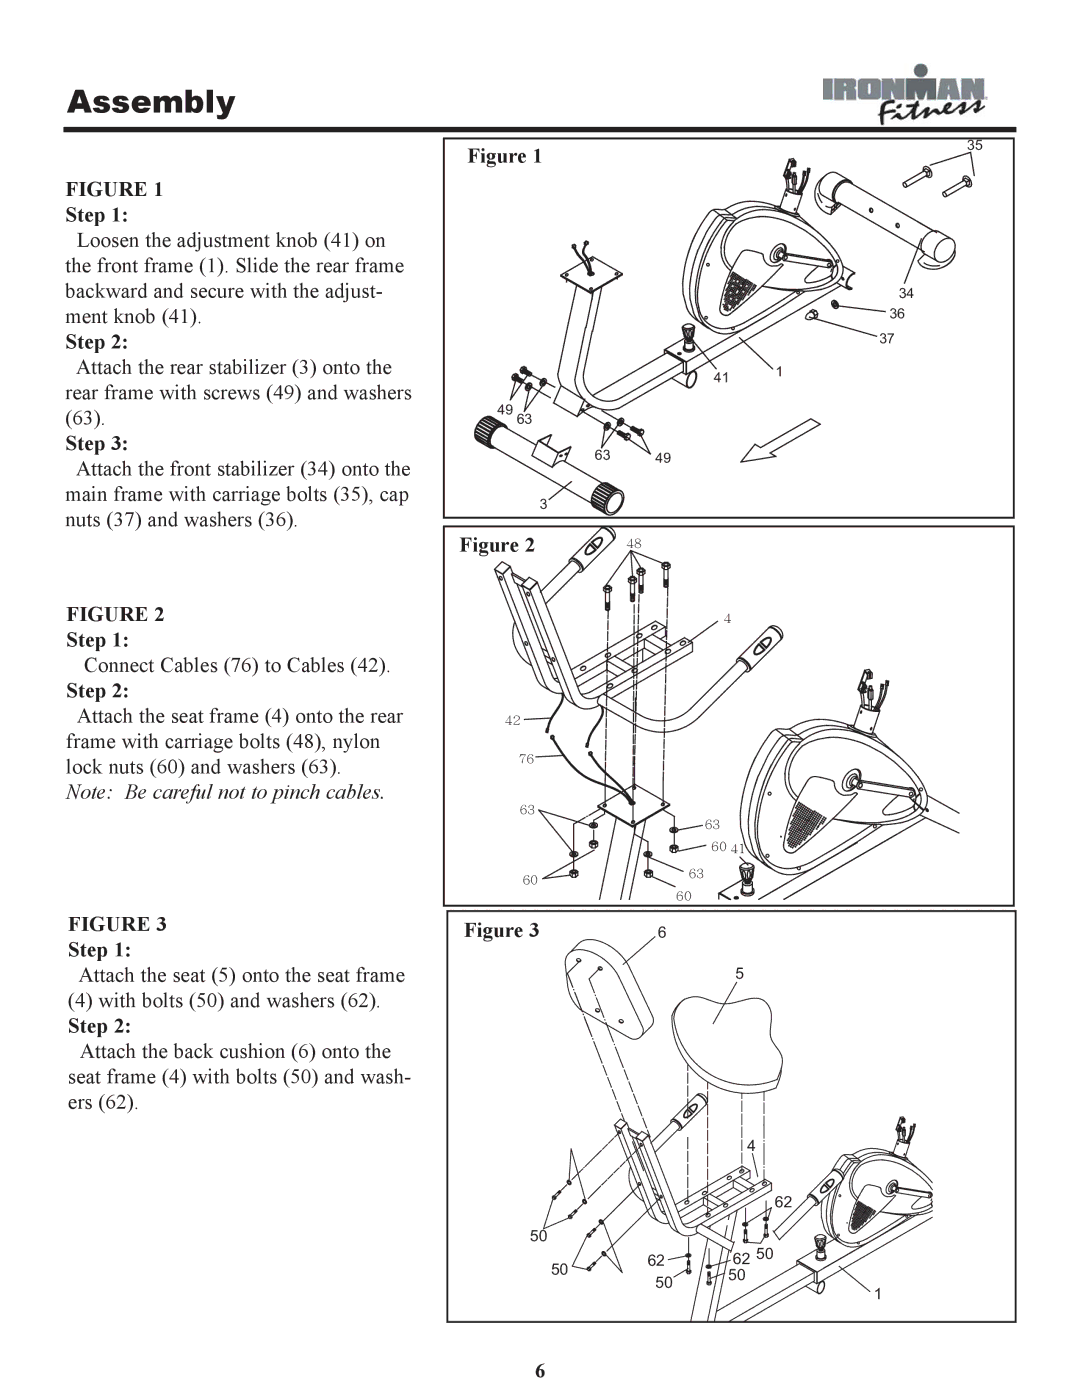
FIGURE 1
Step 1:
Loosen the adjustment knob (41) on the front frame (1). Slide the rear frame backward and secure with the adjust- ment knob (41).
Step 2:
Attach the rear stabilizer (3) onto the rear frame with screws (49) and washers (63).
Step 3:
Attach the front stabilizer (34) onto the main frame with carriage bolts (35), cap nuts (37) and washers (36).
FIGURE 2
Step 1:
Connect Cables (76) to Cables (42).
Step 2:
Attach the seat frame (4) onto the rear frame with carriage bolts (48), nylon lock nuts (60) and washers (63).
Note: Be careful not to pinch cables.
FIGURE 3
Step 1:
Attach the seat (5) onto the seat frame
(4)with bolts (50) and washers (62).
Step 2:
Attach the back cushion (6) onto the seat frame (4) with bolts (50) and wash- ers (62).
Figure 1 |
|
| 35 |
|
|
| |
|
|
| 34 |
|
|
| 36 |
|
|
| 37 |
|
| 41 | 1 |
|
|
| |
49 63 |
|
|
|
63 | 49 |
|
|
3 |
|
|
|
Figure 2 | 48 |
|
|
|
| 4 |
|
42 |
|
|
|
76 |
|
|
|
63 |
| 63 |
|
|
|
| |
|
| 60 41 |
|
60 |
| 63 |
|
| 60 |
| |
|
|
| |
Figure 3 | 6 |
|
|
|
| 5 |
|
|
| 4 |
|
|
|
| 62 |
50 |
| 62 50 |
|
50 | 62 |
| |
50 | 50 |
| |
| 1 | ||
|
| ||
|
|
| |
6 |
|
|
|
