HEADER | SHEET | |
DETAIL | ROCK | |
| INSERT | |
2" X 4" |
| |
SHEET |
| |
ROCK | HEADER | |
| ||
83" |
| |
| BATH | |
| SHOWER |
SIDE DETAIL (TOP VIEW)
![]() 1" X 2"
1" X 2"
DOUBLE
2" X 4"
SHOWER ![]()
SURROUND
SHEET
ROCK
WALL DETAIL
DRILL
CLEARANCE
WALL STUD HOLE
1/4" - 20
STUD
![]()
![]()
![]() CAULKING BLOCKING
CAULKING BLOCKING
MASKING
TAPE
SHOWER
WOOD ENCLOSEDSURROUND WITH FIBERGLASS
Rough Plumbing
The locations of the valves, fill spout and shower head should be marked and drilled before the bath unit is placed in position. Where access to connections is limited, allow enough flexibility in the supply lines for easier positioning of the valves after the unit is in place.
From stable reference points such as the subfloor and front of the double studs, measure and note the locations of the fill spout, valves and shower head arm.
To avoid obstructions during installation , ensure that water lines, spout pipes and valve plumbing do not project into the studwall pocket.
Installation
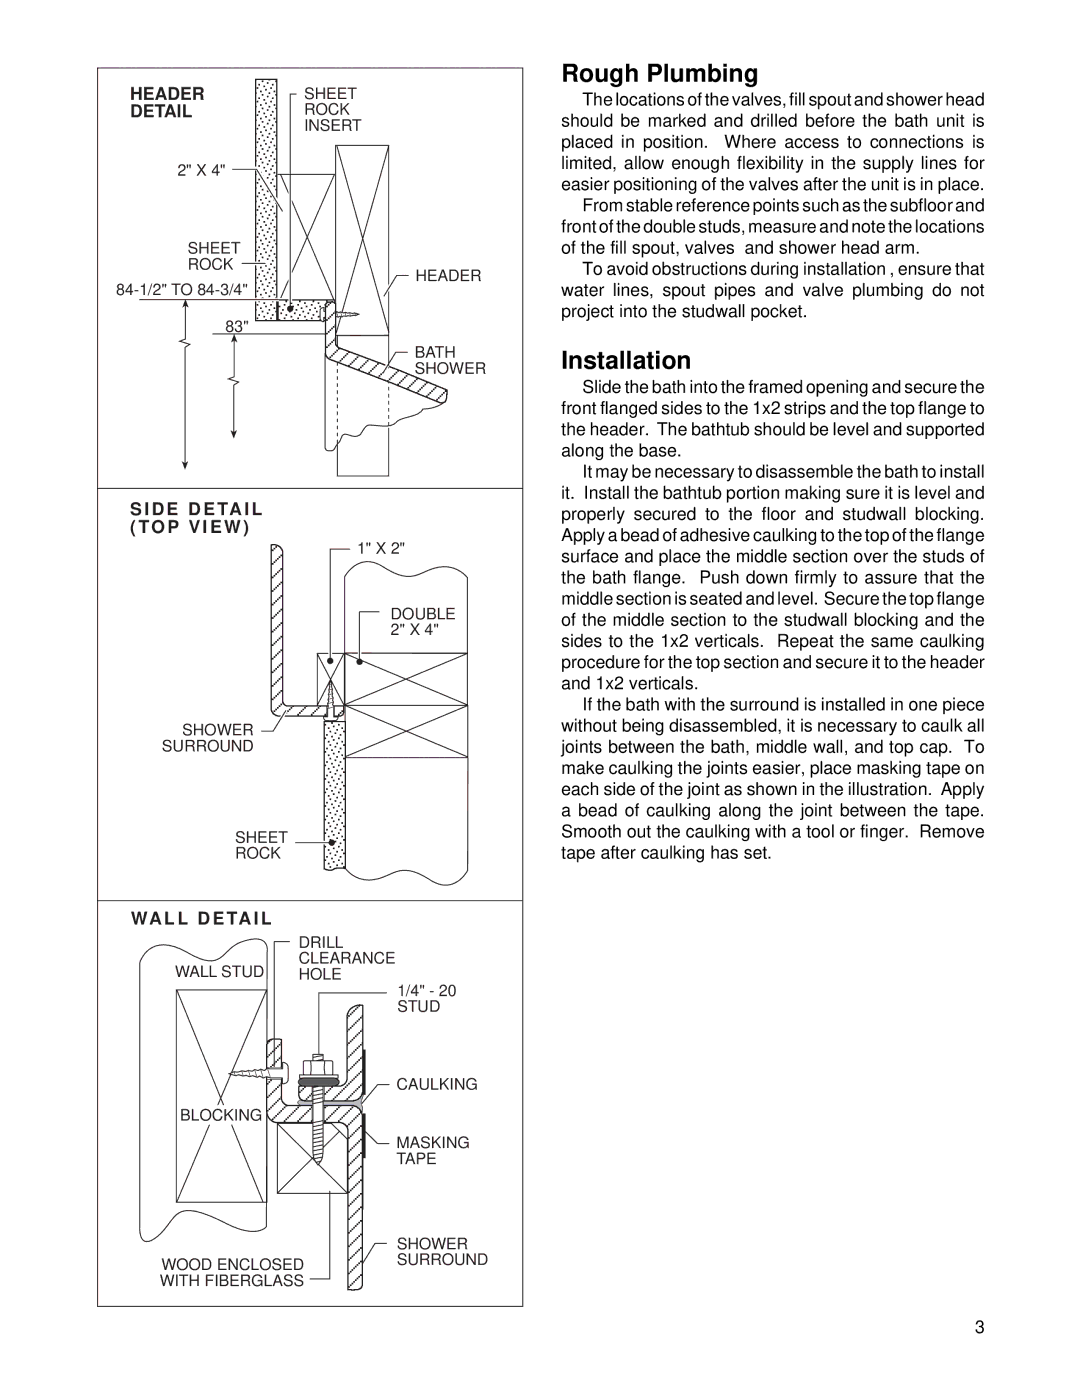
Slide the bath into the framed opening and secure the front flanged sides to the 1x2 strips and the top flange to the header. The bathtub should be level and supported along the base.
It may be necessary to disassemble the bath to install it. Install the bathtub portion making sure it is level and properly secured to the floor and studwall blocking. Apply a bead of adhesive caulking to the top of the flange surface and place the middle section over the studs of the bath flange. Push down firmly to assure that the middle section is seated and level. Secure the top flange of the middle section to the studwall blocking and the sides to the 1x2 verticals. Repeat the same caulking procedure for the top section and secure it to the header and 1x2 verticals.
If the bath with the surround is installed in one piece without being disassembled, it is necessary to caulk all joints between the bath, middle wall, and top cap. To make caulking the joints easier, place masking tape on each side of the joint as shown in the illustration. Apply a bead of caulking along the joint between the tape. Smooth out the caulking with a tool or finger. Remove tape after caulking has set.
3
