Wall-Mounting the Speakers Using Third-Party Wall Brackets
Each JBL On Air Control 2.4G wireless speaker contains a
NOTES:
Customer is responsible for proper selection and installation of appropriate
The threaded insert on the bottom of the speaker is not intended for
Stand-Mounting the Speakers
Each JBL On Air Control 2.4G wireless speaker contains a
NOTE: Customer is responsible for proper selection and installation of appro- priate
Wall-Mounting the Transmitter Module
Step 1.
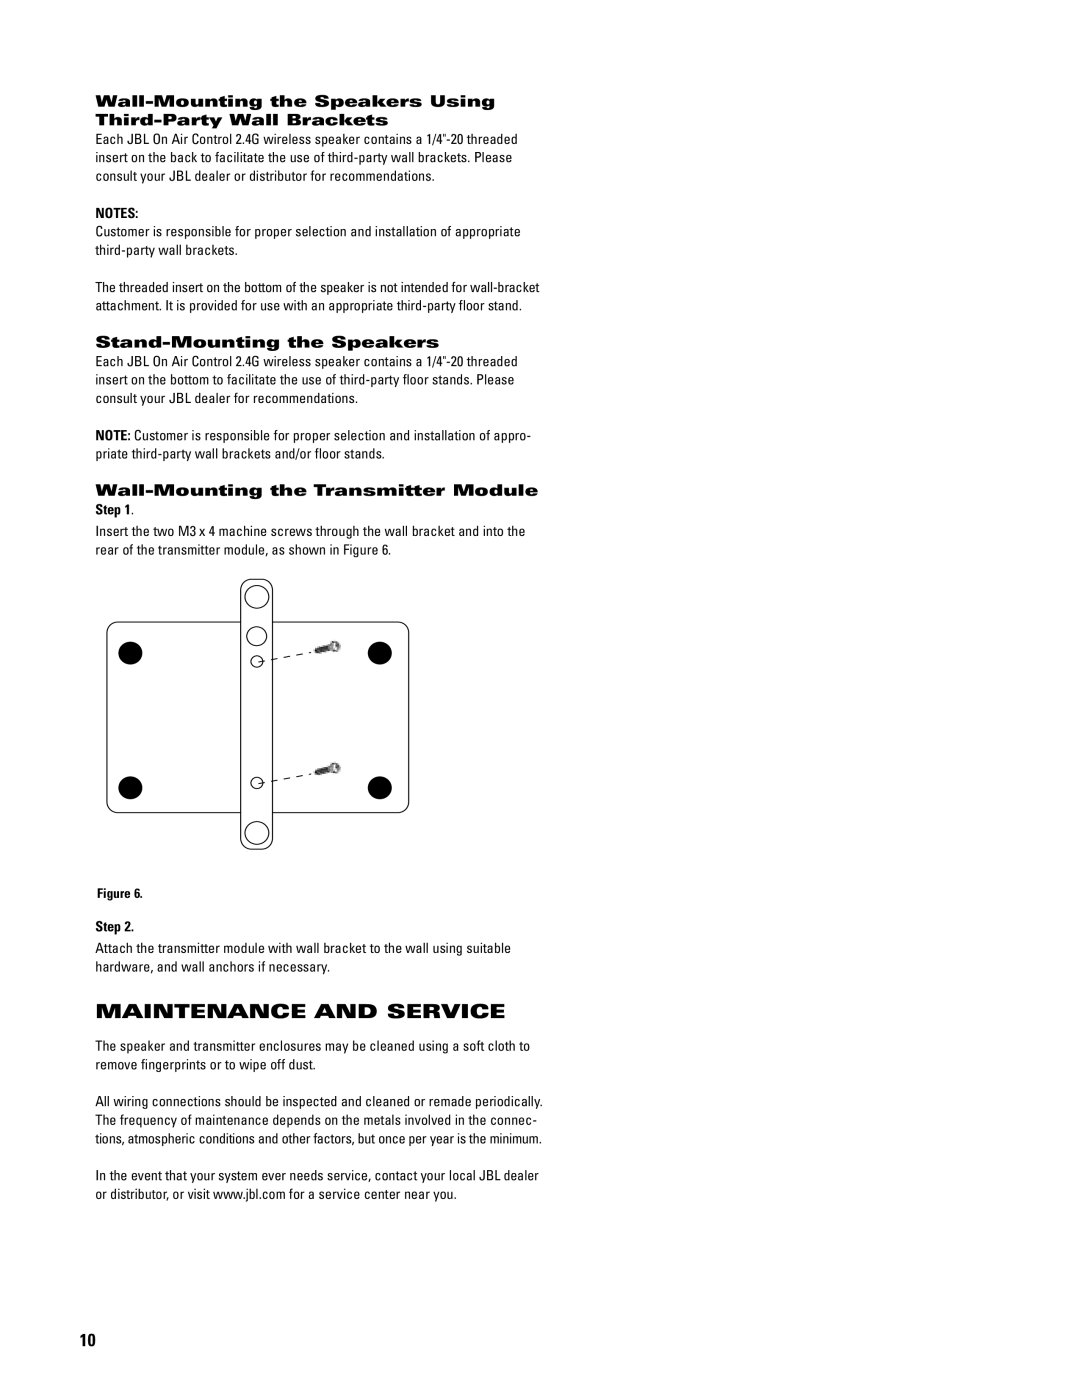
Insert the two M3 x 4 machine screws through the wall bracket and into the rear of the transmitter module, as shown in Figure 6.
Figure 6.
Step 2.
Attach the transmitter module with wall bracket to the wall using suitable hardware, and wall anchors if necessary.
MAINTENANCE AND SERVICE
The speaker and transmitter enclosures may be cleaned using a soft cloth to remove fingerprints or to wipe off dust.
All wiring connections should be inspected and cleaned or remade periodically. The frequency of maintenance depends on the metals involved in the connec- tions, atmospheric conditions and other factors, but once per year is the minimum.
In the event that your system ever needs service, contact your local JBL dealer or distributor, or visit www.jbl.com for a service center near you.
10
