Studio Monitor Model 4348
JBL Incorporated
1: Introduction
Thank you for purchasing the JBL
In order to better understand and correctly use this product, please thoroughly read this Owner's Manual before using the product.
2: Unpacking
The product should have been delivered complete in appearance and functionality. However, if you find any scratches or defects, please directly contact the store where you purchased the product.
We recommend that you keep the original box and packing material after unpacking. Please note that if a product must be shipped for a repair service, JBL Incorporated will not be responsible for any damage incurred during shipping caused by insufficient packing.
3: Installation
Avoid placing the monitors near power amplifiers or radiators that generate large amounts of heat, or in very humid or dusty places, and any places exposed to direct sunlight. Also place them on a firm, solid floor.
•Settings
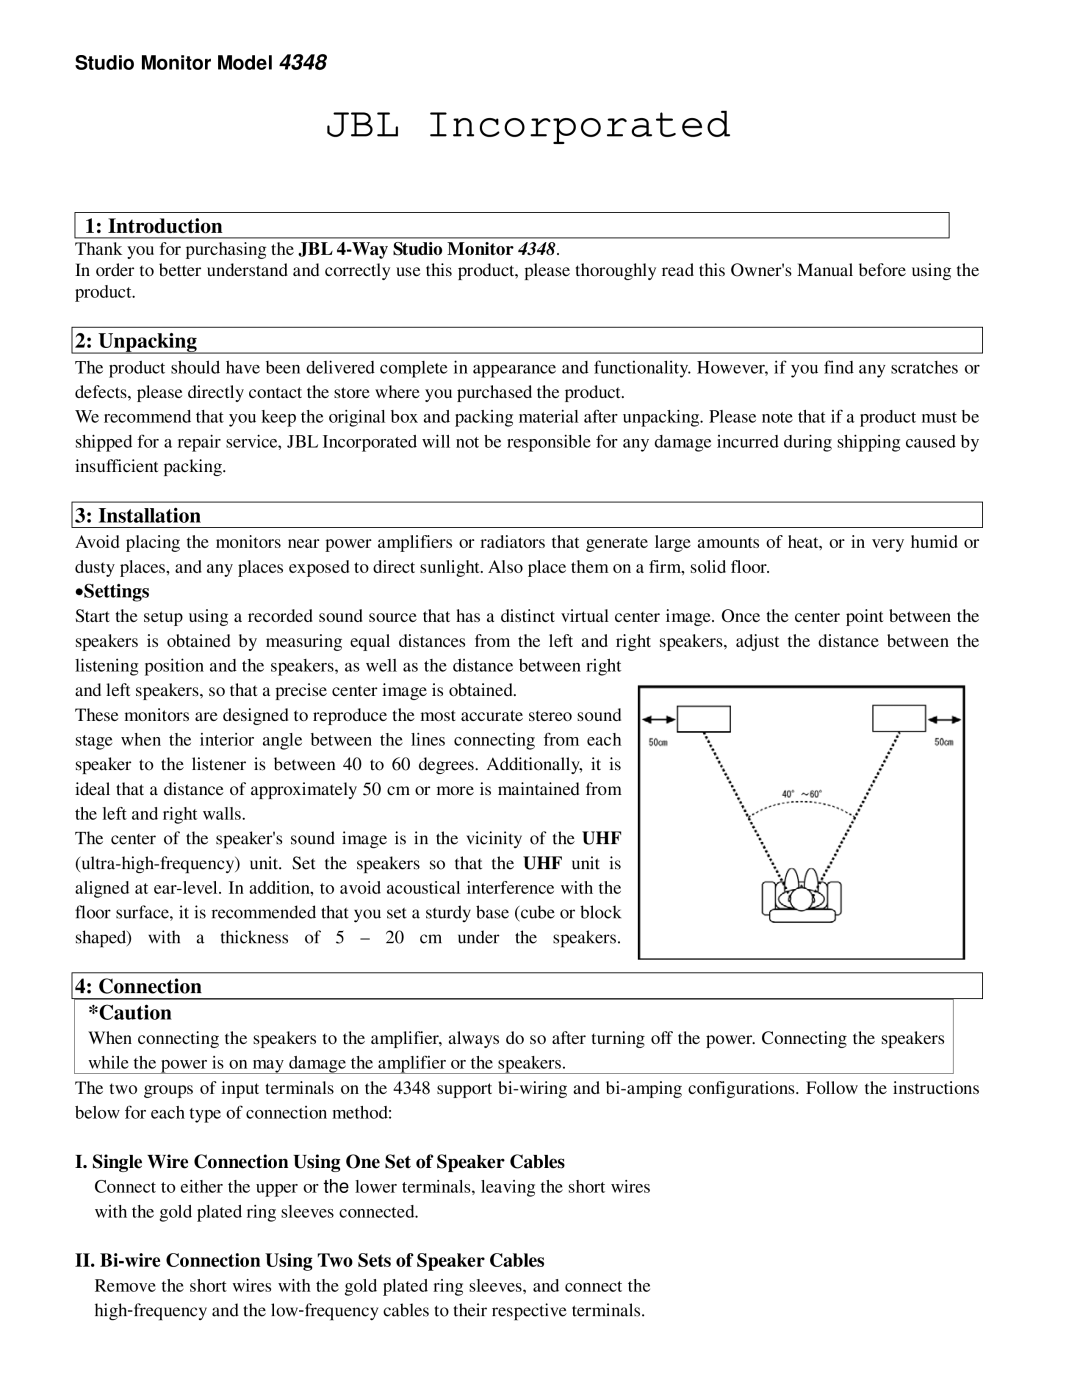
Start the setup using a recorded sound source that has a distinct virtual center image. Once the center point between the speakers is obtained by measuring equal distances from the left and right speakers, adjust the distance between the listening position and the speakers, as well as the distance between right
and left speakers, so that a precise center image is obtained.
These monitors are designed to reproduce the most accurate stereo sound stage when the interior angle between the lines connecting from each speaker to the listener is between 40 to 60 degrees. Additionally, it is ideal that a distance of approximately 50 cm or more is maintained from the left and right walls.
The center of the speaker's sound image is in the vicinity of the UHF
4:Connection *Caution
When connecting the speakers to the amplifier, always do so after turning off the power. Connecting the speakers while the power is on may damage the amplifier or the speakers.
The two groups of input terminals on the 4348 support
I. Single Wire Connection Using One Set of Speaker Cables
Connect to either the upper or the lower terminals, leaving the short wires with the gold plated ring sleeves connected.
II. Bi-wire Connection Using Two Sets of Speaker Cables
Remove the short wires with the gold plated ring sleeves, and connect the