
S120PII specifications
The JBL S120PII is a powerful and versatile subwoofer designed to deliver an exceptional audio experience for both music enthusiasts and movie lovers. With its cutting-edge technology and impressive specifications, it stands out as a reliable choice for enhancing the low-frequency sound in home audio setups.One of the main features of the JBL S120PII is its large 12-inch cone driver, which delivers deep and impactful bass. This driver is engineered to provide enhanced sound reproduction, allowing users to feel the rhythm and power of their favorite tracks. With a frequency response that ranges from 29 Hz to 150 Hz, the S120PII effectively handles the low-end frequencies that are crucial for an immersive listening experience.
The subwoofer is equipped with a robust built-in amplifier that boasts an impressive power output of 300 watts RMS and peaks at 600 watts. This amplification ensures that the subwoofer can deliver consistent and powerful bass even during intense audio playback. The amplifier also features advanced signal processing capabilities, allowing the S120PII to adapt to various room environments and optimize sound performance.
Another key characteristic of the JBL S120PII is its sophisticated enclosure design. The subwoofer is housed in a tuned port cabinet that minimizes distortion and maximizes airflow, resulting in clean and accurate bass reproduction. This design not only enhances the overall sound quality but also adds aesthetic appeal, making it a stylish addition to any home theater or audio setup.
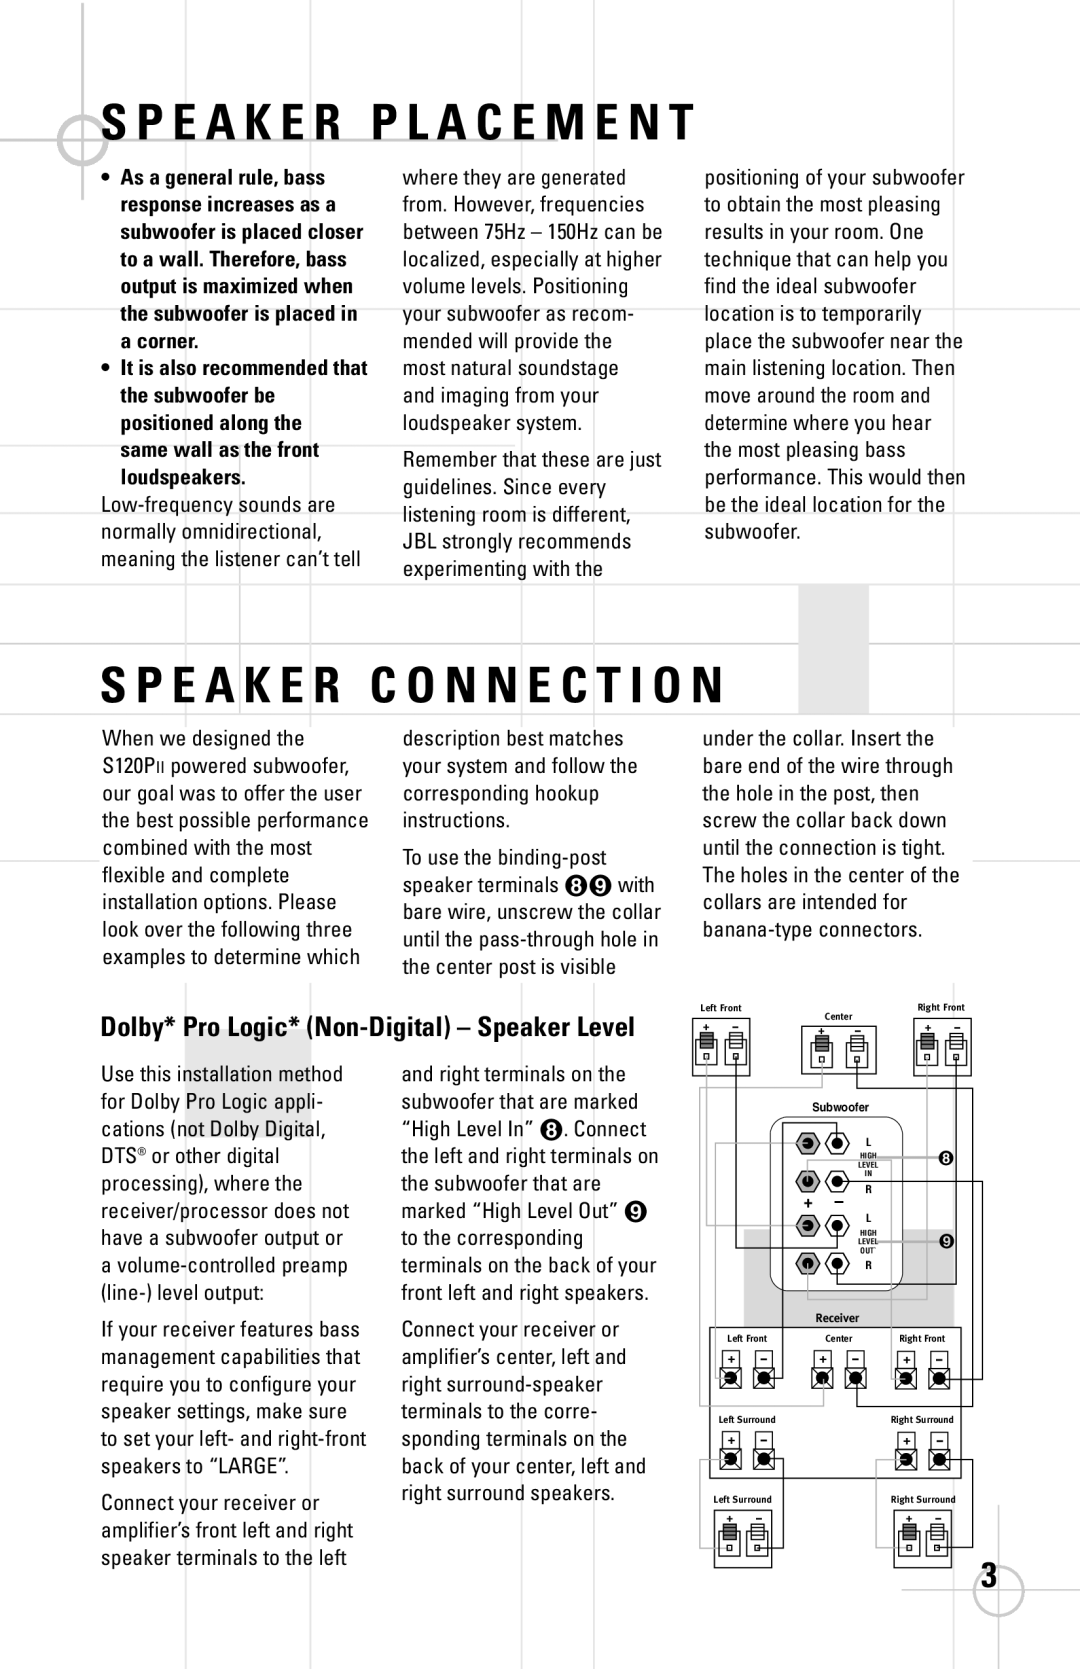
Connectivity options are another highlight of the S120PII. It features both line-level and speaker-level inputs, allowing for easy integration with different audio systems. The subwoofer is compatible with various receivers and amplifiers, making it a versatile choice for home theater enthusiasts.
JBL is known for its commitment to durability and quality, and the S120PII is no exception. The robust construction ensures longevity and resilience, making this subwoofer a lasting investment for any audio lover.
In conclusion, the JBL S120PII subwoofer is a solid choice for those seeking superior bass performance and versatility. With its powerful driver, advanced amplifier, and sleek design, it is well-suited for enhancing both music and movie soundscapes, delivering an unforgettable listening experience.