SS88IWSBB specifications
The JBL SS88IWSBB is an impressive in-wall speaker that represents a perfect blend of cutting-edge technology and exceptional audio performance, making it an ideal choice for both home theater systems and multi-room audio setups. With its sleek design and high-quality components, the SS88IWSBB showcases JBL's dedication to delivering premium sound without compromising on aesthetics.One of the standout features of the SS88IWSBB is its advanced 8-inch woofer, which is engineered to provide deep, powerful bass while maintaining clarity across a wide frequency range. This large driver is complemented by a 1-inch silk dome tweeter that ensures a smooth and detailed high-frequency response. Together, these components create a well-balanced audio experience that caters to various listening preferences, whether enjoying your favorite music, movies, or gaming.
The speaker benefits from JBL's proprietary technologies, including the patented Differential Drive technology, which helps minimize distortion even at high volumes. This feature is crucial for delivering immersive soundscapes in any setting, as it allows listeners to enjoy dynamic audio without compromising clarity. Additionally, the speaker's smooth, wide dispersion pattern ensures that sound is evenly distributed throughout the room, making it perfect for large spaces.
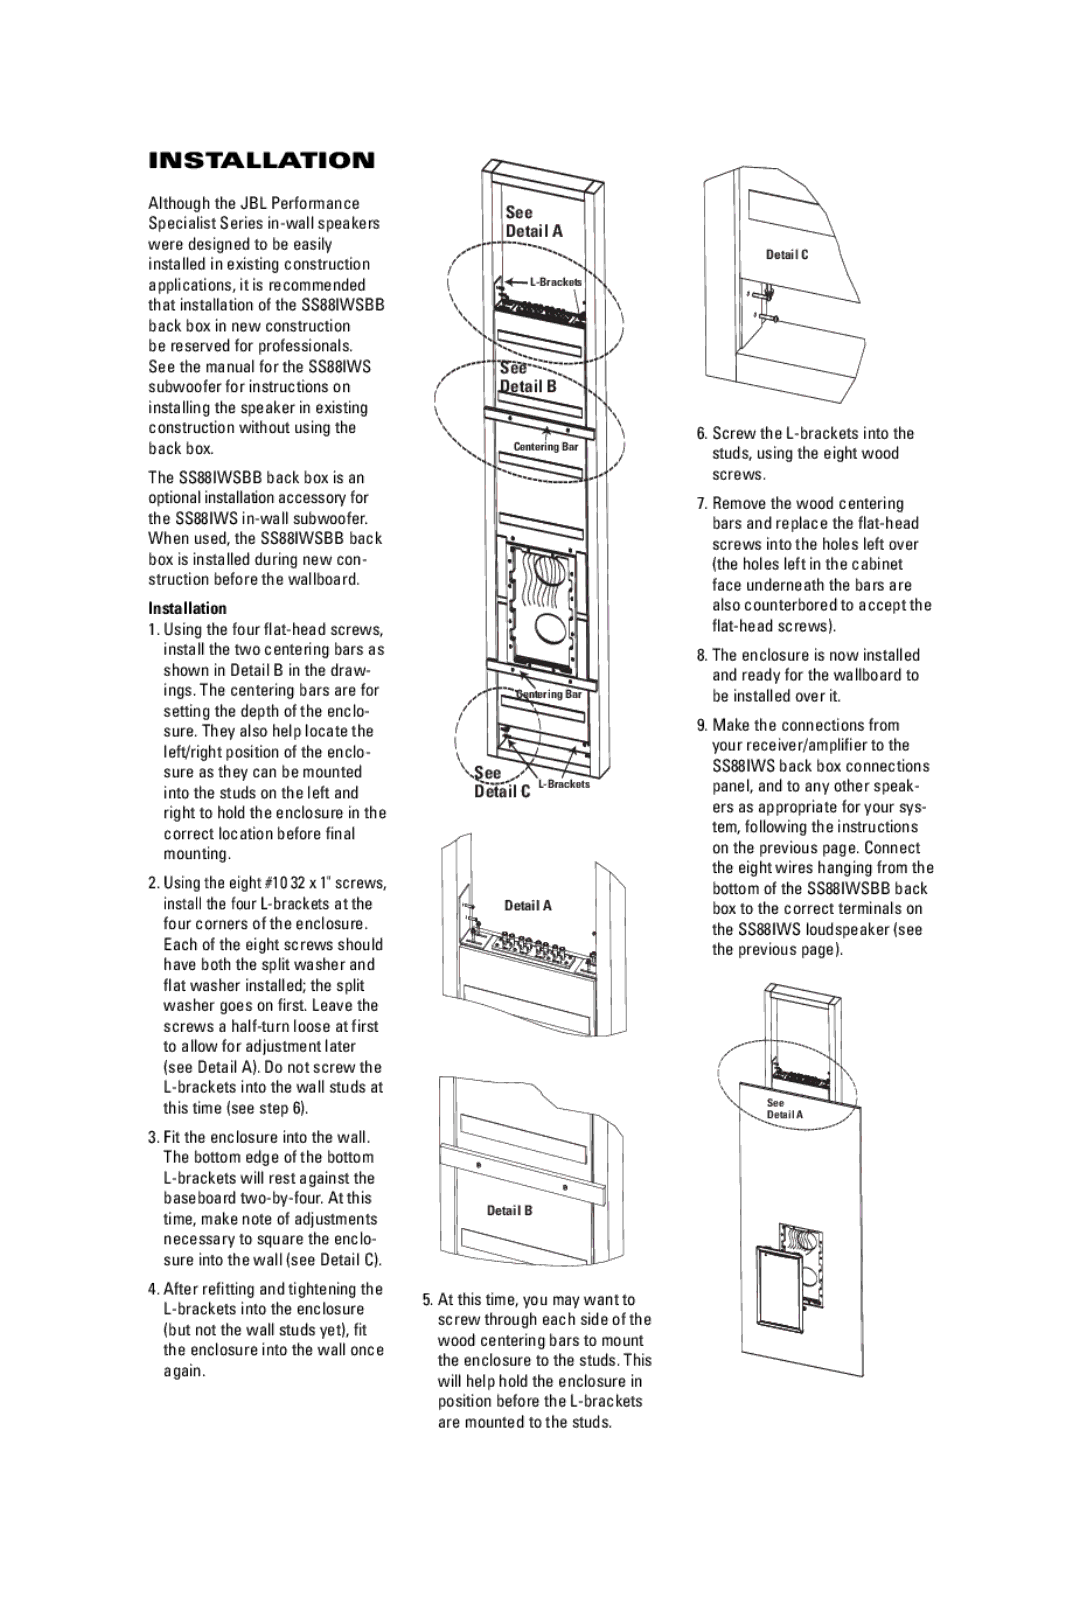
Installation is made easy with the SS88IWSBB's user-friendly design. The speaker is equipped with a standard cutout size, allowing for straightforward integration into most wall types. Its durable construction ensures a long lifespan, and the paintable grille offers customization options, enabling it to blend seamlessly with any interior decor.
The JBL SS88IWSBB also features a sophisticated crossover network that optimally directs frequencies to the respective drivers. This engineering ensures better sound coherence and detail, making it particularly effective for home theaters where audio precision is essential. With a power handling capacity of up to 150 watts, this speaker can easily fill larger spaces with rich sound while maintaining its structural integrity.
In summary, the JBL SS88IWSBB in-wall speaker is a remarkable choice for those seeking high-quality, unobtrusive audio solutions. With its impressive components, advanced technologies, and easy installation, it offers an unparalleled listening experience that meets the needs of audiophiles and casual listeners alike. Whether used in a dedicated home theater or as part of a whole-home audio system, the SS88IWSBB guarantees to elevate your audio experience to new heights.

