S T E P 4
Remove the right side rear cargo panel out of the car.
S T E P 5
Place the supplied wax square into position, as in the picture.
S T E P 6
Fully thread the supplied hex bolt into the bottom of the Stealthbox®.
S T E P 8
Press down on to the Stealthbox® firmly.
Remove the Stealthbox® carefully, leaving the wax square in place. The hex bolt will leave an impression onto the wax.
S T E P 9
Note: Before drilling, make sure that you are not going to be drilling into any gas lines, brake lines, transmission lines, electrical wiring, transfer case (4x4 vehicles) or anything else that might cause a reduction in your weekly pay. Always wear eye protection when drilling!
With a drill and a
S T E P 1 0
Run speaker wire from the amplifier location to the Stealthbox® location and check for proper operation of the woofer.
Back out the hex bolt that was installed in Step 6.
Place the Stealthbox® back into the mounting area.
S T E P 7
Position the Stealthbox® into place.
This mounting area is a tight fit. The Stealthbox® needs to angle into the mounting area. Start by sliding the rear of the Stealthbox ® into the mounting area. Then turn the Stealthbox® clockwise.
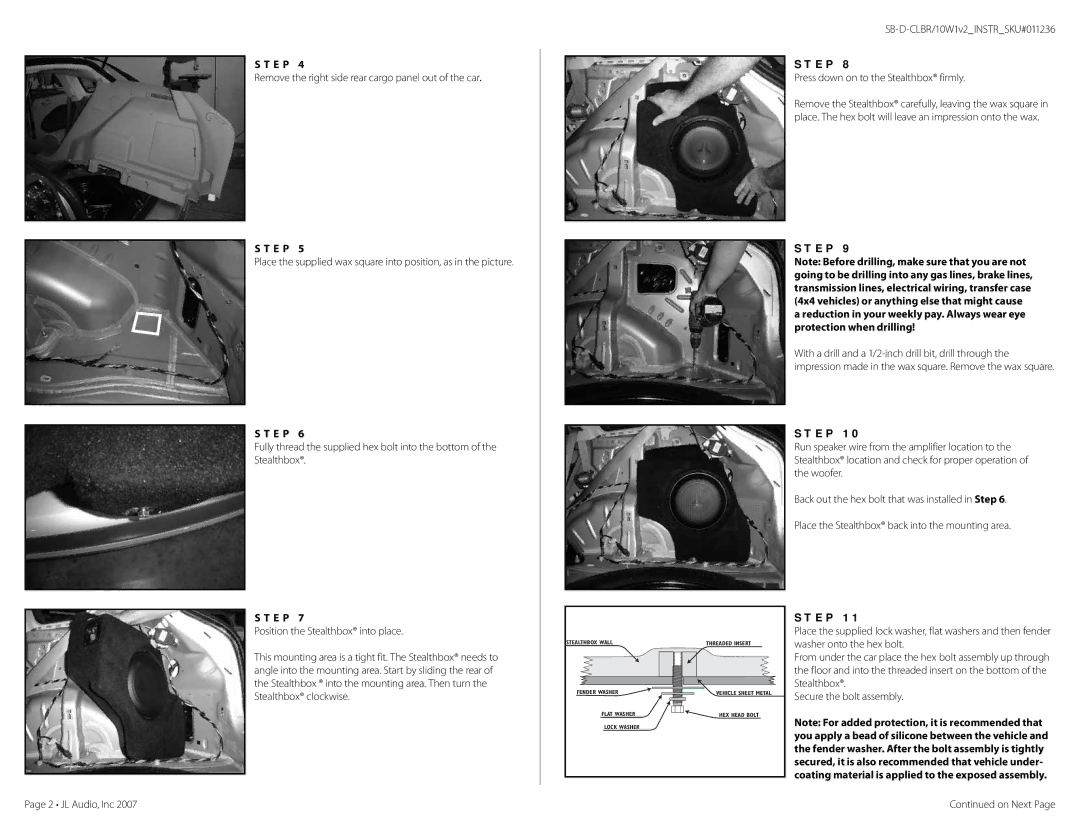
STEALTHBOX WALL | THREADED INSERT |
FENDER WASHER | VEHICLE SHEET METAL |
FLAT WASHER | HEX HEAD BOLT |
LOCK WASHER |
|
S T E P 1 1
Place the supplied lock washer, flat washers and then fender washer onto the hex bolt.
From under the car place the hex bolt assembly up through the floor and into the threaded insert on the bottom of the Stealthbox®.
Secure the bolt assembly.
Note: For added protection, it is recommended that you apply a bead of silicone between the vehicle and the fender washer. After the bolt assembly is tightly secured, it is also recommended that vehicle under- coating material is applied to the exposed assembly.
Page 2 • JL Audio, Inc 2007 | Continued on Next Page |
