JL Audio SB-T-CAM/12W3v3, SB-T-CMRY/12W3v3 manual E P 1, On Next

Models: SB-T-CMRY/12W3v3 SB-T-CAM/12W3v3

1 4
Download 4 pages 60.06 Kb
Page 2
Image 2

S T E P 4

Remove the strap that secured the Jack to the locating foam, this will be re-used to secure the jack to the spare tire.

S T E P 5

Remove the spare tire and turn it over. Put the jack inside the wheel and, expand it so that the pressure from the jack holds it in place.

S T E P 6

Use the strap that was removed in STEP 4 to secure the jack to the spare wheel.

S T E P 7

Align the jack so that the bolt that secures the spare can be re-inserted thru the wheel and, jack thereby securing both in the spare tire well.

SB-T-CAM/12W3V3 INSTR_SKU# 011284

S T E P 8

Re-install both floor panels that were removed in STEP 2. Install both of the brackets on the bottom of the enclo- sure as shown

S T E P 9

Remove the trunk liner fastening plug, this will be replaced by one of 1/4-20 Rivet Nuts (see detailed picture of the Rivet Nut below). Enlarge the hole using a 3/8” drill bit and, drill.

*CAUTION*

Before drilling, always make sure that you are not going to be drilling into any gas lines, brake lines, transmission lines, electrical wiring, exhaust systems or anything else that might cause a reduction in your weekly pay. Always wear eye protection when drilling.
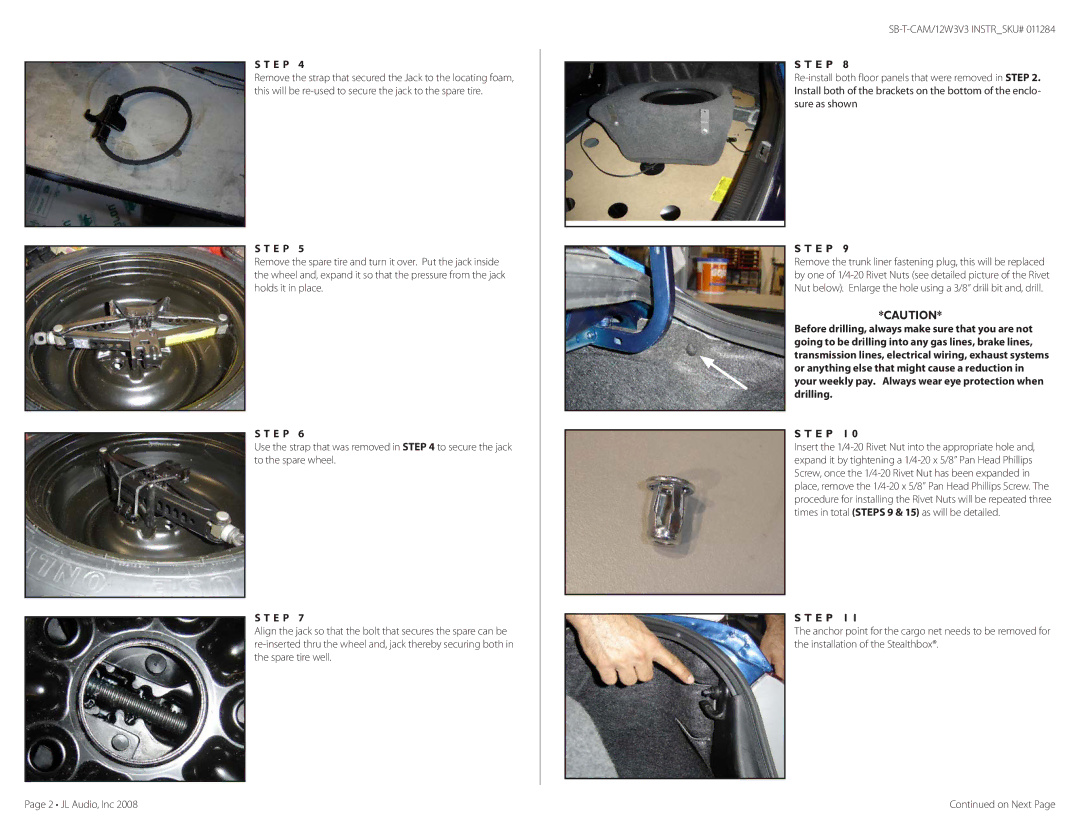
S T E P 1 0

Insert the 1/4-20 Rivet Nut into the appropriate hole and, expand it by tightening a 1/4-20 x 5/8” Pan Head Phillips Screw, once the 1/4-20 Rivet Nut has been expanded in place, remove the 1/4-20 x 5/8” Pan Head Phillips Screw. The procedure for installing the Rivet Nuts will be repeated three times in total (STEPS 9 & 15) as will be detailed.

S T E P 1 1

The anchor point for the cargo net needs to be removed for the installation of the Stealthbox®.

Page 2 • JL Audio, Inc 2008

Continued on Next Page

Page 2
Image 2
JL Audio SB-T-CAM/12W3v3, SB-T-CMRY/12W3v3 manual E P 1, On Next