Installation New Construction:
The speaker brackets should be installed prior to the drywall.
1.Attach the wings to the bracket by snapping them into the sides of the bracket. (See Figure 1). To shorten the wings, break them along the scored lines.
2.The wings and brackets have centering lines to simplify placement of the speaker.
3.Use a tape measure to locate and center the brackets in the ceiling.
4.Mark each speaker location with a pencil.
5.Screw one side of the assembled bracket with wings to the joist using one of the supplied screws.
6.Screw the other side of the bracket/wing assembly to the joist. Two screws on each side make for a very secure installation.
7.Secure the wire to the bracket using the bracket’s wire tie.
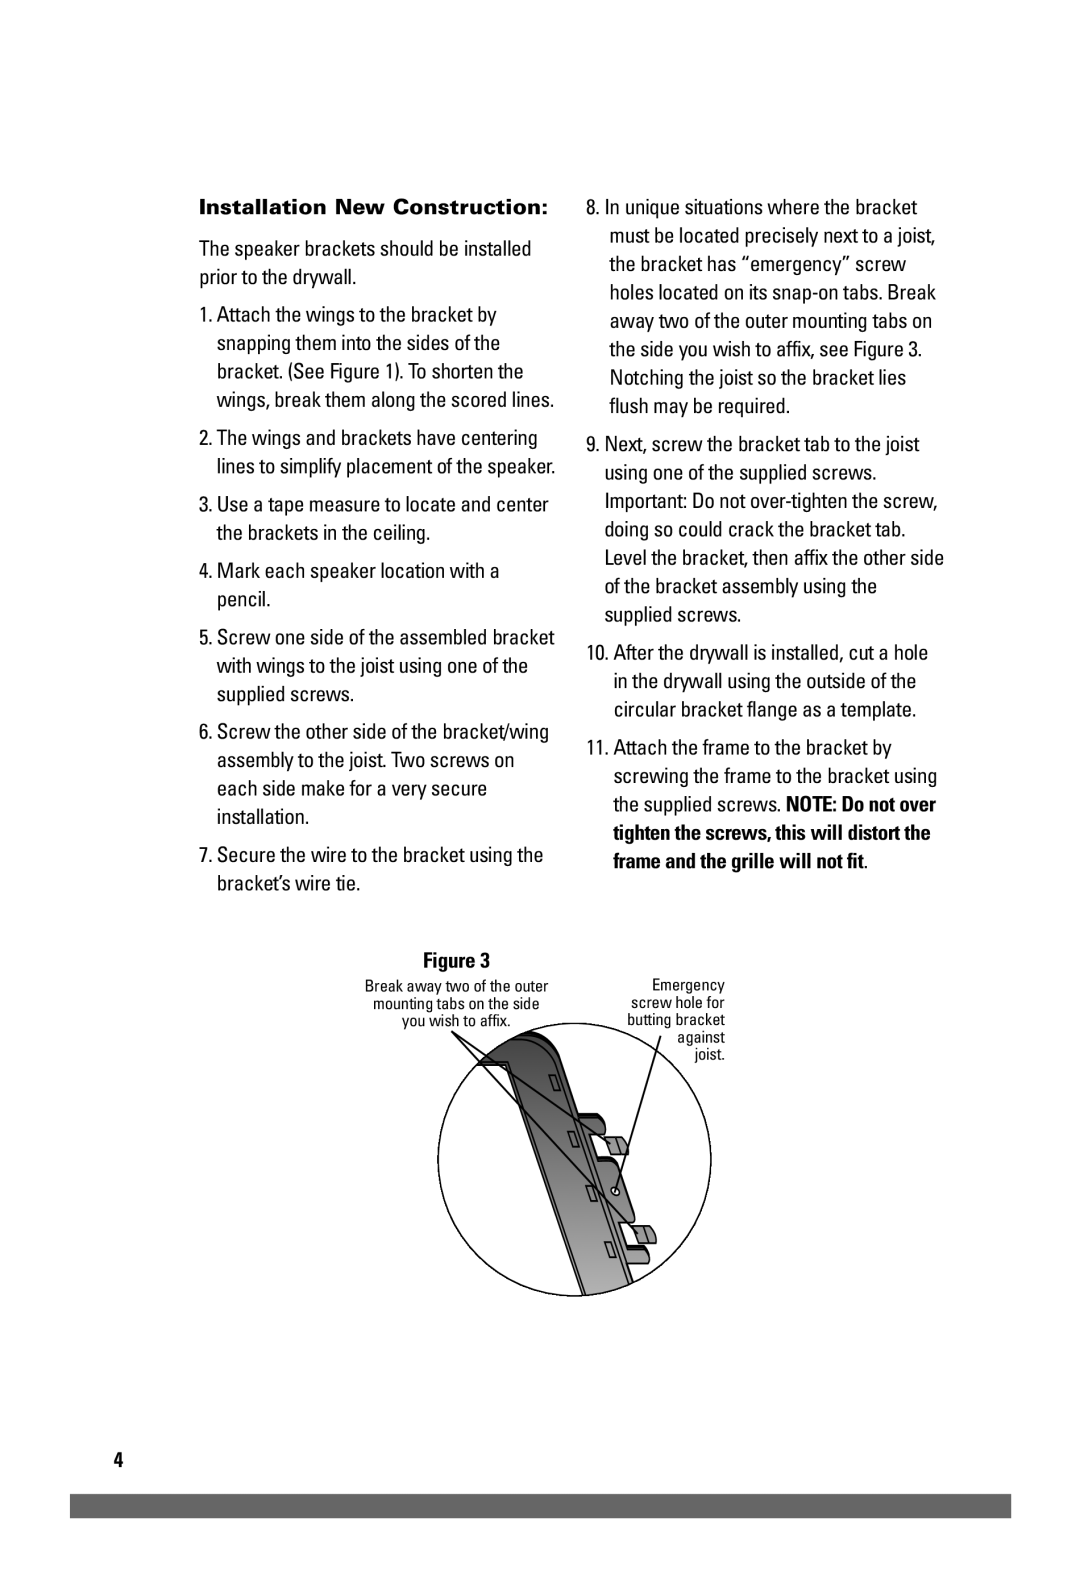
Figure 3
Break away two of the outer mounting tabs on the side you wish to affix.
8.In unique situations where the bracket must be located precisely next to a joist, the bracket has “emergency” screw holes located on its
9.Next, screw the bracket tab to the joist using one of the supplied screws. Important: Do not
10.After the drywall is installed, cut a hole in the drywall using the outside of the circular bracket flange as a template.
11.Attach the frame to the bracket by screwing the frame to the bracket using the supplied screws. NOTE: Do not over tighten the screws, this will distort the frame and the grille will not fit.
Emergency screw hole for butting bracket against joist.
4