|
|
|
|
|
|
|
|
|
|
|
|
|
|
|
|
|
|
|
|
|
|
|
|
|
|
|
|
|
|
|
|
|
|
|
|
|
|
|
|
|
|
|
|
|
|
|
|
|
|
|
|
|
|
|
|
|
|
|
|
|
|
|
|
|
|
|
|
|
|
|
|
|
|
|
|
|
|
|
|
|
|
|
|
|
|
|
|
|
|
|
|
|
|
|
|
|
|
|
|
|
|
|
|
|
|
|
|
|
|
|
|
|
|
|
|
|
|
|
|
|
|
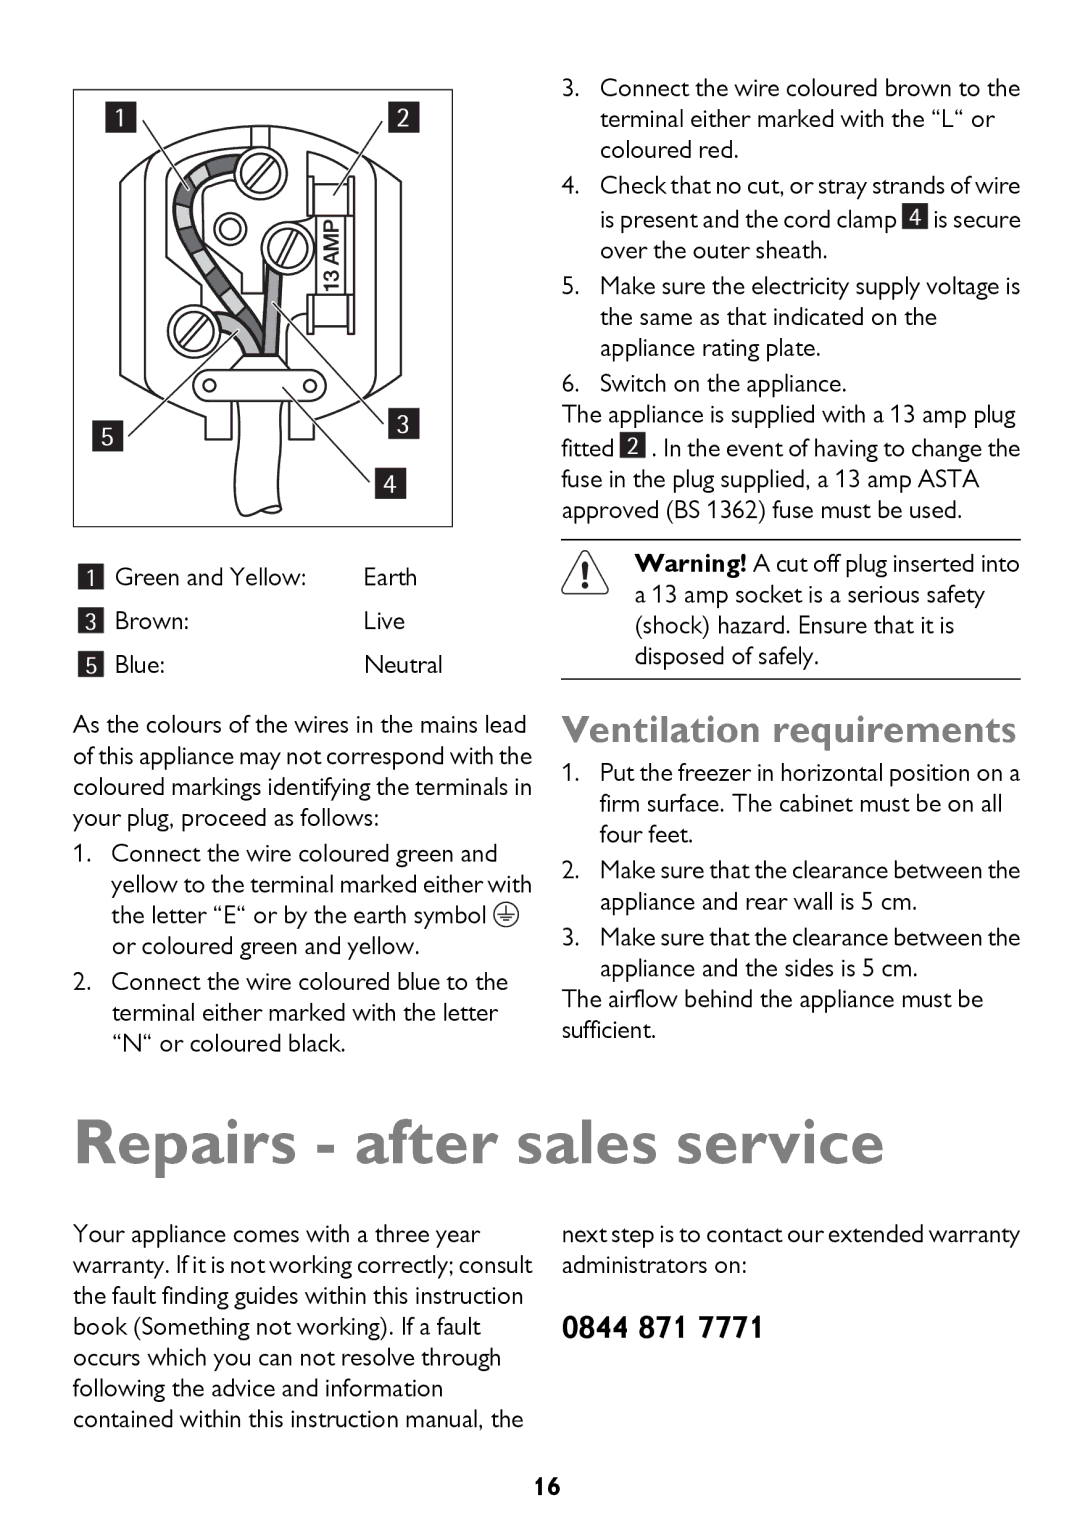
| Green and Yellow: | Earth | |||||||
1 | |||||||||||
|
|
| Brown: | Live | |||||||
3 | |||||||||||
|
|
| Blue: | Neutral | |||||||
5 | |||||||||||
As the colours of the wires in the mains lead of this appliance may not correspond with the coloured markings identifying the terminals in your plug, proceed as follows:
1.Connect the wire coloured green and yellow to the terminal marked either with
the letter “E“ or by the earth symbol ![]() or coloured green and yellow.
or coloured green and yellow.
2.Connect the wire coloured blue to the terminal either marked with the letter “N“ or coloured black.
3.Connect the wire coloured brown to the terminal either marked with the “L“ or coloured red.
4.Check that no cut, or stray strands of wire
is present and the cord clamp ![]() is secure over the outer sheath.
is secure over the outer sheath.
5.Make sure the electricity supply voltage is the same as that indicated on the appliance rating plate.
6.Switch on the appliance.
The appliance is supplied with a 13 amp plug fitted 2 . In the event of having to change the fuse in the plug supplied, a 13 amp ASTA approved (BS 1362) fuse must be used.
Warning! A cut off plug inserted into a 13 amp socket is a serious safety (shock) hazard. Ensure that it is disposed of safely.
Ventilation requirements
1.Put the freezer in horizontal position on a firm surface. The cabinet must be on all four feet.
2.Make sure that the clearance between the appliance and rear wall is 5 cm.
3.Make sure that the clearance between the appliance and the sides is 5 cm.
The airflow behind the appliance must be sufficient.
Repairs - after sales service
Your appliance comes with a three year warranty. If it is not working correctly; consult the fault finding guides within this instruction book (Something not working). If a fault occurs which you can not resolve through following the advice and information contained within this instruction manual, the
next step is to contact our extended warranty administrators on:
0844 871 7771
16