Put a recordable cassette into deck B.

English

To stop recording temporarily (except when the

REC PAUSE

playback source is deck A), press REC PAUSE on


the remote control.


To resume recording, press TAPE 23.

To remove the cassette, press EJECT 0for deck B.

To record on both sides — Reverse Mode

MODE


REVERSE

Press REVERSE MODE so that the Reverse Mode


indicator lights up as —


When using the Reverse Mode for recording, start recording in the forward (3) direction first. Otherwise, recording will stop when recording is done only on one side (reverse) of the tape.

To cancel Reverse Mode, press the button again so that the Reverse Mode indicator lights up as —

To record an AM (MW/LW) station — Beat Cut

While recording an AM (MW/LW) broadcast, beats may be

heard (which are never heard when listening to the broadcast

without recording it).


If this occurs, press PROGRAM repeatedly, while

PROGRAM


recording, until the beats are reduced.


Each time you press the button, the display changes to show the following:

CUT1CUT2 CUT3 CUT4

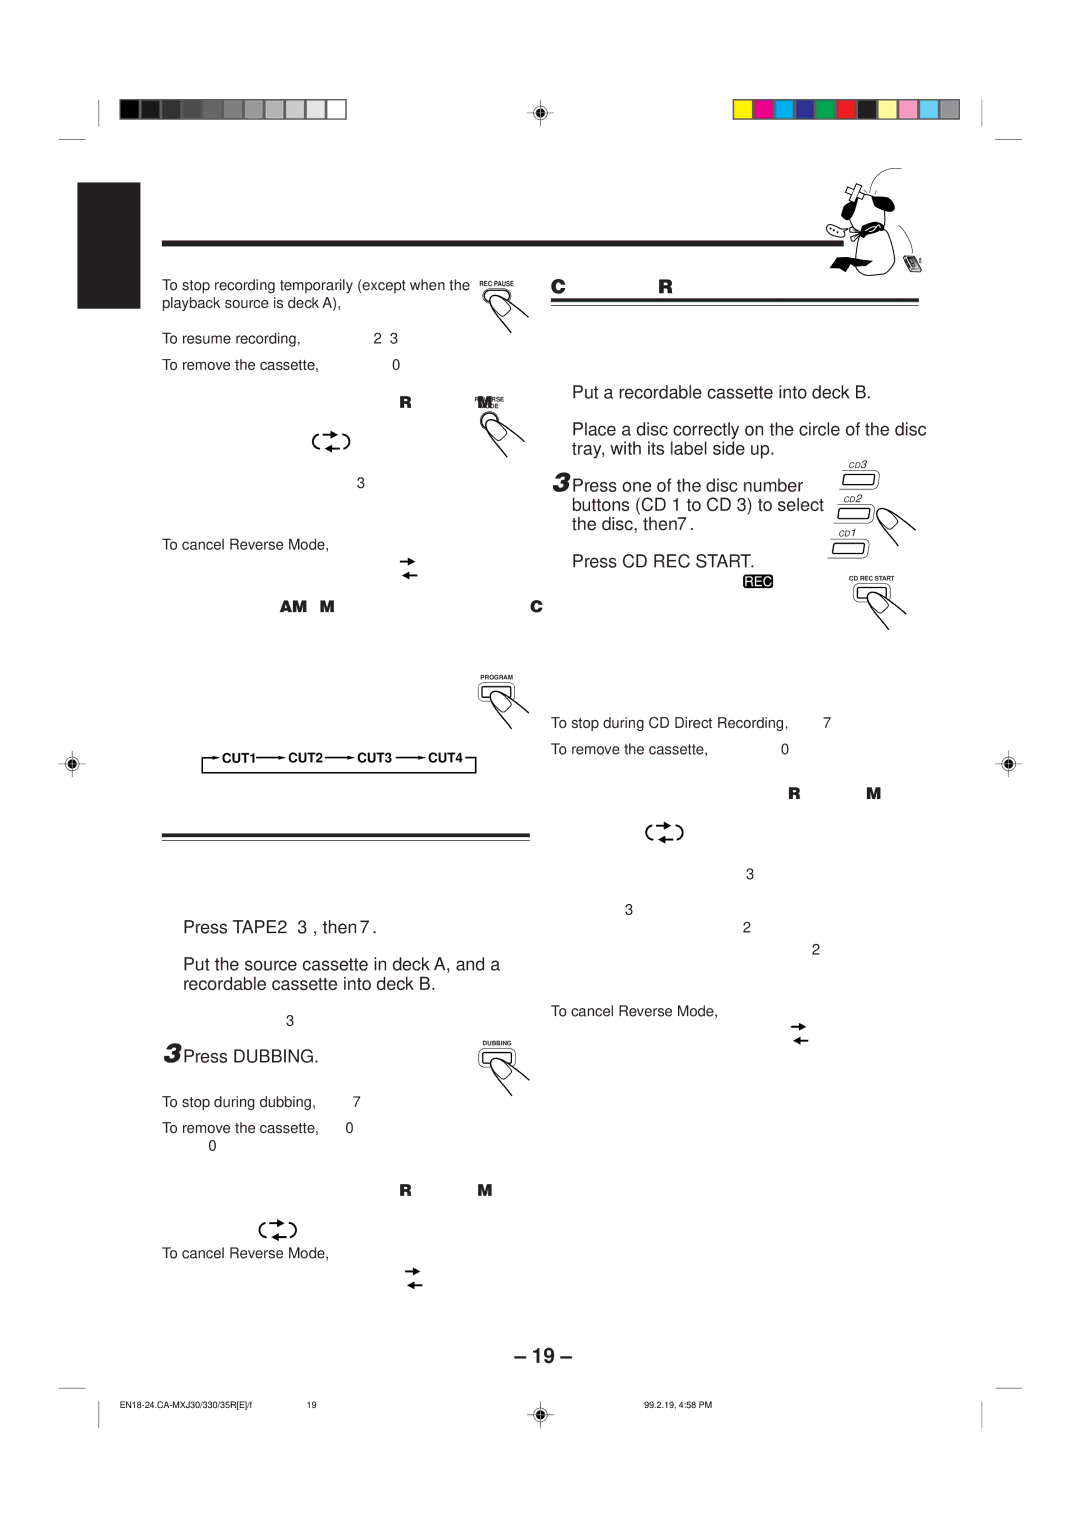
Dubbing Tapes

It is preferable that the tape type (type I or II) you record from be the same as the tape type you record onto when dubbing tapes.

1 Press TAPE 23, then 7.

2 Put the source cassette in deck A, and a recordable cassette into deck B.

Put the cassettes in both decks so that the tapes will run in the forward (3) direction.

DUBBING

3 Press DUBBING.

Dubbing starts.

To stop during dubbing, press 7.

To remove the cassette, press 0EJECT for deck A and EJECT 0 for deck B.

To record on both sides — Reverse Mode

Press REVERSE MODE so that the Reverse Mode indicator lights up as —

To cancel Reverse Mode, press the button again so that the Reverse Mode indicator lights up as —

CD Direct Recording

Everything on the CD goes onto the tape in the order it is on the CD, or according to the order you have made for Program play.

1

2 Place a disc correctly on the circle of the disc tray, with its label side up.

3


CD3

Press one of the disc number

CD2


buttons (CD 1 to CD 3) to select


the disc, then 7.


CD1

4

Press CD REC START.


“CD REC” appears, and the

indicator

CD REC START


lights up on the display.

Deck B starts recording and the CD player starts playing.

When the recording is done, “CD REC FINISHED” appears on the display, and the CD player and deck B stop.

To stop during CD Direct Recording, press 7.

To remove the cassette, press EJECT 0for deck B.

To record on both sides — Reverse Mode

Press REVERSE MODE so that the Reverse Mode indicator lights up as —

When using the Reverse Mode for CD Direct Recording, start recording in the forward (3) direction first. When the tape reaches its end while recording a song in the forward direction (3), the last song will be recorded at the beginning of the reverse side (2).

If you start recording on the reverse side (2), recording will stop when recording is done only on one side (reverse) of the tape.

To cancel Reverse Mode, press the button again so that the Reverse Mode indicator lights up as —

– 19 –

EN18-24.CA-MXJ30/330/35R[E]/f

19

99.2.19, 4:58 PM

Page 24
Image 24
JVC CA-MXJ30, CA-MXJ330, CA-MXJ35R manual Dubbing Tapes, CD Direct Recording

CA-MXJ35R, CA-MXJ330, CA-MXJ30 specifications

The JVC CA-MXJ35R, CA-MXJ30, and CA-MXJ330 are compact audio systems that blend impressive sound quality with user-friendly features, making them ideal for both casual listeners and audiophiles alike. These systems are designed to deliver powerful performance while maintaining a sleek and modern design.

One of the main features across these models is their robust sound output. The CA-MXJ35R, known for its high power output, ensures that any room can be filled with rich sound. The systems are equipped with advanced Amplification Technology that enhances audio clarity and reduces distortion, providing a pristine listening experience whether you’re playing music from CDs, radio, or digital sources.

A standout characteristic of these audio systems is their versatility. The CA-MXJ30 and CA-MXJ330 include multiple input options, allowing users to connect various devices via USB, AUX, and Bluetooth. This Bluetooth connectivity promotes hassle-free streaming from smartphones and tablets, making it convenient for users to enjoy their favorite playlists and podcasts without the clutter of wires.

Another notable technology found in these models is the inclusion of a built-in equalizer with preset modes. This feature allows listeners to customize audio settings based on their preferences or the genre of music being played, resulting in a tailored audio experience. The CD player facilitates the playback of CDs, including MP3-encoded discs, ensuring that users can enjoy their classic collections alongside digital files.

The aesthetic design of the JVC CA-MXJ series adds to its appeal, featuring a compact form factor that fits seamlessly into any living space. The user interface is intuitive, with clearly labeled buttons and an easy-to-read display, enhancing usability for individuals of all ages.

In summary, the JVC CA-MXJ35R, CA-MXJ30, and CA-MXJ330 deliver a balance of power, clarity, and versatility. With their advanced features, such as robust sound technology, multiple connectivity options, built-in equalizers, and a user-friendly design, these audio systems stand out as excellent choices for anyone seeking a reliable and enjoyable audio solution for everyday use.