UX-P6R, UX-P4R, SP-UXP4, SP-UXP6, CA-UXP4R specifications
The JVC CA-UXP6R, SP-UXP6, SP-UXP4, UX-P6R, and UX-P4R are compact yet powerful audio systems designed for music enthusiasts seeking high-quality sound from a small footprint. These systems exemplify JVC's commitment to delivering advanced audio performance and innovative technology in home entertainment.One of the standout features of the JVC CA-UXP6R is its impressive power output. With an output of 45 watts per channel, users can experience dynamic sound with clarity and depth. This makes it suitable for various listening environments, from cozy living spaces to larger rooms. The system's dual speaker configuration contributes to a balanced soundstage, enhancing the overall listening experience.
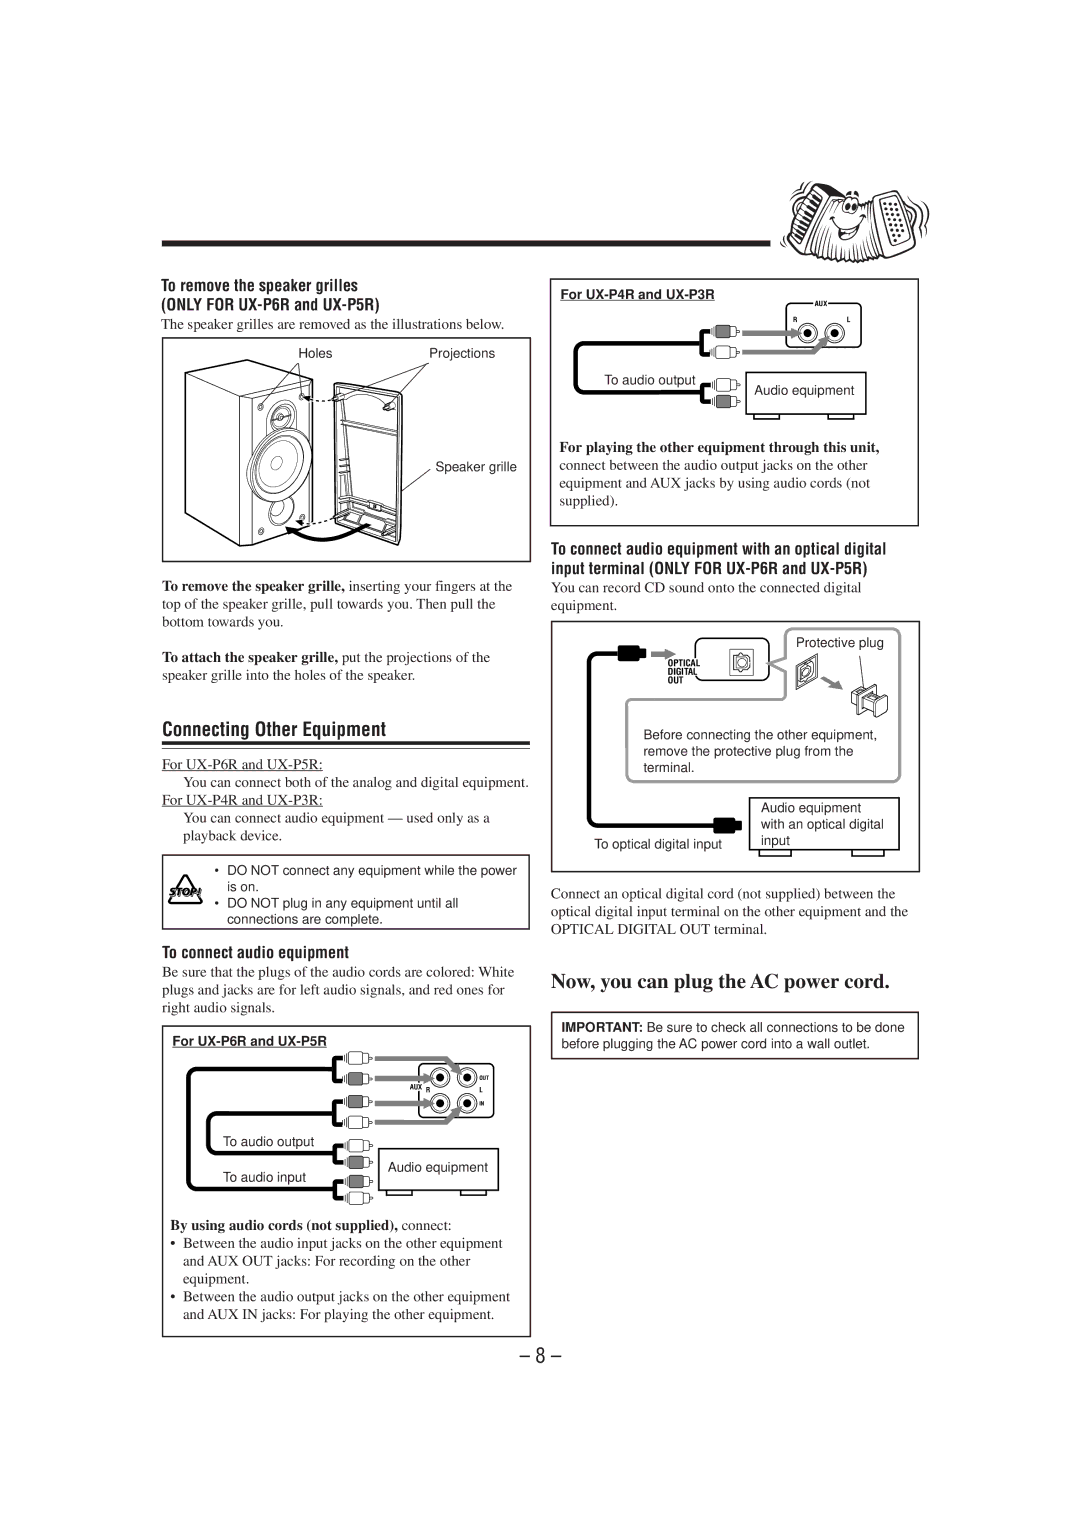
The SP-UXP6 and SP-UXP4 speaker systems are designed to complement the CA-UXP6R, featuring high-quality drivers that deliver rich bass response and crystal-clear highs. The wooden cabinet construction of the speakers minimizes resonance, ensuring that the audio remains uncolored and true to the source. This attention to detail in design and materials is a hallmark of JVC's audio engineering.
These systems also incorporate advanced connectivity options, including Bluetooth technology, allowing users to stream music from their smartphones, tablets, or laptops wirelessly. This feature is particularly convenient for those who enjoy a seamless audio experience without the hassle of tangled wires. Additionally, the systems support USB playback, making it easy to connect and play audio files directly from USB devices.
Another notable characteristic of the JVC UX-P6R and UX-P4R models is their user-friendly interface. They are equipped with an intuitive remote control that gives users easy access to various functions, including adjusting volume, changing tracks, and switching sources. The large LCD display provides clear visual feedback, making it easy to navigate through playlists and settings.
Moreover, these audio systems include a built-in FM tuner, enabling users to enjoy their favorite radio stations without the need for additional equipment. This is a valuable feature for those who appreciate live broadcasts and music from local FM channels.
In summary, the JVC CA-UXP6R, SP-UXP6, SP-UXP4, UX-P6R, and UX-P4R combine compact design with powerful audio performance. With advanced connectivity, high-quality speakers, and user-friendly features, they represent an ideal choice for anyone seeking a versatile audio solution that doesn’t compromise on sound quality. Whether for casual listening, parties, or home theater setups, these systems deliver an impressive and enriching auditory experience.