MAJOR FEATURES
1.Highly sensitive MS
2.Serial angle variation from 0° to 120° (with a 90°
3.Special
PART NAMES
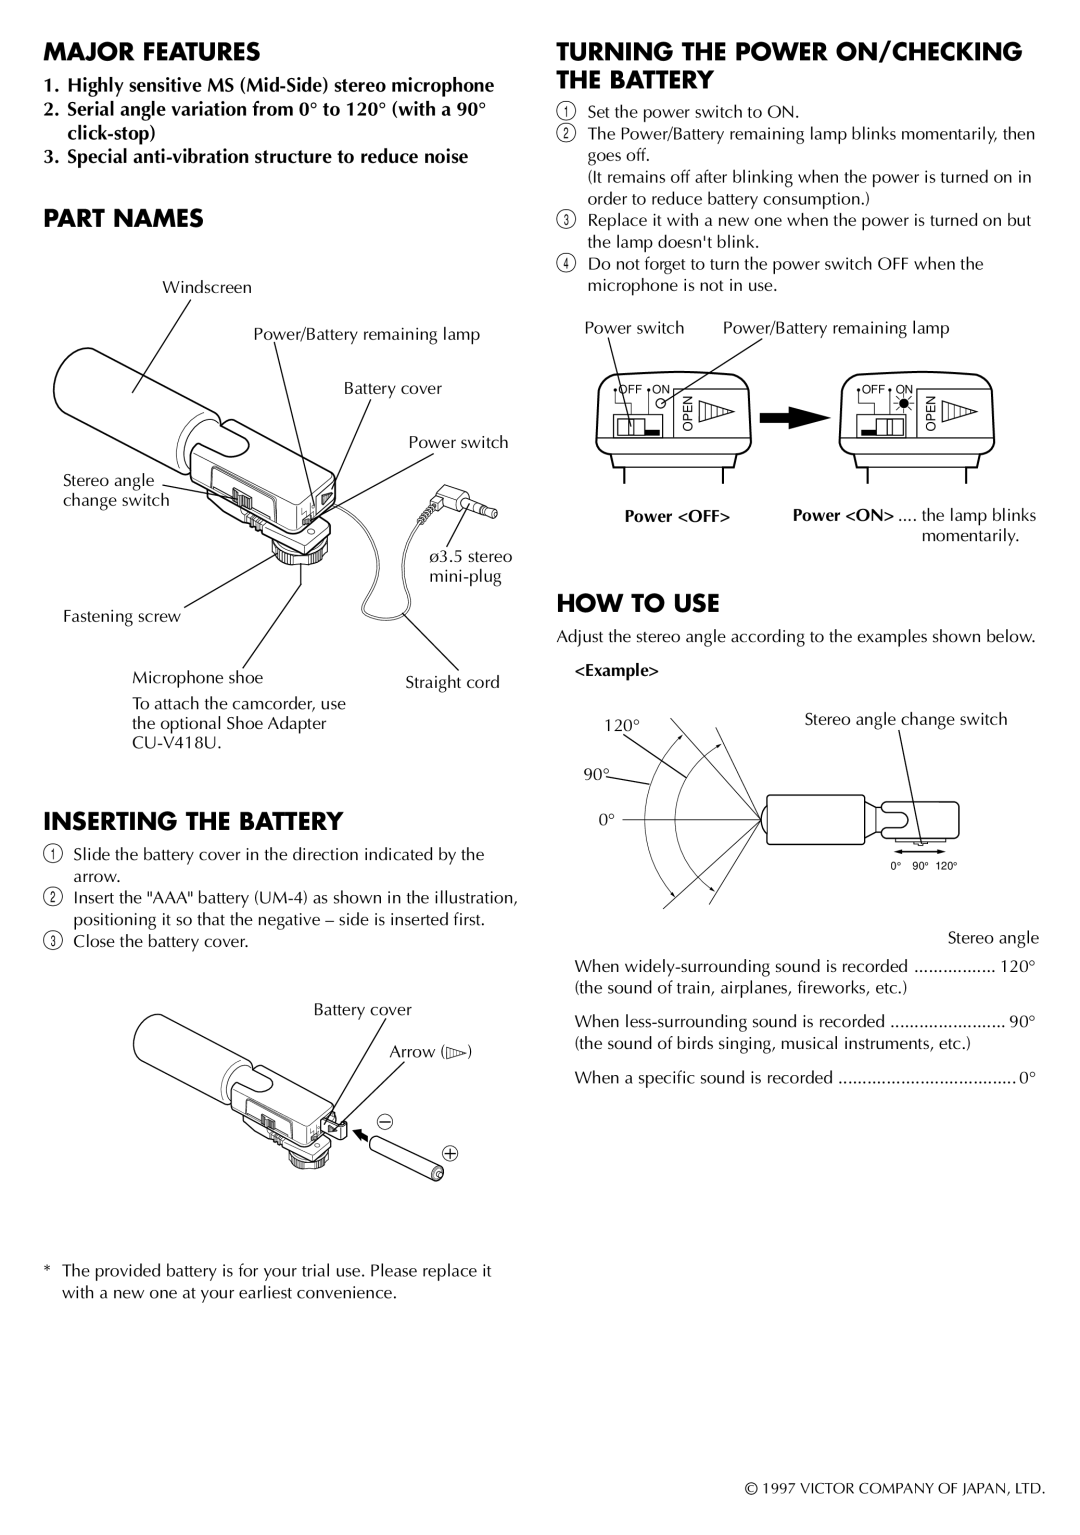
Windscreen
Power/Battery remaining lamp
Battery cover
Power switch
Stereo angle change switch
ø3.5 stereo
Fastening screw
Microphone shoe | Straight cord |
To attach the camcorder, use |
|
the optional Shoe Adapter |
|
|
INSERTING THE BATTERY
1Slide the battery cover in the direction indicated by the arrow.
2Insert the "AAA" battery
3Close the battery cover.
Battery cover
Arrow (![]() )
)
*The provided battery is for your trial use. Please replace it with a new one at your earliest convenience.
TURNING THE POWER ON/CHECKING THE BATTERY
1Set the power switch to ON.
2The Power/Battery remaining lamp blinks momentarily, then goes off.
(It remains off after blinking when the power is turned on in order to reduce battery consumption.)
3Replace it with a new one when the power is turned on but the lamp doesn't blink.
4Do not forget to turn the power switch OFF when the microphone is not in use.
Power switch | Power/Battery remaining lamp | |
OFF ON |
| OFF ON |
OPEN |
| OPEN |
Power <OFF> | Power <ON> .... the lamp blinks | |
|
| momentarily. |
HOW TO USE
Adjust the stereo angle according to the examples shown below.
<Example>
120° | Stereo angle change switch | ||||||
|
|
|
|
|
| ||
90° |
|
|
|
|
|
|
|
0° |
|
|
|
|
|
|
|
|
|
|
|
|
|
| |
|
|
|
|
|
|
|
|
|
|
|
|
|
|
|
|
|
|
|
|
|
| ||
|
| 0° | 90° 120° | ||||
|
|
|
|
|
|
| Stereo angle |
When | ................. 120° | ||||||
(the sound of train, airplanes, fireworks, etc.) |
|
|
| ||||
When | 90° | ||||||
(the sound of birds singing, musical instruments, etc.) | |||||||
When a specific sound is recorded | 0° | ||||||
© 1997 VICTOR COMPANY OF JAPAN, LTD.
