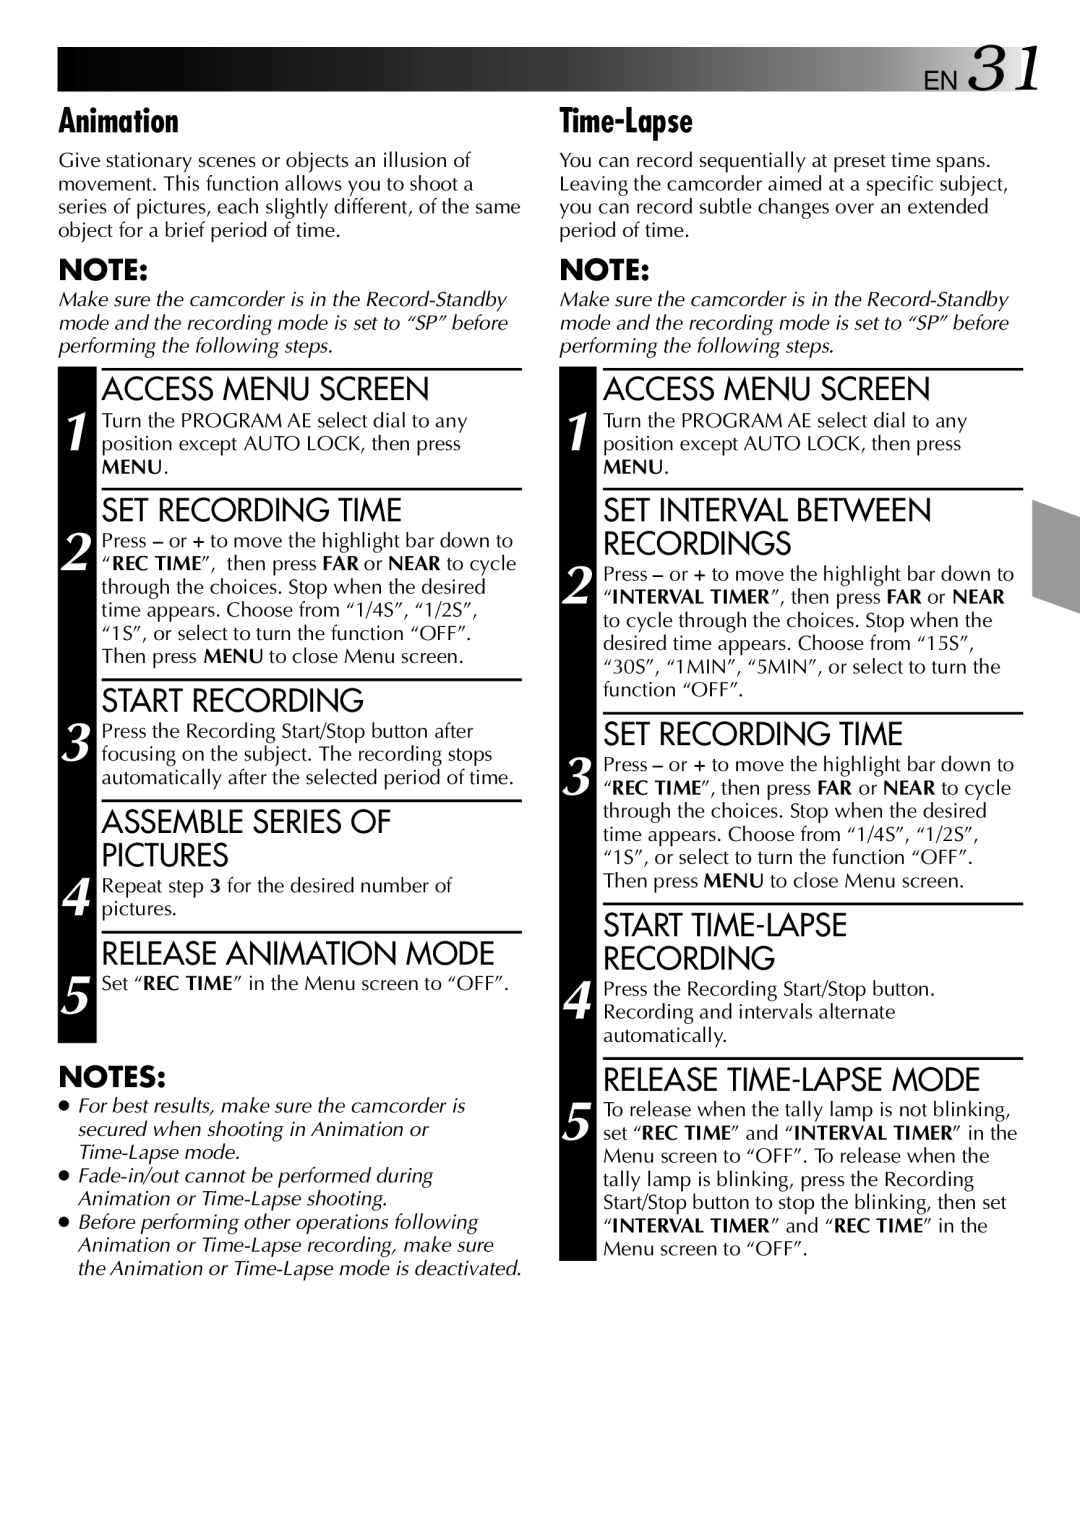
Animation

Give stationary scenes or objects an illusion of movement. This function allows you to shoot a series of pictures, each slightly different, of the same object for a brief period of time.

NOTE:

Make sure the camcorder is in the Record-Standby mode and the recording mode is set to “SP” before performing the following steps.

ACCESS MENU SCREEN

1 Turn the PROGRAM AE select dial to any position except AUTO LOCK, then press MENU.

SET RECORDING TIME

2 Press or + to move the highlight bar down to “REC TIME”, then press FAR or NEAR to cycle through the choices. Stop when the desired time appears. Choose from “1/4S”, “1/2S”, “1S”, or select to turn the function “OFF”. Then press MENU to close Menu screen.

START RECORDING

3 Press the Recording Start/Stop button after focusing on the subject. The recording stops automatically after the selected period of time.

ASSEMBLE SERIES OF

PICTURES

4 Repeat step 3 for the desired number of pictures.

RELEASE ANIMATION MODE

5 Set “REC TIME” in the Menu screen to “OFF”.

NOTES:

For best results, make sure the camcorder is secured when shooting in Animation or Time-Lapse mode.

Fade-in/out cannot be performed during Animation or Time-Lapse shooting.

Before performing other operations following Animation or Time-Lapse recording, make sure the Animation or Time-Lapse mode is deactivated.

EN 31

Time-Lapse

You can record sequentially at preset time spans. Leaving the camcorder aimed at a specific subject, you can record subtle changes over an extended period of time.

NOTE:

Make sure the camcorder is in the Record-Standby mode and the recording mode is set to “SP” before performing the following steps.

ACCESS MENU SCREEN

1 Turn the PROGRAM AE select dial to any position except AUTO LOCK, then press MENU.

SET INTERVAL BETWEEN

RECORDINGS

2 Press or + to move the highlight bar down to “INTERVAL TIMER”, then press FAR or NEAR to cycle through the choices. Stop when the desired time appears. Choose from “15S”, “30S”, “1MIN”, “5MIN”, or select to turn the function “OFF”.

SET RECORDING TIME

3 Press or + to move the highlight bar down to “REC TIME”, then press FAR or NEAR to cycle through the choices. Stop when the desired time appears. Choose from “1/4S”, “1/2S”, “1S”, or select to turn the function “OFF”. Then press MENU to close Menu screen.

START TIME-LAPSE

RECORDING

4 Press the Recording Start/Stop button. Recording and intervals alternate automatically.

RELEASE TIME-LAPSE MODE

5 To release when the tally lamp is not blinking, set “REC TIME” and “INTERVAL TIMER” in the Menu screen to “OFF”. To release when the tally lamp is blinking, press the Recording Start/Stop button to stop the blinking, then set “INTERVAL TIMER” and “REC TIME” in the Menu screen to “OFF”.

Page 31
Image 31
JVC GR-AXM2 manual Animation, Time-Lapse

GR-AXM2 specifications

The JVC GR-AXM2 is a compact camcorder that emerged in the early 1990s and quickly made a name for itself due to its user-friendly design and advanced features for its time. As part of the JVC GR series, this camcorder brought innovation into the consumer video market, allowing users to capture their precious moments with ease and reliability.

One of the standout features of the JVC GR-AXM2 is its lightweight and portable form factor. Designed for ease of use, it features an ergonomic grip that allows users to hold the camcorder comfortably for extended periods. Weighing in at just a few pounds, it is an ideal choice for family outings, vacations, and special events, making it easy to carry and operate.

The GR-AXM2 offers an impressive 14x optical zoom capability, allowing users to capture distant subjects with clarity and detail. This zoom feature is complemented by advanced image stabilization technology, which reduces the shakiness often seen in handheld recordings. This innovation is especially helpful when filming moving subjects or when the user is in a less than stable position.

Equipped with a Super VHS recording format, the JVC GR-AXM2 delivers enhanced picture quality compared to standard VHS camcorders. This provides users with the ability to record in higher resolution, resulting in clearer and more vibrant footage. The Super VHS tapes also allowed for longer recording times, catering to users who preferred to film extended events without needing to change tapes frequently.

Another notable characteristic of the GR-AXM2 is its built-in LCD display, which allows users to easily monitor their recordings while shooting. The LCD screen is intuitive and offers a straightforward user interface, enabling quick access to settings and playback functions. This makes it easier for users to frame their shots and ensure they are capturing exactly what they desire.

The camcorder also includes various manual and automatic settings, giving users the flexibility to adjust exposure, focus, and white balance according to the conditions they are filming in. This versatility is appealing to both inexperienced videographers and those looking to experiment with more creative filming techniques.

In summary, the JVC GR-AXM2 stands out as a significant player in the consumer camcorder market during its time. With features like lightweight portability, 14x optical zoom, Super VHS recording, and an intuitive LCD display, it offered an accessible and versatile platform for capturing videos with enhanced quality. This camcorder helped many families preserve their memories and continues to be remembered fondly by those who used it.