30

 EN
EN 


 RECORDI
 NG
NG
Advanced Featur
 es
es (cont.)
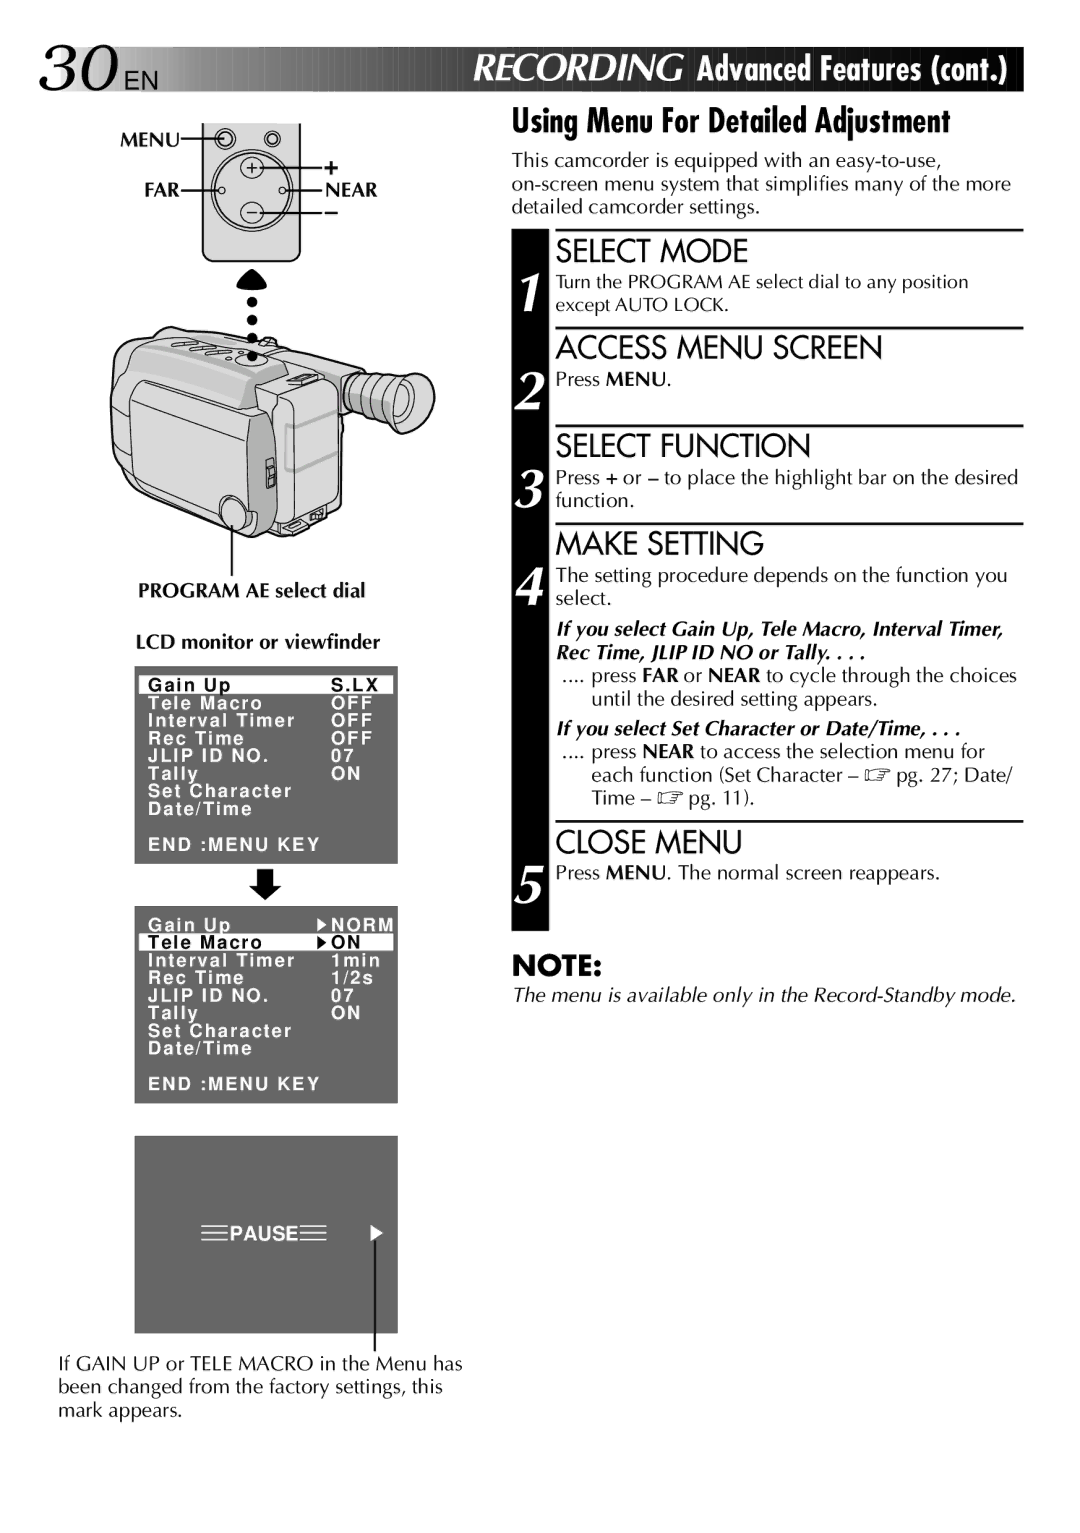
MENU |
| Using Menu For Detailed Adjustment | |
| This camcorder is equipped with an | ||
|
| ||
FAR | NEAR | ||
detailed camcorder settings. | |||
|
|
PROGRAM AE select dial
LCD monitor or viewfinder
Gain Up | S . LX |
Tele Macro | OFF |
Interval Timer | OFF |
Rec Time | OFF |
JLIP ID NO . | 07 |
Tally | ON |
Set Character |
|
Date/Time |
|
END :MENU KEY |
|
Gain Up | NORM |
Tele Macro | ON |
Interval Timer | 1min |
Rec Time | 1/2s |
JLIP ID NO . | 07 |
Tally | ON |
Set Character |
|
Date/Time |
|
END :MENU KEY |
|
SELECT MODE
1 Turn the PROGRAM AE select dial to any position except AUTO LOCK.
ACCESS MENU SCREEN
2 Press MENU.
SELECT FUNCTION
3 Press + or – to place the highlight bar on the desired function.
MAKE SETTING
4 The setting procedure depends on the function you select.
If you select Gain Up, Tele Macro, Interval Timer, Rec Time, JLIP ID NO or Tally. . . .
.... press FAR or NEAR to cycle through the choices
until the desired setting appears.
If you select Set Character or Date/Time, . . .
.... press NEAR to access the selection menu for
each function (Set Character – ☞ pg. 27; Date/ Time – ☞ pg. 11).
CLOSE MENU
5 Press MENU. The normal screen reappears.
NOTE:
The menu is available only in the Record-Standby mode.
![]() PAUSE
PAUSE![]()
If GAIN UP or TELE MACRO in the Menu has been changed from the factory settings, this mark appears.