EN 33

Display

1 6 0 E-MA IL CL IP

3 5m i n


Remaining time


0 0 : 0 0


STANDBY


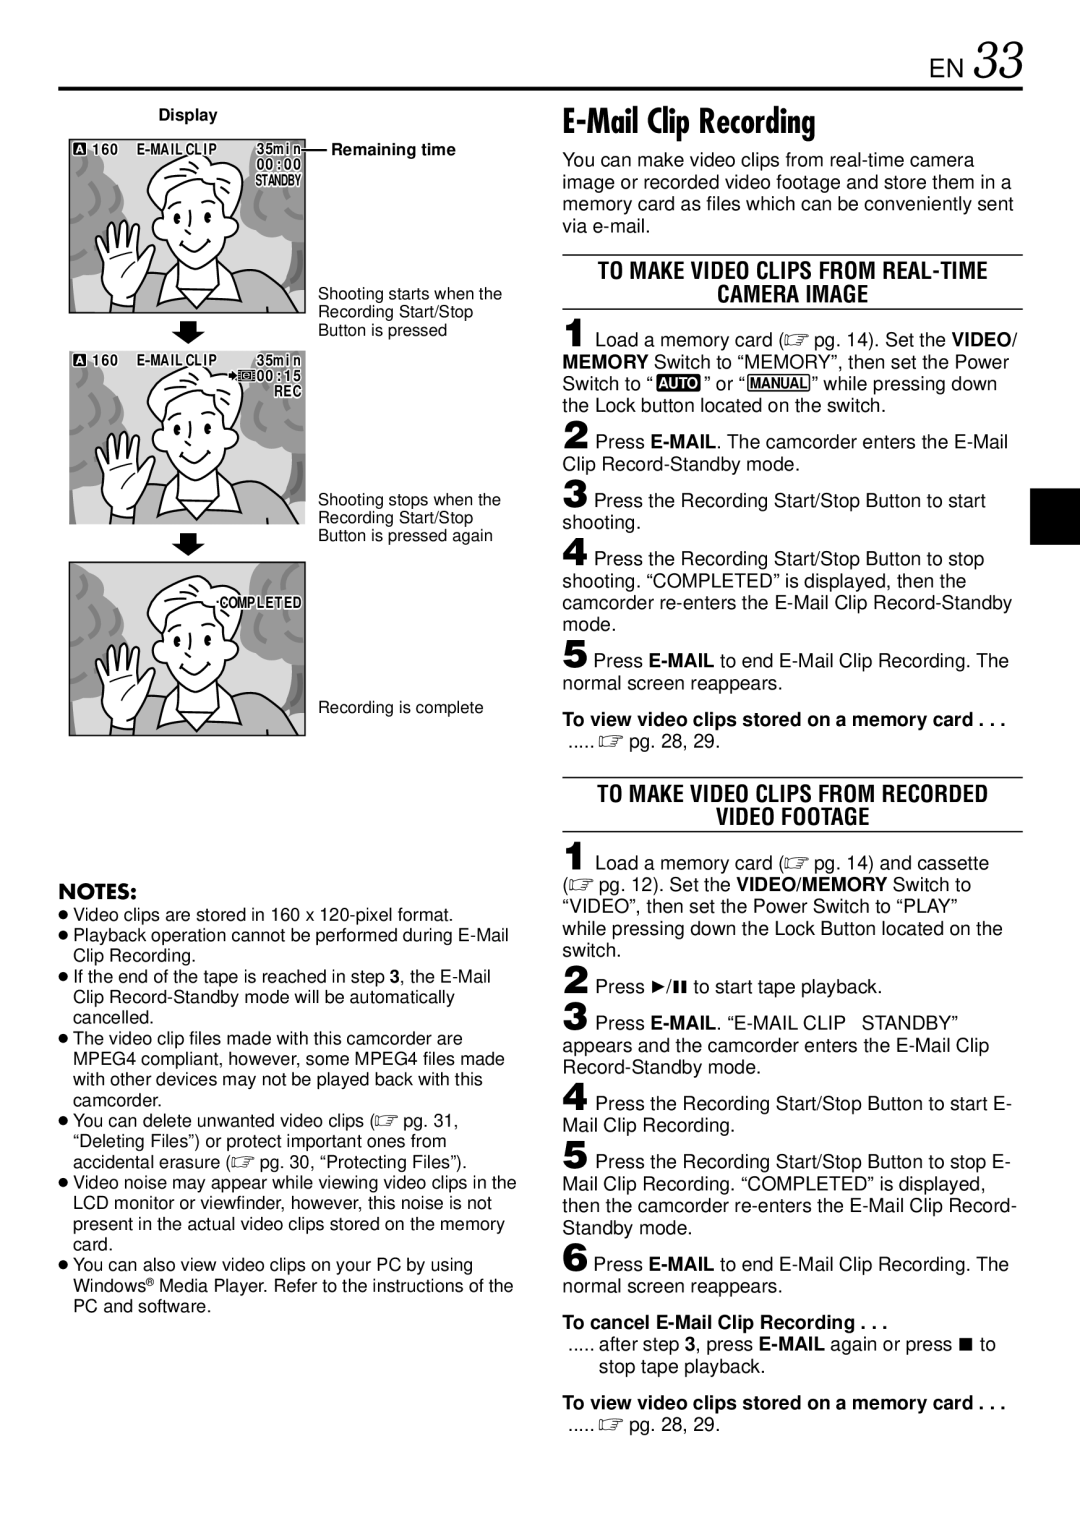
Shooting starts when the

Recording Start/Stop

Button is pressed

1 6 0 E-MA IL CL IP 3 5m i n

e0 0 : 1 5

REC

Shooting stops when the

Recording Start/Stop

Button is pressed again

COMPLETED

Recording is complete

E-Mail Clip Recording

You can make video clips from real-time camera image or recorded video footage and store them in a memory card as files which can be conveniently sent via e-mail.

TO MAKE VIDEO CLIPS FROM REAL-TIME

CAMERA IMAGE

1 Load a memory card ( pg. 14). Set the VIDEO/ MEMORY Switch to “MEMORY”, then set the Power

Switch to “

” or “

” while pressing down

AUTO

MANUAL


the Lock button located on the switch.

2 Press E-MAIL. The camcorder enters the E-Mail Clip Record-Standby mode.

3 Press the Recording Start/Stop Button to start shooting.

4 Press the Recording Start/Stop Button to stop shooting. “COMPLETED” is displayed, then the camcorder re-enters the E-Mail Clip Record-Standby mode.

5 Press E-MAILto end E-Mail Clip Recording. The normal screen reappears.

To view video clips stored on a memory card . . .

.....  pg. 28, 29.

NOTES:

Video clips are stored in 160 x 120-pixel format.

Playback operation cannot be performed during E-Mail Clip Recording.

If the end of the tape is reached in step 3, the E-Mail Clip Record-Standby mode will be automatically cancelled.

The video clip files made with this camcorder are MPEG4 compliant, however, some MPEG4 files made with other devices may not be played back with this camcorder.

You can delete unwanted video clips ( pg. 31,

“Deleting Files”) or protect important ones from accidental erasure ( pg. 30, “Protecting Files”).

Video noise may appear while viewing video clips in the LCD monitor or viewfinder, however, this noise is not present in the actual video clips stored on the memory card.

You can also view video clips on your PC by using Windows® Media Player. Refer to the instructions of the PC and software.

TO MAKE VIDEO CLIPS FROM RECORDED

VIDEO FOOTAGE

1 Load a memory card ( pg. 14) and cassette ( pg. 12). Set the VIDEO/MEMORY Switch to “VIDEO”, then set the Power Switch to “PLAY” while pressing down the Lock Button located on the switch.

2 Press 4/6to start tape playback.

3 Press E-MAIL. “E-MAIL CLIP STANDBY” appears and the camcorder enters the E-Mail Clip Record-Standby mode.

4 Press the Recording Start/Stop Button to start E- Mail Clip Recording.

5 Press the Recording Start/Stop Button to stop E- Mail Clip Recording. “COMPLETED” is displayed, then the camcorder re-enters the E-Mail Clip Record- Standby mode.

6 Press E-MAILto end E-Mail Clip Recording. The normal screen reappears.

To cancel E-Mail Clip Recording . . .

..... after step 3, press E-MAILagain or press 5 to

stop tape playback.

To view video clips stored on a memory card . . .

.....  pg. 28, 29.

Page 33
Image 33
JVC GR-DVL767, GR-DVL367 To Make Video Clips from REAL-TIME Camera Image, To Make Video Clips from Recorded Video Footage

GR-DVL160, GR-DVL767, GR-DVL367, DVL367, GR-DVL365 specifications

The JVC GR-DVL365, DVL367, GR-DVL367, GR-DVL767, and GR-DVL160 represent a series of high-quality camcorders that cater to videography enthusiasts and casual users alike. With their compact designs and user-friendly features, these models have garnered attention for their exceptional performance and versatility.

One of the standout features across these models is the incorporation of the MiniDV format, which offers superior video quality with high resolution and low compression. This ensures that users can capture videos that are sharp and vibrant, making them perfect for everything from family events to professional projects.

The GR-DVL365 and GR-DVL367, in particular, are equipped with a powerful 800,000-pixel sensor that delivers clear images and videos even in moderate lighting conditions. The GR-DVL767 ups the ante with a 1.5-megapixel CCD sensor, allowing for even finer detail in recordings. These sensors contribute to the overall image quality, making these camcorders suitable for capturing memorable moments in stunning clarity.

Another impressive feature is the 10x optical zoom lens found in many of these models. This allows users to get close to their subjects without sacrificing image quality, a crucial element when filming events where space may be limited. The GR-DVL767 goes even further with a 20x optical zoom, enabling users to capture distant subjects with ease.

The user interface of these camcorders is designed to be intuitive. Most models feature a color LCD screen that not only provides a clear view of the subject but also allows users to navigate the various settings and options effortlessly. Additionally, the built-in image stabilization technology helps reduce the effects of handheld camera shake, resulting in smoother videos.

For those interested in editing their footage, the ability to output video through IEEE 1394 (FireWire) is a significant advantage. This makes transferring video to a computer for editing straightforward and efficient, enhancing the overall filmmaking experience.

Moreover, the GR-DVL365 and GR-DVL367 come equipped with several shooting modes, including night mode and digital effects, allowing users more creativity in their filming. The GR-DVL160, while simpler, still offers essential features that make it a reliable option for everyday use.

In summary, the JVC GR-DVL series of camcorders boasts an impressive array of features, including advanced sensors, optical zoom capabilities, user-friendly interfaces, and solid video output options. Whether you're a budding filmmaker or simply looking to document your life, these camcorders deliver a remarkable blend of performance and ease of use.