22
 EN
EN


 RECORDING


 Advanced
 Features
 (cont.)

Using Menus For Detailed Adjustment
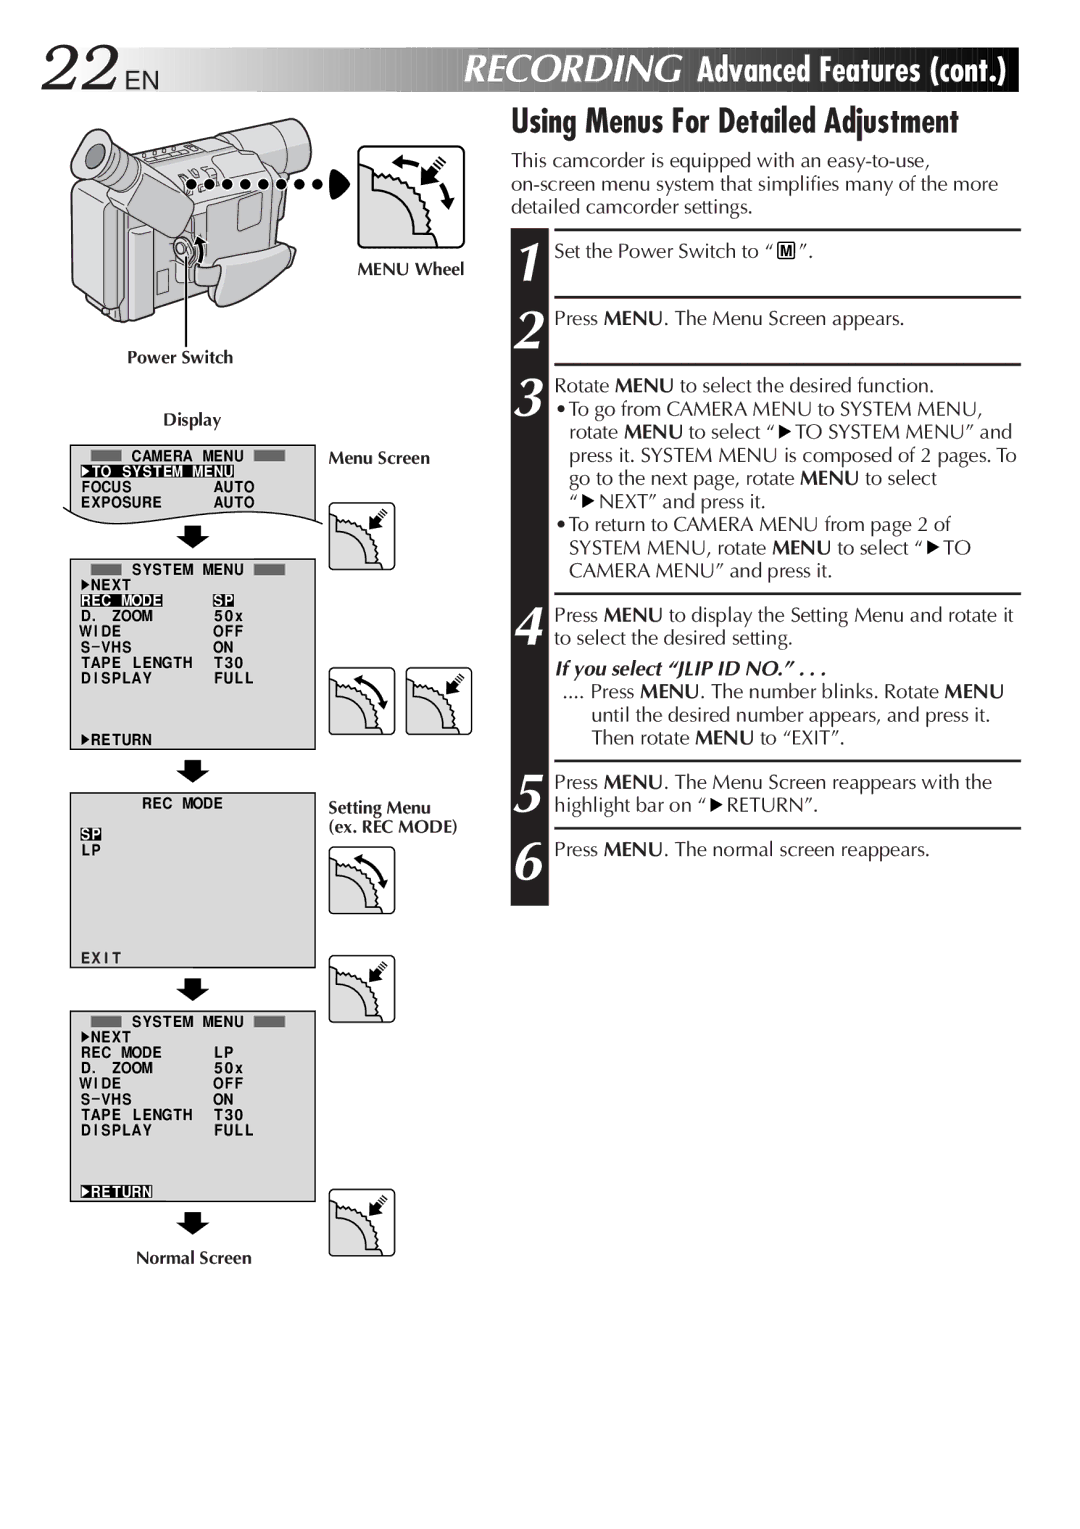
MENU Wheel
Power Switch
Display
CAMERA MENU |
| Menu Screen |
|
▶TO SYST EM MENU
FOCUSAUTO
EXPOSURE AUTO
SYS T EM MENU
▶NEX T |
|
| |
REC MODE |
| SP | x |
D . ZOOM |
| 5 0 | |
W I DE | OF F | ||
S – VHS | ON | ||
TAPE LENGTH | T 3 0 | ||
D I SP LAY | FUL L | ||
▶RE TURN |
|
| |
|
|
| REC MODE |
| Setting Menu |
|
|
|
| ||
|
|
|
|
| (ex. REC MODE) |
SP |
|
|
| ||
|
|
| |||
L P |
|
| |||
This camcorder is equipped with an
1 Set the Power Switch to “ ![]() ”.
”.
2 Press MENU. The Menu Screen appears.
3 Rotate MENU to select the desired function.
•To go from CAMERA MENU to SYSTEM MENU, rotate MENU to select “![]() TO SYSTEM MENU” and press it. SYSTEM MENU is composed of 2 pages. To go to the next page, rotate MENU to select
TO SYSTEM MENU” and press it. SYSTEM MENU is composed of 2 pages. To go to the next page, rotate MENU to select
“![]() NEXT” and press it.
NEXT” and press it.
•To return to CAMERA MENU from page 2 of SYSTEM MENU, rotate MENU to select “![]() TO CAMERA MENU” and press it.
TO CAMERA MENU” and press it.
4 Press MENU to display the Setting Menu and rotate it to select the desired setting.
If you select “JLIP ID NO.” . . .
.... Press MENU. The number blinks. Rotate MENU
until the desired number appears, and press it. Then rotate MENU to “EXIT”.
5 Press MENU. The Menu Screen reappears with the highlight bar on “![]() RETURN”.
RETURN”.
6 Press MENU. The normal screen reappears.
EX I T
SYS T EM MENU
▶NEX T |
| |
REC MODE | L P | |
D . ZOOM | 5 0 x | |
W I DE | OF F | |
S – VHS | ON | |
TAPE LENGTH | T 3 0 | |
D I SP LAY | FUL L | |
|
|
|
▶RE TURN |
| |
Normal Screen