18![]()
![]()
![]() EN
EN![]()
![]()
![]()
![]()
![]()
![]()
![]()
![]()
![]()
![]()
![]()
![]()
![]()
![]()
![]()
![]()
![]()
![]()
![]()
![]()
![]()
![]()
![]()
![]()
![]()
![]()
![]()
![]()
![]()
![]()
![]()
![]()
![]()
![]()
![]()
![]()
![]()
![]()
![]()
![]()
![]()
![]()
![]()
![]()
![]()
![]()
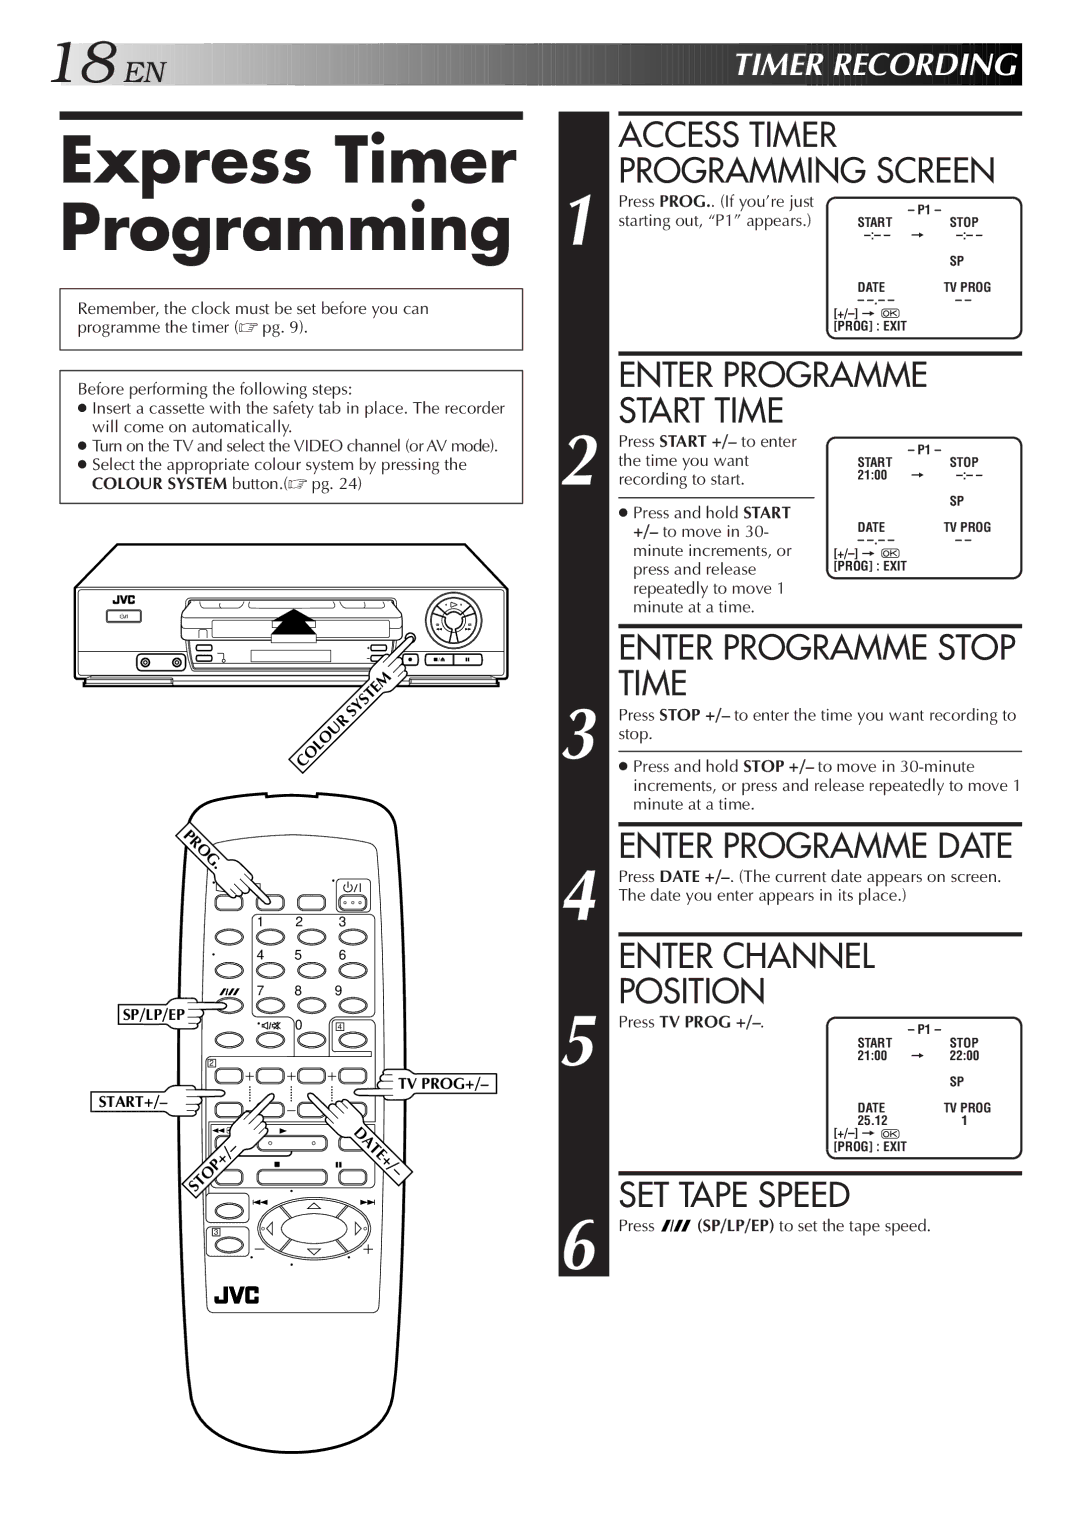
Express Timer Programming
Remember, the clock must be set before you can programme the timer (☞ pg. 9).
Before performing the following steps:
●Insert a cassette with the safety tab in place. The recorder will come on automatically.
●Turn on the TV and select the VIDEO channel (or AV mode).
●Select the appropriate colour system by pressing the COLOUR SYSTEM button.(☞ pg. 24)


 TIMER
TIMER
 RECORDING

ACCESS TIMER PROGRAMMING SCREEN
1 | Press PROG.. (If you’re just |
| – P1 – |
|
|
|
| ||
| starting out, “P1” appears.) | START | STOP | |
| = | |||
|
| |||
|
|
|
| SP |
|
| DATE |
| TV PROG |
|
| – |
| – – |
|
|
|
| |
|
| [PROG] : EXIT |
|
|
|
|
| ||
| ENTER PROGRAMME |
| ||
| START TIME |
|
|
|
| Press START +/– to enter |
| – P1 – |
|
| the time you want | START | STOP | |
| = | |||
2 recording to start. | 21:00 | |||
|
| SP | ||
| ● Press and hold START |
|
| |
| DATE |
| TV PROG | |
| +/– to move in 30- |
| ||
| minute increments, or | – |
| – – |
|
|
| ||
| press and release | [PROG] : EXIT |
|
|
| repeatedly to move 1 |
|
|
|
| minute at a time. |
|
|
|
COLOUR | SYSTEM |
|
ROG |
|
|
. |
|
|
1 |
|
|
1 | 2 | 3 |
4 | 5 | 6 |
7 | 8 | 9 |
SP/LP/EP | 0 | 4 |
| ||
2 |
|
|
START+/– |
| TV PROG+/– |
|
| |
– |
| DATE+/ |
STOP+/ |
| – |
|
| |
3 |
|
|
3
4
5
6
ENTER PROGRAMME STOP TIME
Press STOP +/– to enter the time you want recording to stop.
●Press and hold STOP +/– to move in
ENTER PROGRAMME DATE
Press DATE
ENTER CHANNEL |
|
POSITION |
|
Press TV PROG | – P1 – |
| |
START | STOP |
21:00 | = 22:00 |
| SP |
DATE | TV PROG |
25.12 | 1 |
| |
[PROG] : EXIT |
|
SET TAPE SPEED
Press ![]()
![]() (SP/LP/EP) to set the tape speed.
(SP/LP/EP) to set the tape speed.