
HR-J341EM specifications
The JVC HR-J341EM is a sophisticated VCR that epitomizes the technological advancements of its time, offering consumers a seamless way to enjoy video playback and recording. Designed primarily for home use, this model brings together functionality and user-friendly features, making it an appealing choice for both casual viewers and avid enthusiasts.One of the standout characteristics of the JVC HR-J341EM is its support for both NTSC and PAL video formats, which adds versatility for users who may have different types of video media. This dual-format capability ensures that users can enjoy a wide range of content, regardless of the source. In terms of video quality, the HR-J341EM utilizes advanced video processing technology, delivering impressive picture clarity and vibrant colors. This makes it a suitable option for watching films and recording broadcast television.
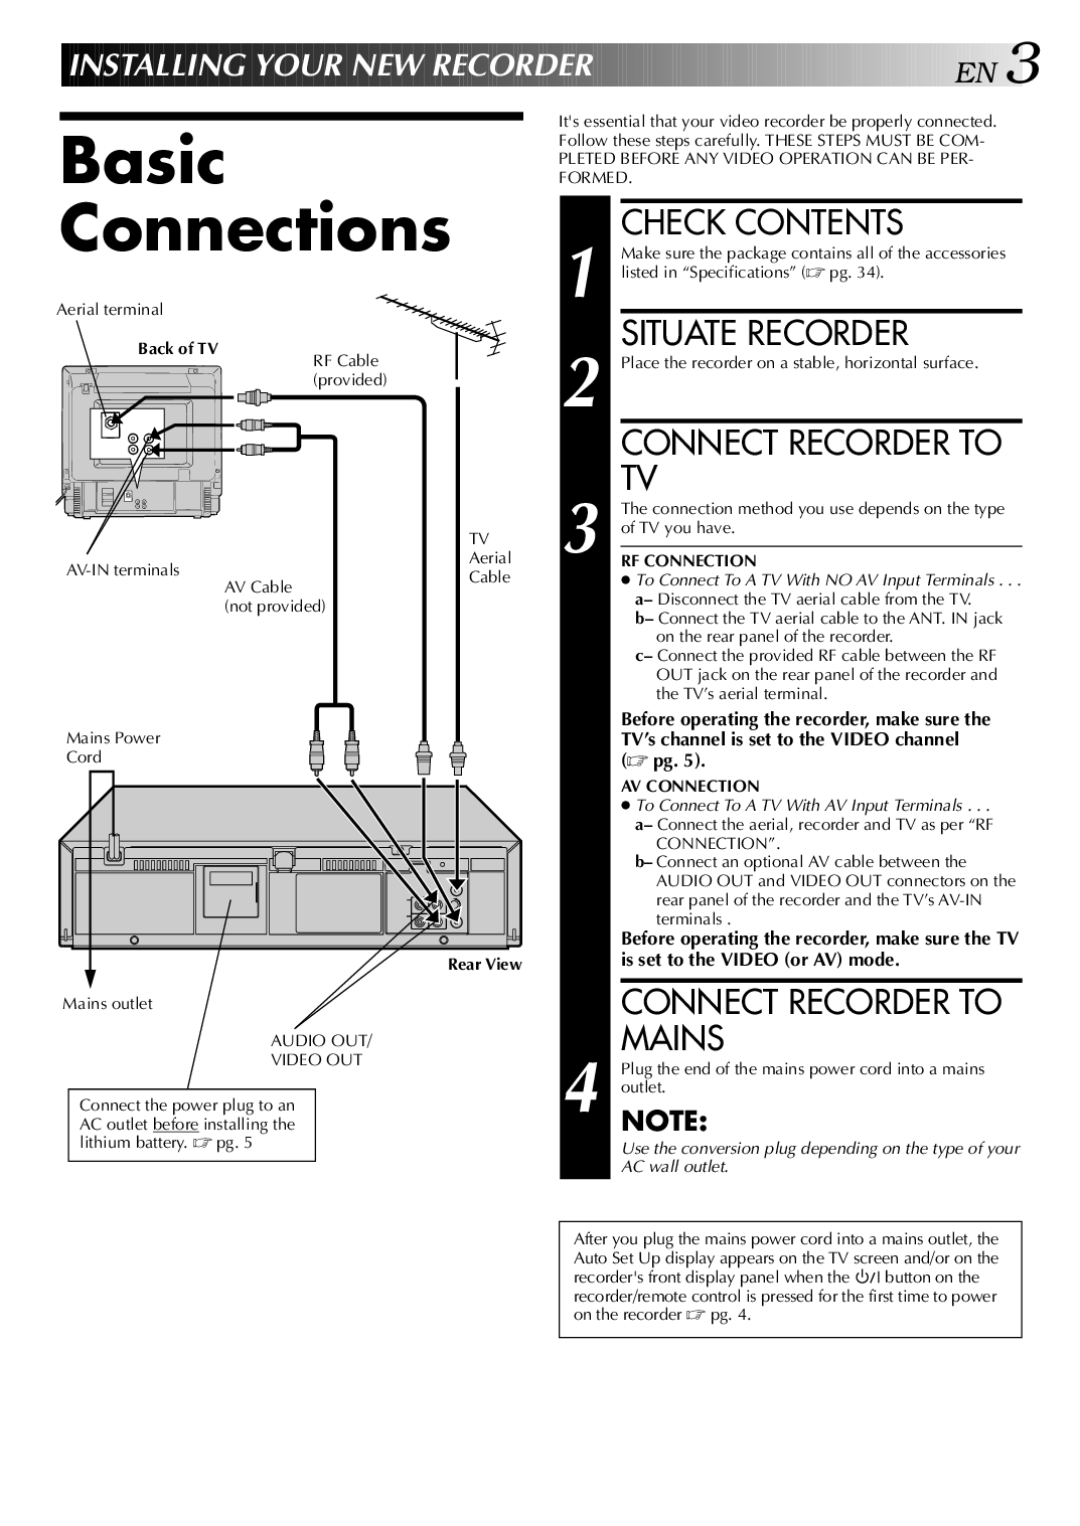
The VCR also features a built-in digital tuner, which allows users to directly receive and record over-the-air television broadcasts. This is particularly beneficial in an era where accessible television programming is essential, and users can save their favorite shows directly onto VHS tapes. Additionally, the HR-J341EM is equipped with various input and output options, including composite video and audio jacks, making it easy to connect to other devices such as televisions and audio systems.
For ease of use, the device is designed with intuitive controls, including a straightforward on-screen menu that guides users through different functions such as recording, playback, and timer settings. The VCR’s timer recording feature is especially noteworthy, as it allows users to schedule recordings in advance, ensuring they never miss their favorite programming. Furthermore, the HR-J341EM employs Super VHS compatibility, which offers superior video quality for users looking to enhance their home video recording experience.
In summary, the JVC HR-J341EM combines a robust set of features with innovative technology to deliver an exceptional viewing and recording experience. Whether it's for capturing live television, replaying treasured home videos, or enjoying films, this VCR stands as a testament to JVC's commitment to quality and ease of use in video technology. Despite the decline of VHS in favor of digital formats, the HR-J341EM remains a significant model in the history of home entertainment, offering nostalgia and reliability for those who appreciate the charm of VHS tapes.