
KD-G115, KD-G116 specifications
The JVC KD-G116 and KD-G115 are high-performance car audio receivers that offer a seamless blend of sound quality, user-friendly features, and cutting-edge technology. Designed for audiophiles and casual listeners alike, these models provide a range of functionalities that enhance your driving experience.One of the standout features of both the JVC KD-G116 and KD-G115 is their exceptional sound quality. With a built-in powerful amplifier, these receivers deliver crisp treble and rich bass, ensuring that your favorite music sounds great on the road. The adjustable EQ settings allow users to customize their audio output according to personal preferences, making each listening experience unique.
The KD-G116 and KD-G115 are equipped with AM/FM tuners that support RDS (Radio Data System), which enables users to receive additional information from compatible radio stations, such as song titles and artist names. This feature allows for a more interactive and informative listening experience. Additionally, these models include support for CD playback, providing a traditional option for those who still enjoy physical media.
In terms of connectivity, both models are designed with modern technology in mind. They come with a front auxiliary input and USB port, allowing for easy connection of smartphones, tablets, and other portable media devices. This flexibility means that users can enjoy their favorite digital music collections with ease. Furthermore, the KD-G116 features Bluetooth wireless technology for hands-free calling and audio streaming, making it easier and safer to enjoy music or take calls while driving.
Another highlight of these receivers is their user-friendly interface, which includes a clear LCD display and intuitive controls. The large buttons make it easy to navigate through settings and playlists while keeping your focus on the road. The detachable faceplate also adds a layer of security, ensuring that the unit is protected from theft.
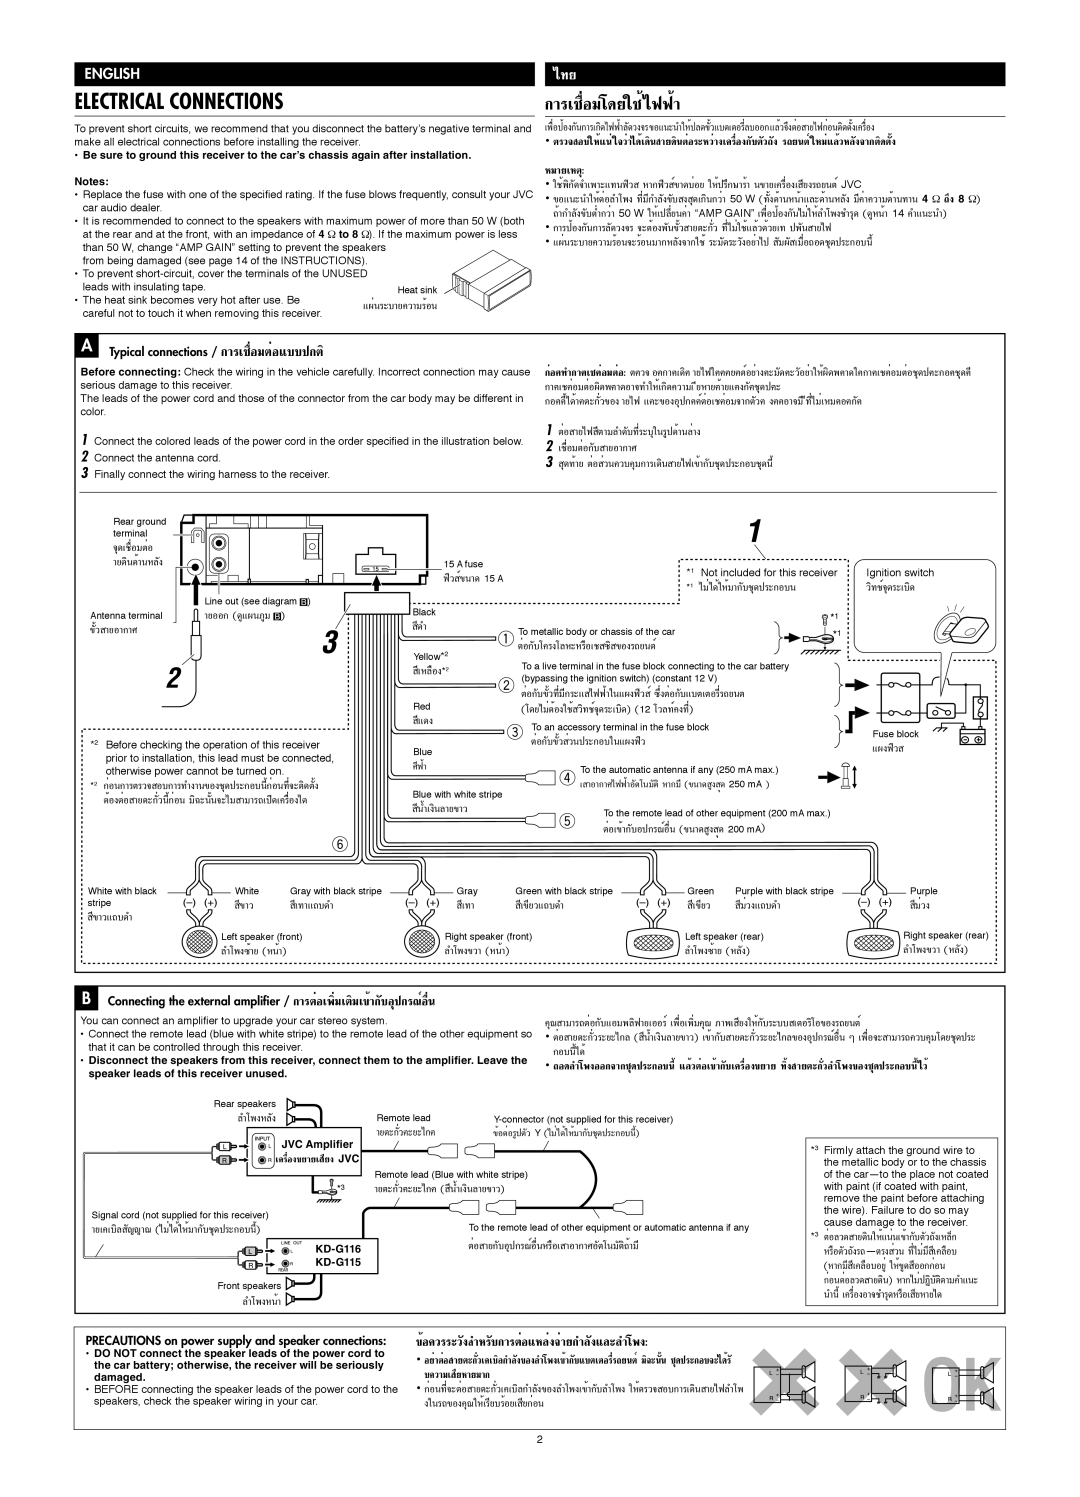
In terms of vehicle integration, both the KD-G116 and KD-G115 are compatible with a wide range of vehicles, making them a versatile choice for many drivers. The installation process is straightforward, with detailed instructions provided for those who prefer a DIY approach.
Overall, the JVC KD-G116 and KD-G115 are excellent choices for anyone looking to upgrade their car audio system. With their blend of sound quality, modern connectivity options, and user-friendly design, these receivers stand out as reliable and feature-rich options in the competitive car audio market.