KD-G305 specifications
The JVC KD-G305 is a remarkable car CD receiver that blends traditional functionality with modern technological advancements, making it a popular choice for music enthusiasts and casual listeners alike. With a sleek, functional design, this audio unit is built to enhance the in-car listening experience while ensuring ease of use and versatility.One of the standout features of the KD-G305 is its compatibility with various audio formats. The device supports CD, CD-R, and CD-RW playback, allowing users to enjoy their favorite albums and custom mixes without restrictions. Additionally, it boasts an integrated AM/FM tuner with 24 presets, providing access to a wide range of radio stations.
The KD-G305 is designed with a user-friendly interface. Its large, easy-to-read LCD display shows track information, radio frequencies, and station names, making navigation simple even while on the move. The unit also features tactile buttons that provide a satisfying response, ensuring that drivers can control their music without getting distracted.
In terms of sound quality, the KD-G305 is equipped with a powerful built-in amplifier offering a peak power output of 50 watts per channel. This capability allows the receiver to deliver rich, clear audio across various volume levels. Additionally, it features a five-band graphic equalizer, enabling users to customize their sound preferences by adjusting frequencies to suit their tastes. This feature is particularly helpful for listeners who want to enhance the audio experience according to their vehicle's acoustics.
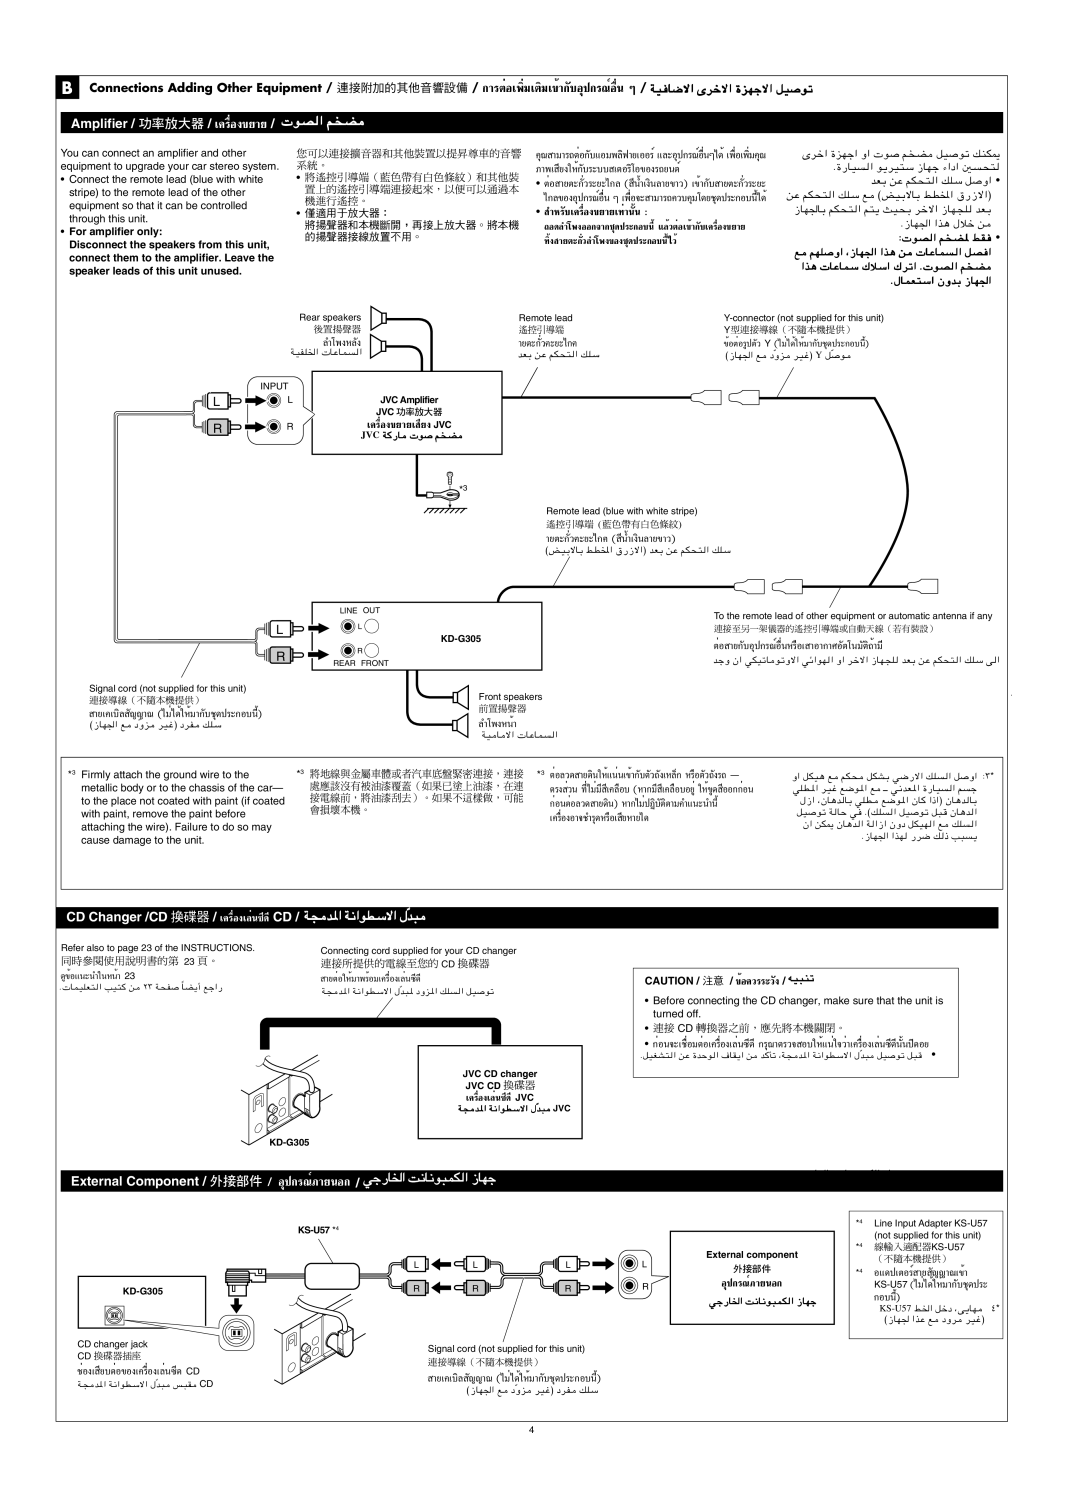
The KD-G305 also includes multiple inputs for versatility. It features an auxiliary input, allowing users to connect external devices such as smartphones or MP3 players directly to the receiver. This functionality caters to the increasing demand for using mobile devices for music playback, as many users prefer streaming their favorite playlists.
Furthermore, the device is designed to enhance the connectivity options for the modern user. While it does not feature Bluetooth, it can still accommodate USB devices when connected through appropriate adapters. This flexibility allows for a range of music sources while maintaining high sound quality.
The durability and build quality of the JVC KD-G305 are also noteworthy. With robust construction, it is built to withstand the rigors of daily use in a vehicle environment. The unit's design also minimizes glare on the display, ensuring that visibility remains clear under various lighting conditions.
In summary, the JVC KD-G305 is a well-rounded car audio receiver that combines essential features with enhanced sound quality and versatility. Its support for multiple audio formats, user-friendly interface, and customizable sound settings make it an attractive option for anyone looking to improve their in-car audio experience. Whether for casual listening or serious music appreciation, the KD-G305 delivers functionality and style.