Timer Recording

This recorder can be programmed to record up to 16 programs within a period of 1 month. For unattended recording, the timer needs to know the channels to be recorded, the starting and ending time.

Note:

If you use a completely blank disc for timer recording, you must format the disc before starting timer recording. (Refer to “Disc Format” on page 20.)

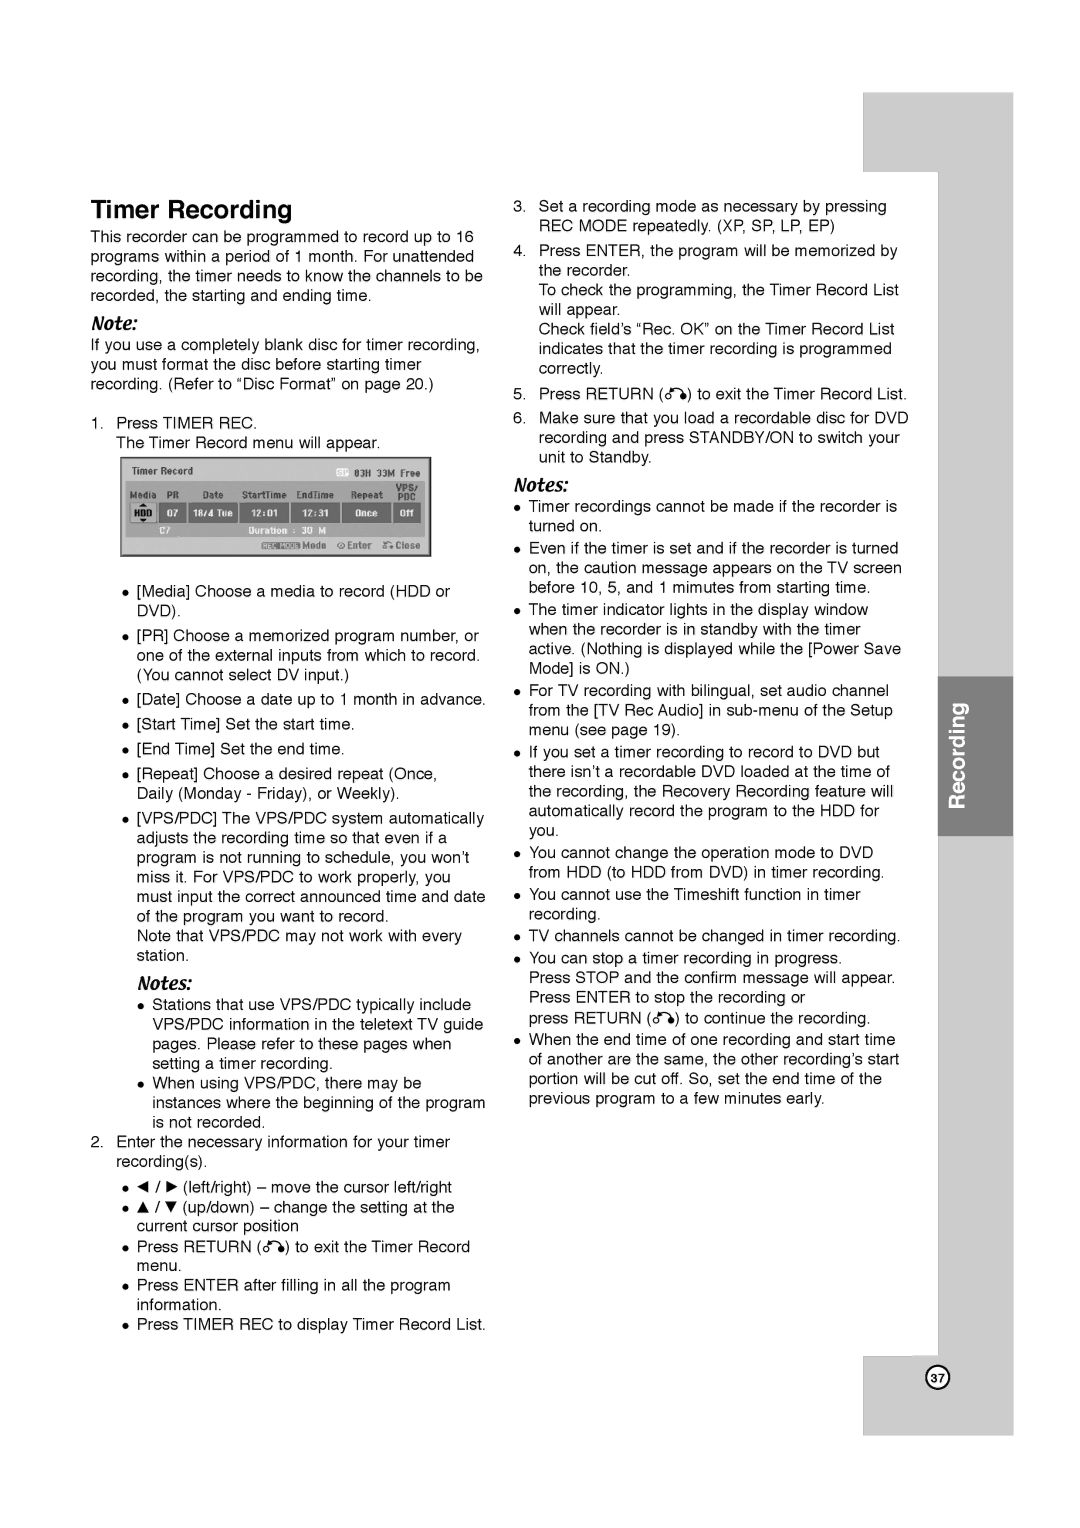
1.Press TIMER REC.

The Timer Record menu will appear.

[Media] Choose a media to record (HDD or DVD).

[PR] Choose a memorized program number, or one of the external inputs from which to record. (You cannot select DV input.)

[Date] Choose a date up to 1 month in advance. [Start Time] Set the start time.

[End Time] Set the end time.

[Repeat] Choose a desired repeat (Once, Daily (Monday - Friday), or Weekly).

[VPS/PDC] The VPS/PDC system automatically adjusts the recording time so that even if a program is not running to schedule, you won’t miss it. For VPS/PDC to work properly, you must input the correct announced time and date of the program you want to record.

Note that VPS/PDC may not work with every station.

Notes:

Stations that use VPS/PDC typically include VPS/PDC information in the teletext TV guide pages. Please refer to these pages when setting a timer recording.

When using VPS/PDC, there may be instances where the beginning of the program is not recorded.

2.Enter the necessary information for your timer recording(s).

b/ B (left/right) – move the cursor left/right v / V (up/down) – change the setting at the current cursor position

Press RETURN (O) to exit the Timer Record menu.

Press ENTER after filling in all the program information.

Press TIMER REC to display Timer Record List.

3.Set a recording mode as necessary by pressing REC MODE repeatedly. (XP, SP, LP, EP)

4.Press ENTER, the program will be memorized by the recorder.

To check the programming, the Timer Record List will appear.

Check field’s “Rec. OK” on the Timer Record List indicates that the timer recording is programmed correctly.

5.Press RETURN (O) to exit the Timer Record List.

6.Make sure that you load a recordable disc for DVD recording and press STANDBY/ON to switch your unit to Standby.

Notes:

Timer recordings cannot be made if the recorder is turned on.

Even if the timer is set and if the recorder is turned on, the caution message appears on the TV screen before 10, 5, and 1 mimutes from starting time.

The timer indicator lights in the display window when the recorder is in standby with the timer active. (Nothing is displayed while the [Power Save Mode] is ON.)

For TV recording with bilingual, set audio channel from the [TV Rec Audio] in sub-menu of the Setup menu (see page 19).

If you set a timer recording to record to DVD but there isn’t a recordable DVD loaded at the time of the recording, the Recovery Recording feature will automatically record the program to the HDD for you.

You cannot change the operation mode to DVD from HDD (to HDD from DVD) in timer recording. You cannot use the Timeshift function in timer recording.

TV channels cannot be changed in timer recording. You can stop a timer recording in progress.

Press STOP and the confirm message will appear. Press ENTER to stop the recording or

press RETURN (O) to continue the recording. When the end time of one recording and start time of another are the same, the other recording’s start portion will be cut off. So, set the end time of the previous program to a few minutes early.

Recording

37

Page 37
Image 37
JVC LPT1132-001A manual Timer Recording

LPT1132-001A specifications

The JVC LPT1132-001A represents a significant advancement in the realm of consumer electronics, particularly for users seeking high-quality audiovisual experiences. This product is engineered with cutting-edge technologies that cater to both performance and usability.

One of the standout features of the LPT1132-001A is its superior image processing capability. Utilizing JVC's proprietary Clear Motion Drive technology, the device minimizes motion blur, ensuring that fast-moving scenes appear smooth and fluid. This is particularly advantageous for sports enthusiasts and action movie lovers, who can enjoy a more immersive viewing experience without the distractions of ghosting or lag.

In addition to its impressive motion handling, the LPT1132-001A is equipped with a high dynamic range (HDR) support. HDR technology allows for a broader spectrum of colors and enhanced contrast, showcasing the intricate details in both bright highlights and deep shadows. This results in a more realistic and vibrant picture quality, making it an ideal choice for content creators and avid viewers alike.

The audio capabilities of the LPT1132-001A do not fall short either. Featuring JVC's Dolby Audio system, it provides an enriched sound experience that matches its exceptional visual performance. The multi-channel audio support allows for an enveloping soundstage that enhances the overall viewing experience, whether watching movies, playing video games, or streaming music.

Interconnectivity is another highlight of the JVC LPT1132-001A. It boasts multiple input and output options, including HDMI, USB, and optical audio connections. This versatility ensures compatibility with a wide range of devices, from gaming consoles to Blu-ray players, making it a central hub for any home entertainment setup.

Furthermore, the design of the LPT1132-001A emphasizes user-friendliness. The intuitive interface, coupled with a responsive remote control, allows users to navigate through settings and streaming apps effortlessly. The device also supports popular streaming services, making it easier than ever to access a vast library of content.

In summary, the JVC LPT1132-001A is a well-rounded product that combines advanced video and audio technologies with user-centric features. It is an excellent choice for anyone looking to elevate their home entertainment experience, offering vibrant visuals, immersive sound, and versatile connectivity in one sleek package. Whether you are a casual viewer or a dedicated audiophile, this device aims to meet and exceed expectations.