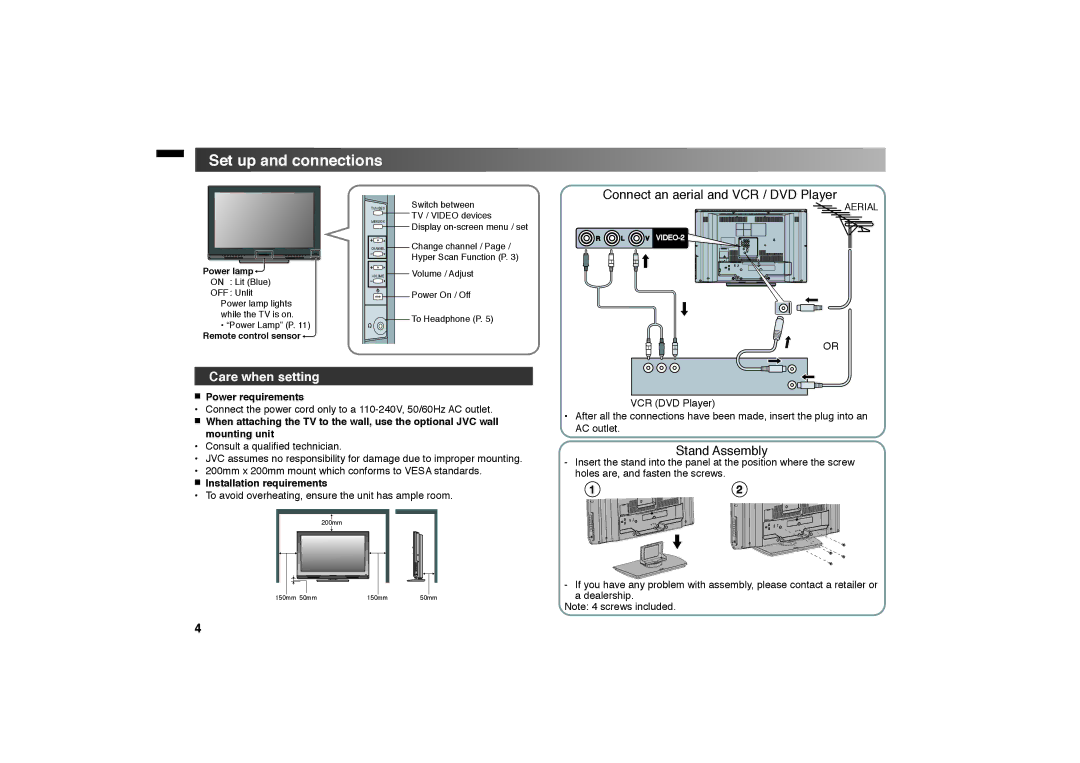
Set up and connections
TV/VIDEO
MENU/OK
CHANNEL
Power lamp ![]()
VOLUME
ON : Lit (Blue)
OFF : Unlit
Power lamp lights
while the TV is on.
• “Power Lamp” (P. 11)
Remote control sensor 
Switch between
TV / VIDEO devices
Display
Change channel / Page / Hyper Scan Function (P. 3)
Volume / Adjust
Power On / Off
To Headphone (P. 5)
Connect an aerial and VCR / DVD Player
AERIAL
![]() R
R ![]() L
L ![]() V
V
OR
Care when setting
■Power requirements
•Connect the power cord only to a
■ When attaching the TV to the wall, use the optional JVC wall mounting unit
•Consult a qualified technician.
•JVC assumes no responsibility for damage due to improper mounting.
•200mm x 200mm mount which conforms to VESA standards.
■Installation requirements
• To avoid overheating, ensure the unit has ample room.
200mm
VCR (DVD Player)
•After all the connections have been made, insert the plug into an AC outlet.
Stand Assembly
-Insert the stand into the panel at the position where the screw holes are, and fasten the screws.
1 | 2 |
|
|
|
|
|
|
|
|
|
|
|
|
|
|
|
|
|
|
| - If you have any problem with assembly, please contact a retailer or |
|
|
|
|
|
|
|
|
|
|
|
|
|
|
|
|
|
|
| |
|
|
|
|
|
|
|
|
|
|
|
|
|
|
|
| a dealership. | |||
150mm 50mm | 150mm | 50mm | |||||||||||||||||
|
|
|
|
|
|
|
|
|
|
|
|
|
|
|
|
|
|
| Note: 4 screws included. |
4