Parts and Functions
8
Strap
7 6
2 4
Front glass
![]() 4 1
4 1![]()
![]()
35
Bottom view
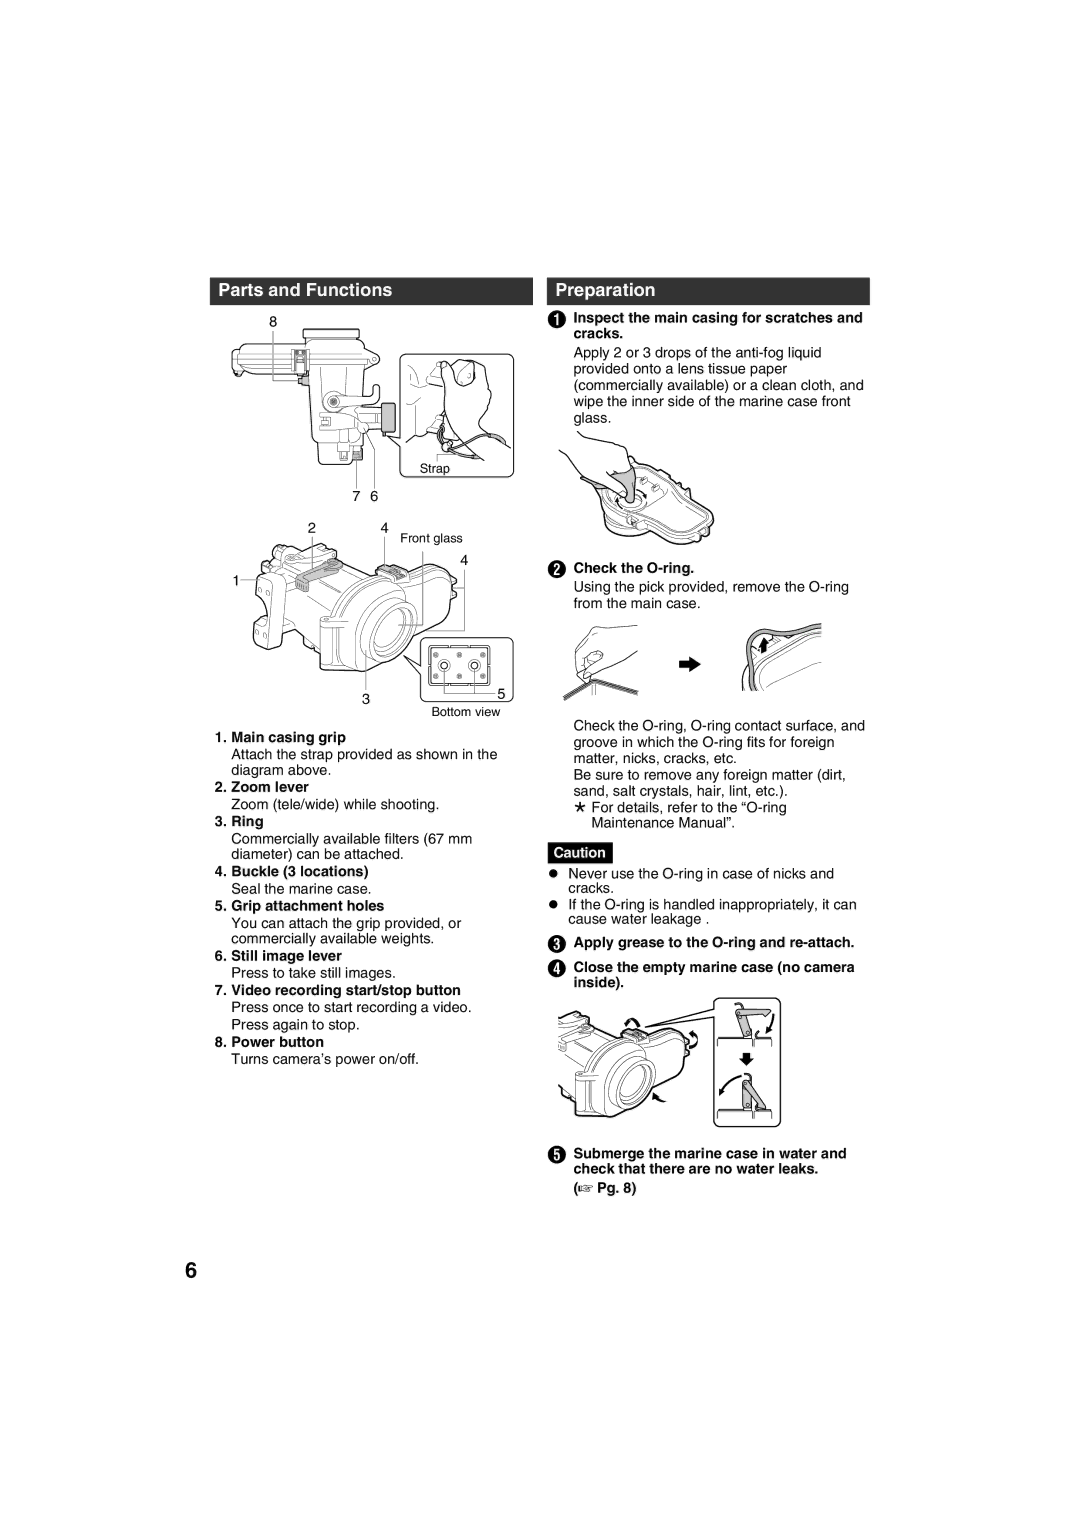
1.Main casing grip
Attach the strap provided as shown in the diagram above.
2.Zoom lever
Zoom (tele/wide) while shooting.
3.Ring
Commercially available filters (67 mm diameter) can be attached.
4.Buckle (3 locations) Seal the marine case.
5.Grip attachment holes
You can attach the grip provided, or commercially available weights.
6.Still image lever
Press to take still images.
7.Video recording start/stop button Press once to start recording a video. Press again to stop.
8.Power button
Turns camera’s power on/off.
6
Preparation
AInspect the main casing for scratches and cracks.
Apply 2 or 3 drops of the
BCheck the O-ring.
Using the pick provided, remove the
![]() B
B 
Check the
Be sure to remove any foreign matter (dirt, sand, salt crystals, hair, lint, etc.).
¹For details, refer to the
Caution
zNever use the
zIf the
CApply grease to the
DClose the empty marine case (no camera inside).
ESubmerge the marine case in water and check that there are no water leaks.
(A Pg. 8)