To record on both sides — Reverse Mode

Press REVERSE MODE so that the Reverse

Mode indicator lights up like —

.

When using the Reverse Mode for recording, start recording in the forward (3) direction

first. Otherwise, recording will stop when recording is done only on one side (reverse) of the tape.

To cancel Reverse Mode, press the button again so that the

Reverse Mode indicator lights up like —

.

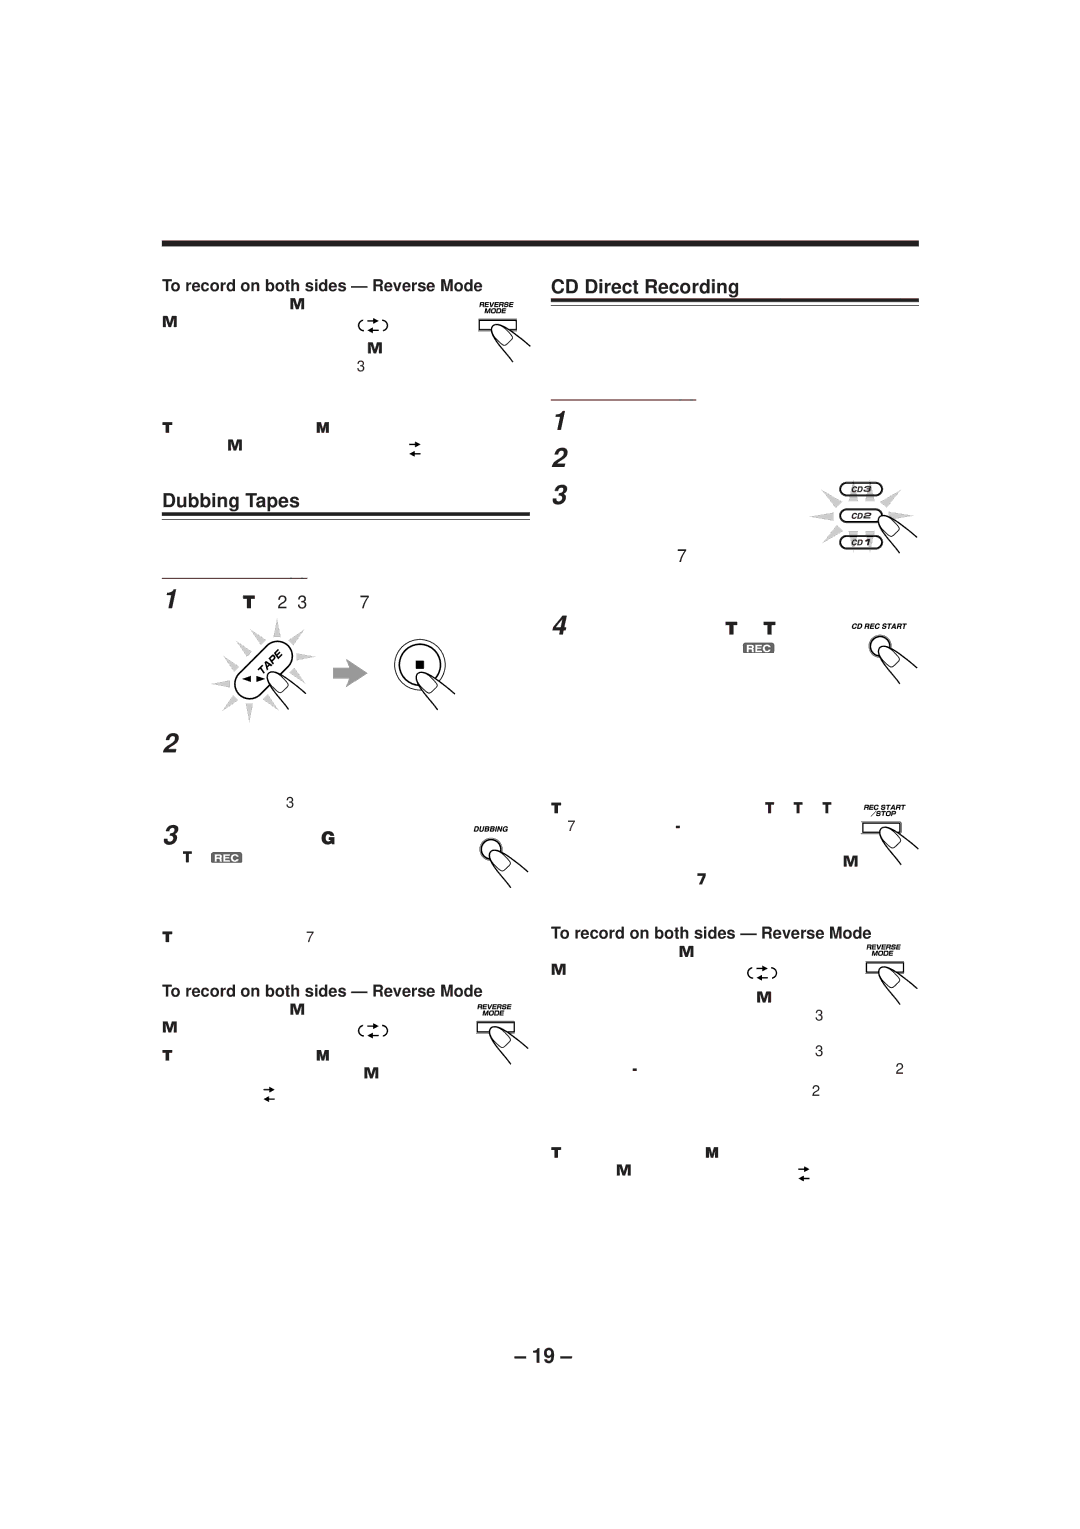
Dubbing Tapes

You can record from one tape to another.

On the unit ONLY:

1 Press TAPE 23, then 7.

2 Put the source cassette in deck A, and a recordable cassette into deck B.

Put the cassettes in both decks so that the tapes will run in the forward (3) direction.

3 Press DUBBING.

The (recording) indicator lights up on the display and dubbing starts.

To stop dubbing, press 7so that both decks (A and B) stop.

To record on both sides — Reverse Mode

Press REVERSE MODE so that the Reverse

Mode indicator lights up like — .

To cancel Reverse Mode, press the button again so that the Reverse Mode indicator

lights up like —

.

CD Direct Recording

Everything on the CD goes onto the tape in the order it is on the CD, or according to the order you have made for Program play.

On the unit ONLY:

1 Put a recordable cassette into deck B.

2 Load CDs.

3 Press one of the disc number buttons (CD1, CD2, and CD3) to select the disc, then 7.

If you want to make a program, perform steps 2 to 5 on page 15. After making a program, go to the next step.

4 Press CD REC START. “CD REC” appears, and the (recording) indicator lights up on the

display.

Deck B starts recording and the CD player starts playing. When the recording is done, “CD REC FINISHED” appears on the display, and the CD player and deck B stop.

To stop recording, press REC START/STOP or 7. So that a 4-second blank portion is created on the recording tape. (Remember a 4- second blank is important when using Music Scan — see page 17.)

To record on both sides — Reverse Mode

Press REVERSE MODE so that the Reverse

Mode indicator lights up like —

.

When using the Reverse Mode for CD Direct Recording, start recording in the forward (3) direction first. When the tape reaches its end while recording a song in the forward direction (3), the last song will be re-recorded at the beginning of the reverse side (2).

If you start recording on the reverse side (2), recording will stop when recording is done only on one side (reverse) of the tape.

To cancel Reverse Mode, press the button again so that the

Reverse Mode indicator lights up like —

.

– 19 –

Page 22
Image 22
JVC MX-GT70 manual Dubbing Tapes, CD Direct Recording, Press Dubbing, To record on both sides Reverse Mode

MX-GT70 specifications

The JVC MX-GT70 is a powerful and versatile audio system that stands out for its impressive features and modern technologies, making it a top choice for music enthusiasts. This speaker system, which combines functionality with an eye-catching design, offers a unique blend of performance and style.

One of the main features of the JVC MX-GT70 is its high-performance speakers. The system is designed to deliver robust audio quality, with exceptional clarity and depth. Boasting an impressive output power, it can fill a room with sound, making it ideal for parties and gatherings. The system effectively reproduces a wide range of frequencies, ensuring that bass sounds are deep and powerful while highs are crisp and clear.

The MX-GT70 also incorporates advanced audio technologies, including JVC's proprietary Dynamic Bass Boost. This feature enhances low frequencies, providing an extra layer of punch to your music. Whether you are listening to hip-hop, electronic, or any genre that benefits from bass, the Dynamic Bass Boost ensures that you feel the rhythm. Additionally, the system supports various audio formats, including MP3 and WMA, allowing you to enjoy your favorite tracks in multiple ways.

Connectivity is another strong suit of the JVC MX-GT70. It offers multiple input options, including USB, AUX, and Bluetooth, facilitating seamless integration with various devices. Bluetooth connectivity gives users the flexibility to play music wirelessly from smartphones, tablets, and laptops, promoting convenience without compromising sound quality.

The JVC MX-GT70 also features an intuitive control panel, making navigation through tracks and settings straightforward. The LCD display provides clear information on the current track, volume levels, and system settings, enhancing user experience.

Moreover, the design of the MX-GT70 is aesthetically pleasing, with a modern yet robust look that ensures it fits well in any environment. Its compact size allows for easy placement, while the build quality ensures durability.

In summary, the JVC MX-GT70 stands out for its powerful audio performance, advanced technologies, and user-friendly features. With its impressive connectivity options and striking design, it not only meets the needs of audio enthusiasts but also enhances their overall music experience. Whether for casual listening or lively parties, the MX-GT70 delivers a high-quality sound that truly impresses.