Installing the batteries
To install the batteries in the remote control unit
Before operating the remote control unit, install two batteries.
1. Remove the rear cover of the remote control unit by pressing down and simultaneously pulling it backwards.
2. Install batteries. Be sure that the batteries are installed with correct polarity, (+) and
3. Attach the rear cover by sliding it back into position.
Notes
Incorrect use of batteries can cause corrosion or damage. Note the following points to lengthen battery life.
ÖInstall batteries observing the correct polarity, (+) and
ÖDo not use new and old batteries simultaneously.
ÖBatteries with similar shapes may have different voltage ratings. Be sure to use the correct batteries.
ÖRemove batteries from the remote control unit if it will not be used for a long period of time.
ÖDo not expose batteries to heat or flame.
Battery replacement
Service life of batteries depends on the condition of use; standard life is about one year. When the batteries become weak, the operating distance of the remote control unit becomes short . If this happens, replace the batteries
Note
ÖThe lower the temperature, the shorter the battery life.
BEFORE USING FOR THE FIRST TIME
COMPU LINK connection
JVC’s COMPU LINK Remote Control System provides unified control over system components connected with COMPU LINK. Connecting JVC audio components with the COMPU LINK jacks automatically controls relative operations between components and facilitates vari- ous operations. With the COMPU LINK connection to an amplifier or receiver, you can operate
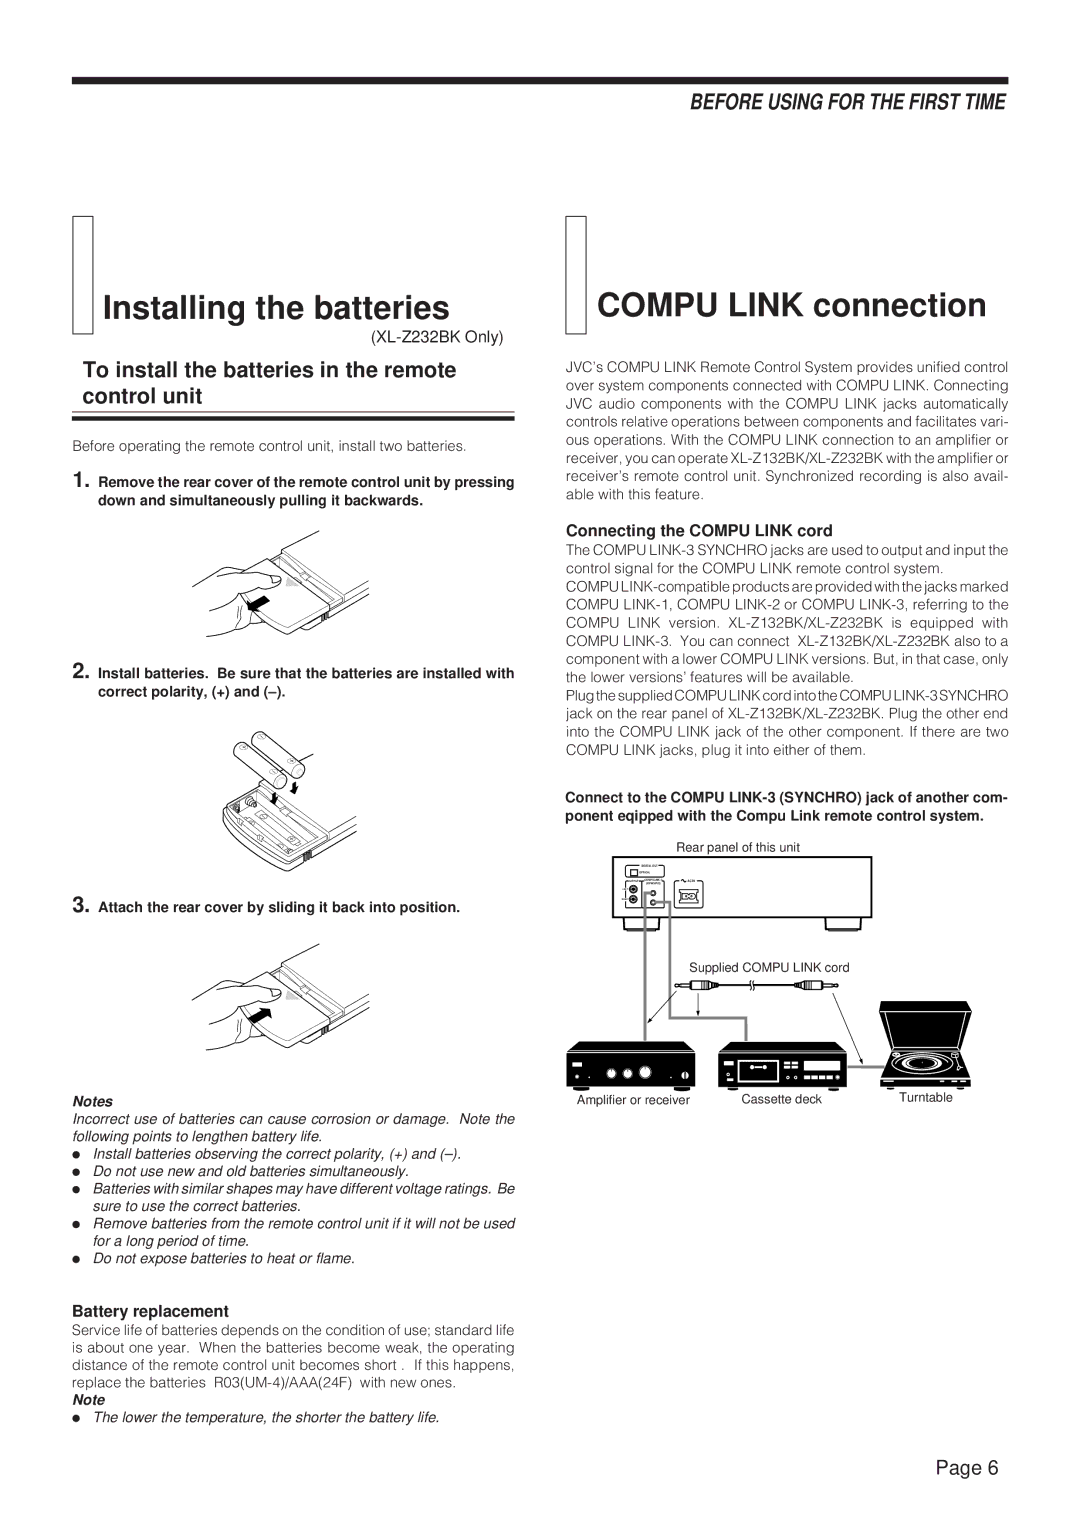
Connecting the COMPU LINK cord
The COMPU
COMPU
Plug the supplied COMPU LINK cord into the COMPU
Connect to the COMPU
Rear panel of this unit
DIGITAL OUT
| OPTICAL |
|
OUTPUT | AC IN | |
| (SYNCHRO) |
|
LEFT
RIGHT
Supplied COMPU LINK cord
Amplifier or receiver | Cassette deck | Turntable |
Page 6