BEFORE USING FOR THE FIRST TIME
Installing the unit
Best location
Select a location which is level, dry and neither too cold nor too hot (temperature range 5°C (41°F) to 35°C (95°F)). Also, avoid dusty locations or any location subject to vibration.
If interference occurs
If this equipment is placed near a tuner or a radio receiver tuned to AM frequencies, interference may occur. If this happens, we recommend either that you move this unit as far away as possible from the tuner or receiver or briefly turn off the power to this unit.
Connecting to the Digital Output Jack
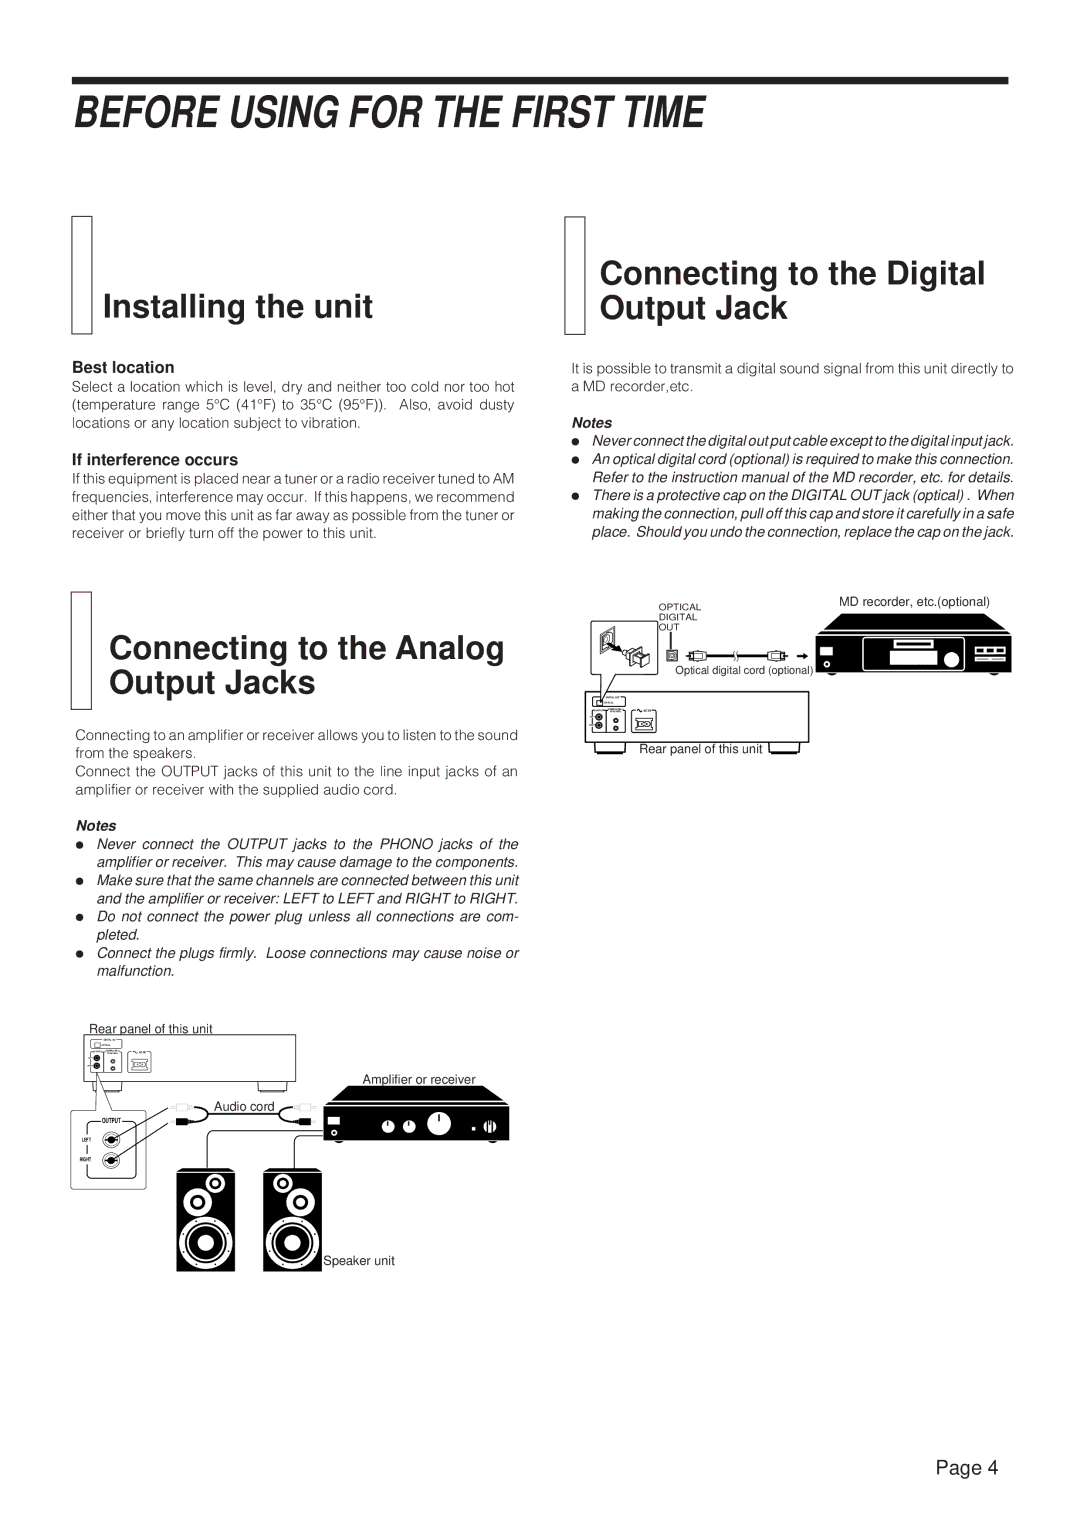
It is possible to transmit a digital sound signal from this unit directly to a MD recorder,etc.
Notes
ÖNever connect the digital out put cable except to the digital input jack.
ÖAn optical digital cord (optional) is required to make this connection. Refer to the instruction manual of the MD recorder, etc. for details.
ÖThere is a protective cap on the DIGITAL OUT jack (optical) . When making the connection, pull off this cap and store it carefully in a safe place. Should you undo the connection, replace the cap on the jack.
Connecting to the Analog Output Jacks
Connecting to an amplifier or receiver allows you to listen to the sound from the speakers.
Connect the OUTPUT jacks of this unit to the line input jacks of an amplifier or receiver with the supplied audio cord.
Notes
ÖNever connect the OUTPUT jacks to the PHONO jacks of the amplifier or receiver. This may cause damage to the components.
ÖMake sure that the same channels are connected between this unit and the amplifier or receiver: LEFT to LEFT and RIGHT to RIGHT.
ÖDo not connect the power plug unless all connections are com- pleted.
ÖConnect the plugs firmly. Loose connections may cause noise or malfunction.
Rear panel of this unit
DIGITAL OUT
| OPTICAL |
|
OUTPUT | AC IN | |
SYNCHRO |
Amplifier or receiver
![]()
![]()
![]()
![]()
![]()
![]() Audio cord
Audio cord ![]()
![]()
![]()
![]()
![]()
![]()
OUTPUT
OPTICAL | MD recorder, etc.(optional) |
DIGITAL |
|
OUT |
|
Optical digital cord (optional) |
|
DIGITAL OUT
| OPTICAL |
|
OUTPUT | AC IN | |
SYNCHRO |
LEFT
RIGHT
Rear panel of this unit ![]()
![]()
![]()
LEFT
RIGHT
Speaker unit
Page 4
