Getting started
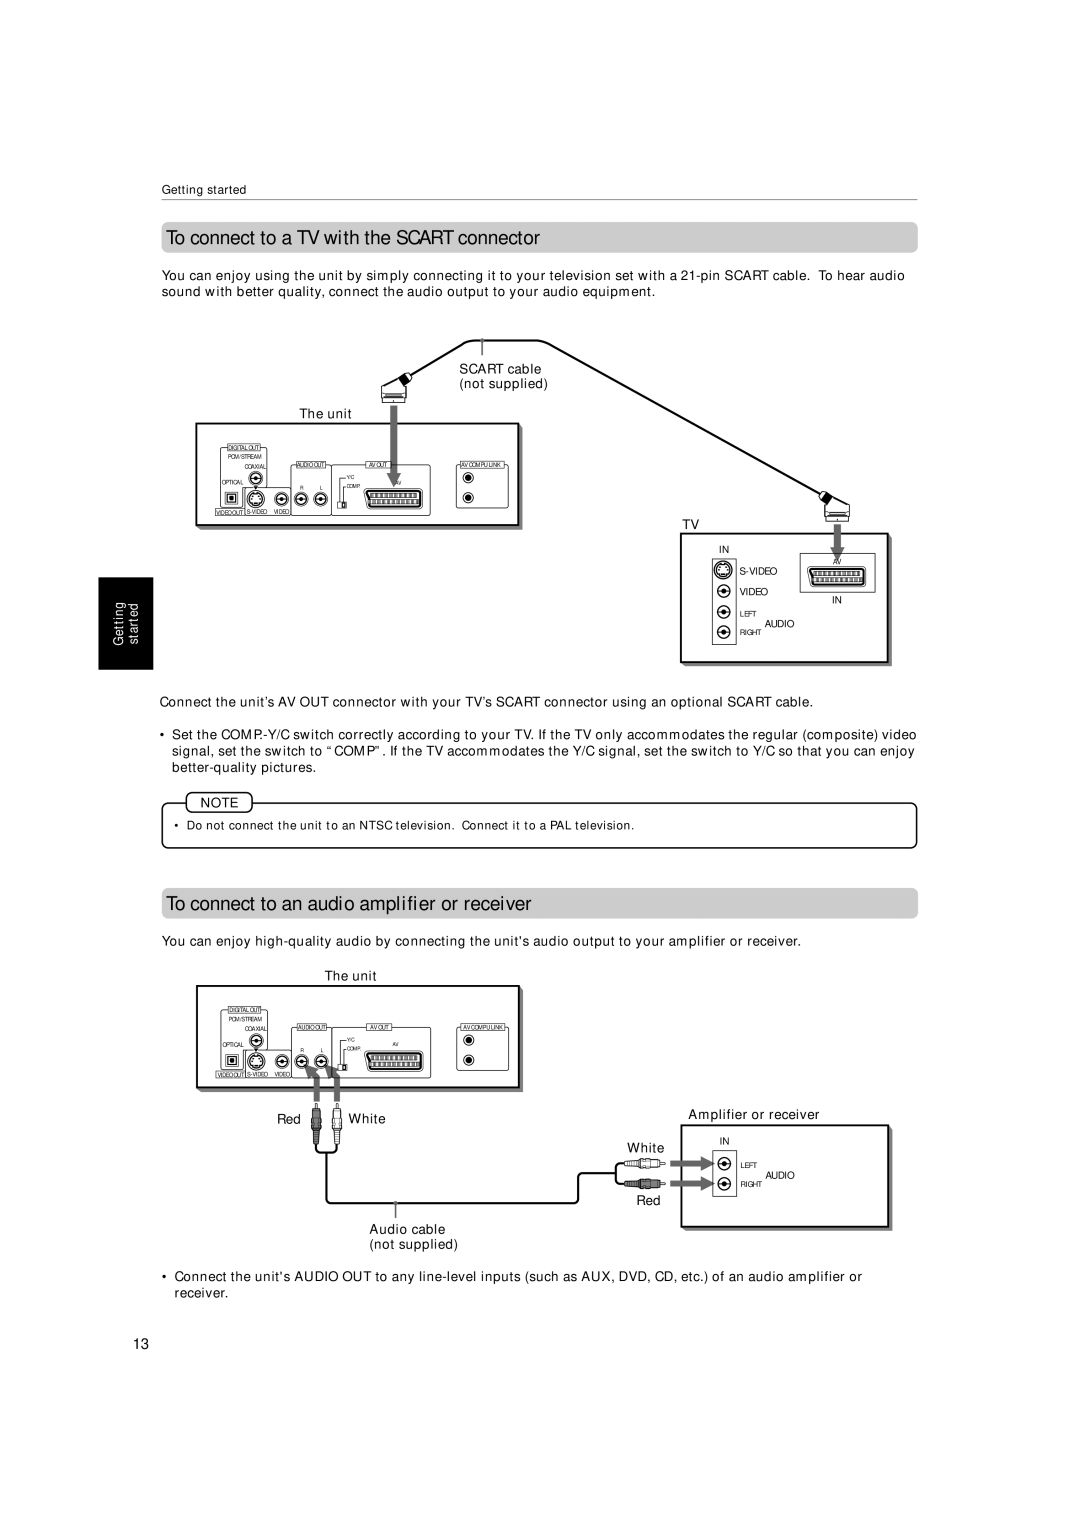
To connect to a TV with the SCART connector
You can enjoy using the unit by simply connecting it to your television set with a
SCART cable (not supplied)
Getting | started |
|
|
The unit
DIGITAL OUT |
|
|
|
| |
PCM/STREAM |
|
|
|
| |
COAXIAL | AUDIO OUT | AV OUT | AV COMPU LINK | ||
OPTICAL |
|
| Y/C | AV | |
R | L | COMP. | |||
|
| ||||
|
|
| |||
VIDEO OUT | VIDEO |
|
|
| |
TV
IN
AV
VIDEO
IN
LEFT
AUDIO
RIGHT
Connect the unit’s AV OUT connector with your TV’s SCART connector using an optional SCART cable.
•Set the
NOTE
• Do not connect the unit to an NTSC television. Connect it to a PAL television.
To connect to an audio amplifier or receiver
You can enjoy
The unit
DIGITAL OUT |
|
|
|
| |
PCM/STREAM |
|
|
|
| |
COAXIAL | AUDIO OUT | AV OUT | AV COMPU LINK | ||
OPTICAL |
|
| Y/C | AV | |
R | L | COMP. | |||
|
| ||||
VIDEO OUT | VIDEO |
|
|
| |
Red 
 White
White
White
Red
Audio cable (not supplied)
Amplifier or receiver
IN
LEFT
AUDIO
RIGHT
•Connect the unit's AUDIO OUT to any
13