Getting started
To connect to a TV with the component video input jacks
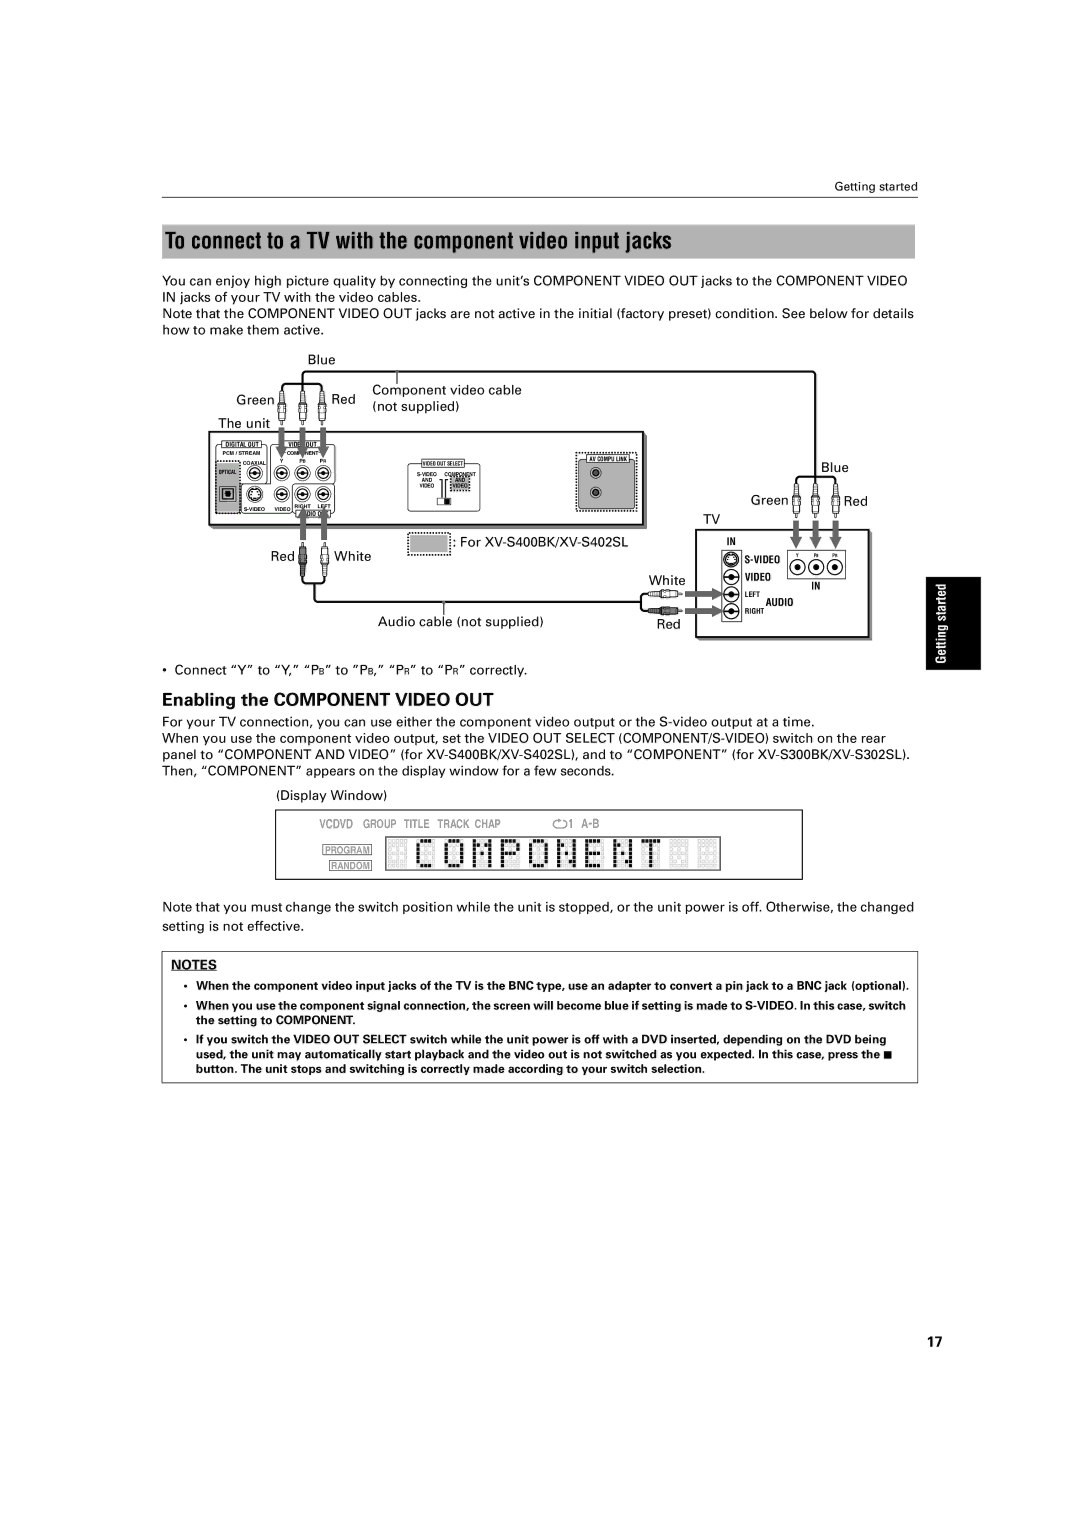
You can enjoy high picture quality by connecting the unit’s COMPONENT VIDEO OUT jacks to the COMPONENT VIDEO IN jacks of your TV with the video cables.
Note that the COMPONENT VIDEO OUT jacks are not active in the initial (factory preset) condition. See below for details how to make them active.
|
| Blue |
|
|
Green |
| Red | Component video cable | |
| (not supplied) | |||
|
|
| ||
The unit |
|
|
|
|
DIGITAL OUT |
| OUT |
|
|
PCM / STREAM |
| COMPONENT |
| AV COMPU LINK |
COAXIAL | Y | PB PR |
| |
|
| VIDEO OUT SELECT | ||
OPTICAL |
|
| COMPONENT | |
|
|
| AND | AND |
|
|
| VIDEO | VIDEO |
: For
Red ![]()
![]() White
White
Audio cable (not supplied)
White
Red
Blue
Green ![]()
![]()
![]() Red
Red
TV
IN
Y PB PR | |
| |
VIDEO | IN |
|
LEFT
AUDIO
RIGHT
Getting started
•Connect “Y” to “Y,” “PB” to ”PB,” “PR” to “PR” correctly.
Enabling the COMPONENT VIDEO OUT
For your TV connection, you can use either the component video output or the
When you use the component video output, set the VIDEO OUT SELECT
(Display Window)
VCDVD GROUP TITLE TRACK CHAP | 1 |
PROGRAM
RANDOM
Note that you must change the switch position while the unit is stopped, or the unit power is off. Otherwise, the changed
setting is not effective.
NOTES
•When the component video input jacks of the TV is the BNC type, use an adapter to convert a pin jack to a BNC jack (optional).
•When you use the component signal connection, the screen will become blue if setting is made to
•If you switch the VIDEO OUT SELECT switch while the unit power is off with a DVD inserted, depending on the DVD being used, the unit may automatically start playback and the video out is not switched as you expected. In this case, press the 7 button. The unit stops and switching is correctly made according to your switch selection.
17