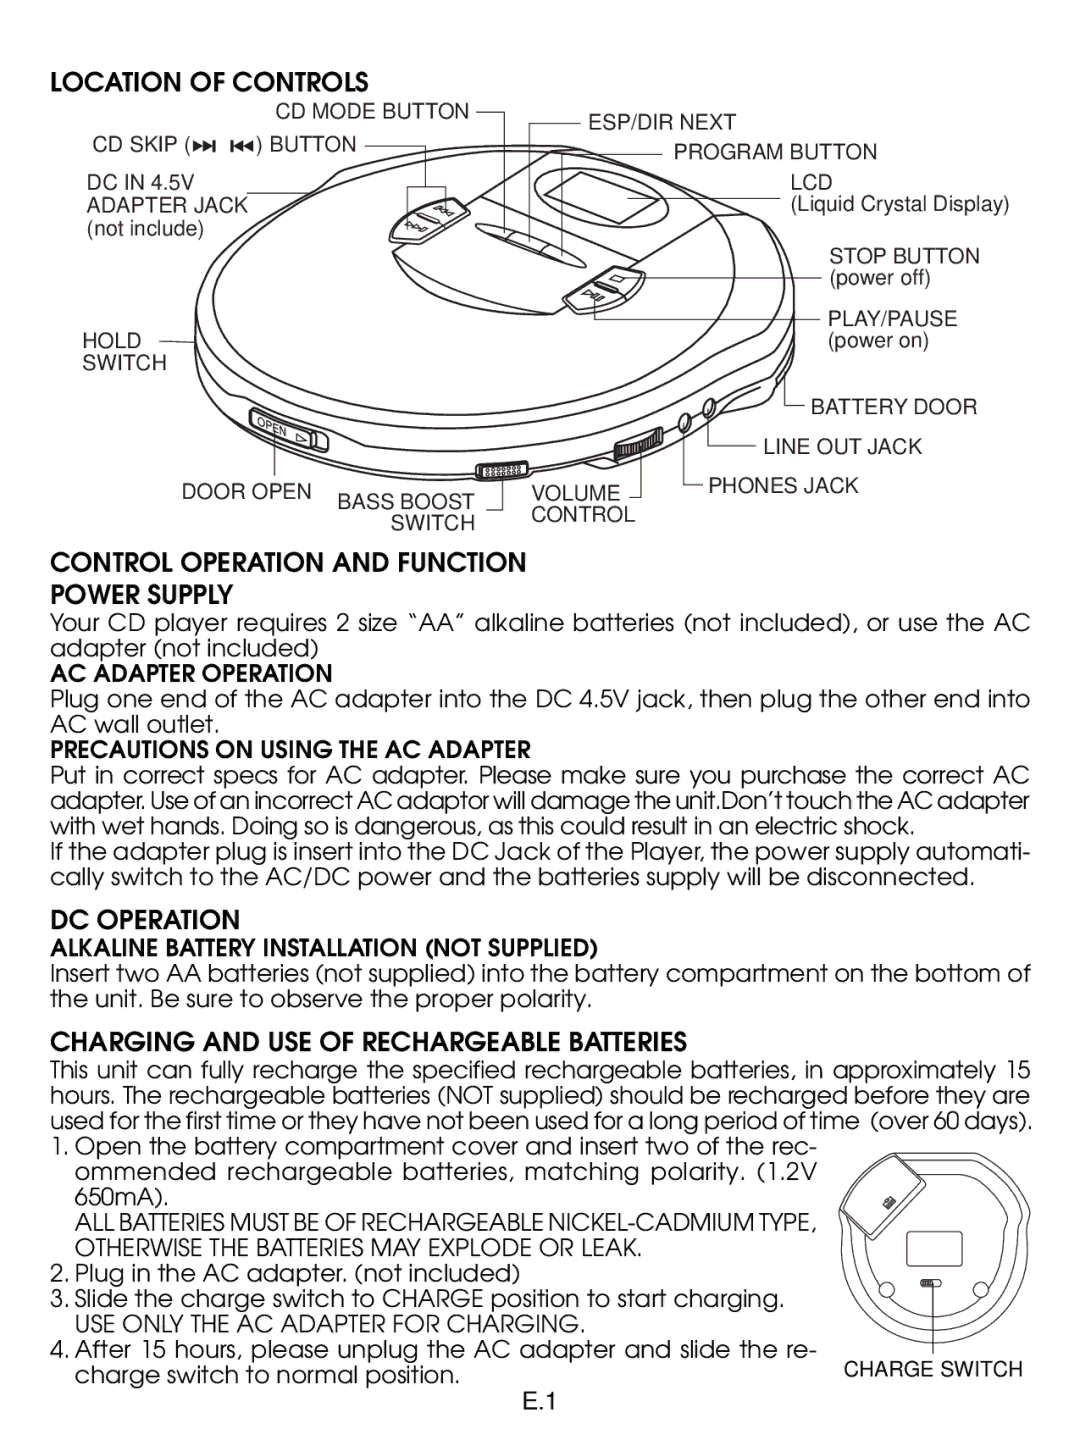
LOCATION OF CONTROLS
CD MODE BUTTON
CD SKIP (![]()
![]()
![]()
![]() ) BUTTON
) BUTTON
DC IN 4.5V ADAPTER JACK (not include)
HOLD
SWITCH
DOOR OPEN | BASS BOOST |
| SWITCH |
ESP/DIR NEXT PROGRAM BUTTON
LCD
(Liquid Crystal Display)
STOP BUTTON (power off)
PLAY/PAUSE (power on)
| BATTERY DOOR |
| LINE OUT JACK |
VOLUME | PHONES JACK |
CONTROL |
|
CONTROL OPERATION AND FUNCTION
POWER SUPPLY
Your CD player requires 2 size “AA” alkaline batteries (not included), or use the AC adapter (not included)
AC ADAPTER OPERATION
Plug one end of the AC adapter into the DC 4.5V jack, then plug the other end into AC wall outlet.
PRECAUTIONS ON USING THE AC ADAPTER
Put in correct specs for AC adapter. Please make sure you purchase the correct AC adapter. Use of an incorrect AC adaptor will damage the unit.Don’t touch the AC adapter with wet hands. Doing so is dangerous, as this could result in an electric shock.
If the adapter plug is insert into the DC Jack of the Player, the power supply automati- cally switch to the AC/DC power and the batteries supply will be disconnected.
DC OPERATION
ALKALINE BATTERY INSTALLATION (NOT SUPPLIED)
Insert two AA batteries (not supplied) into the battery compartment on the bottom of the unit. Be sure to observe the proper polarity.
CHARGING AND USE OF RECHARGEABLE BATTERIES
This unit can fully recharge the specified rechargeable batteries, in approximately 15 hours. The rechargeable batteries (NOT supplied) should be recharged before they are used for the first time or they have not been used for a long period of time (over 60 days).
1.Open the battery compartment cover and insert two of the rec- ommended rechargeable batteries, matching polarity. (1.2V
650mA).
ALL BATTERIES MUST BE OF RECHARGEABLE
2. Plug in the AC adapter. (not included)
3. Slide the charge switch to CHARGE position to start charging.
USE ONLY THE AC ADAPTER FOR CHARGING.
4. After 15 hours, please unplug the AC adapter and slide the re- charge switch to normal position.
E.1
