K1400 electric 6/27/02 6/27/02 10:01 AM Page 4
IMPORTANT PRECAUTIONS – continued
ASSEMBLY INSTRUCTIONS – continued
Water Supply
(Cold Water Only)
•Water hose must be at least 3/4 inch in diameter.
•Flow rate of water supply must not fall below 2.5 GPM (gallons per minute).
•Flow rate can be determined by running the water for one minute into an empty
•The water supply temperature must not exceed 104°F/40°C.
•Never use the pressure washer to draw in water contaminated with solvents, e.g. paint thinners, gasoline, oil, etc.
•Always prevent debris from being drawn into the unit by using a clean water source.
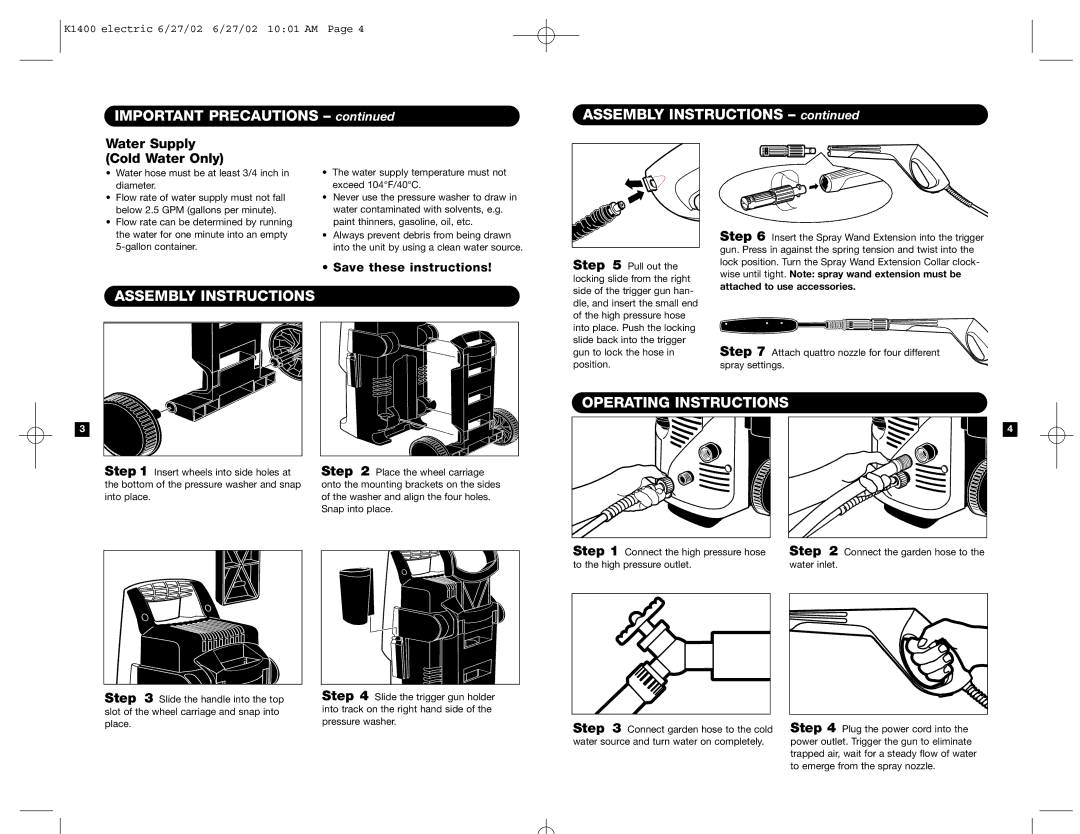
Step 6 Insert the Spray Wand Extension into the trigger gun. Press in against the spring tension and twist into the
• Save these instructions!
ASSEMBLY INSTRUCTIONS
Step 5 Pull out the locking slide from the right side of the trigger gun han- dle, and insert the small end of the high pressure hose into place. Push the locking slide back into the trigger gun to lock the hose in position.
lock position. Turn the Spray Wand Extension Collar clock- wise until tight. Note: spray wand extension must be
attached to use accessories.
Step 7 Attach quattro nozzle for four different spray settings.
Step 1 Insert wheels into side holes at |
| Step 2 Place the wheel carriage |
the bottom of the pressure washer and snap |
| onto the mounting brackets on the sides |
into place. |
| of the washer and align the four holes. |
|
| Snap into place. |
|
|
|
|
|
|
OPERATING INSTRUCTIONS
4
Step 1 Connect the high pressure hose | Step 2 Connect the garden hose to the |
to the high pressure outlet. | water inlet. |
Step 3 Slide the handle into the top slot of the wheel carriage and snap into place.
Step 4 Slide the trigger gun holder into track on the right hand side of the pressure washer.
Step 3 Connect garden hose to the cold water source and turn water on completely.
Step 4 Plug the power cord into the power outlet. Trigger the gun to eliminate trapped air, wait for a steady flow of water to emerge from the spray nozzle.