English
MAINTENANCE
 Initial inspection after 8 operating hours
!Caution!
For the safe functioning of your sweeper, an initial inspection must be carried out after 8 hours of operation. You should have the inspection done by your Kärcher Customer Ser- vice.
–inspect all bowden cables and adjust where necessary
–check that all hydraulic parts are leakproof and function correctly
–check that the handbrake functions
 Daily maintenance
–Inspect main brush roller for strapping and/or cord, etc., which may have wrapped round it. If so remove them.
–Check dust filters. If they are heavily contaminated with dust, shake them out.
–Empty waste hopper.
 Maintenance intervals
KeeptothemaintenanceschedulegivenintheMaintenance booklet
The maintenance work required must be carried out by an authorised specialist workshop.
 Maintenance tasks
!Risk of injury
Before you work under the waste hopper in its
–Remove ignition key
–Pull out battery plug connection
–Opencover
Tip seat forwards. Pull cover up by the handle grip designed for the purpose.
 Checking the hydraulic system
–Carry out a visual inspection. If there is any loss of fluid from the hydraulic unit, cylinder or hoses, call Kärcher Customer Service.
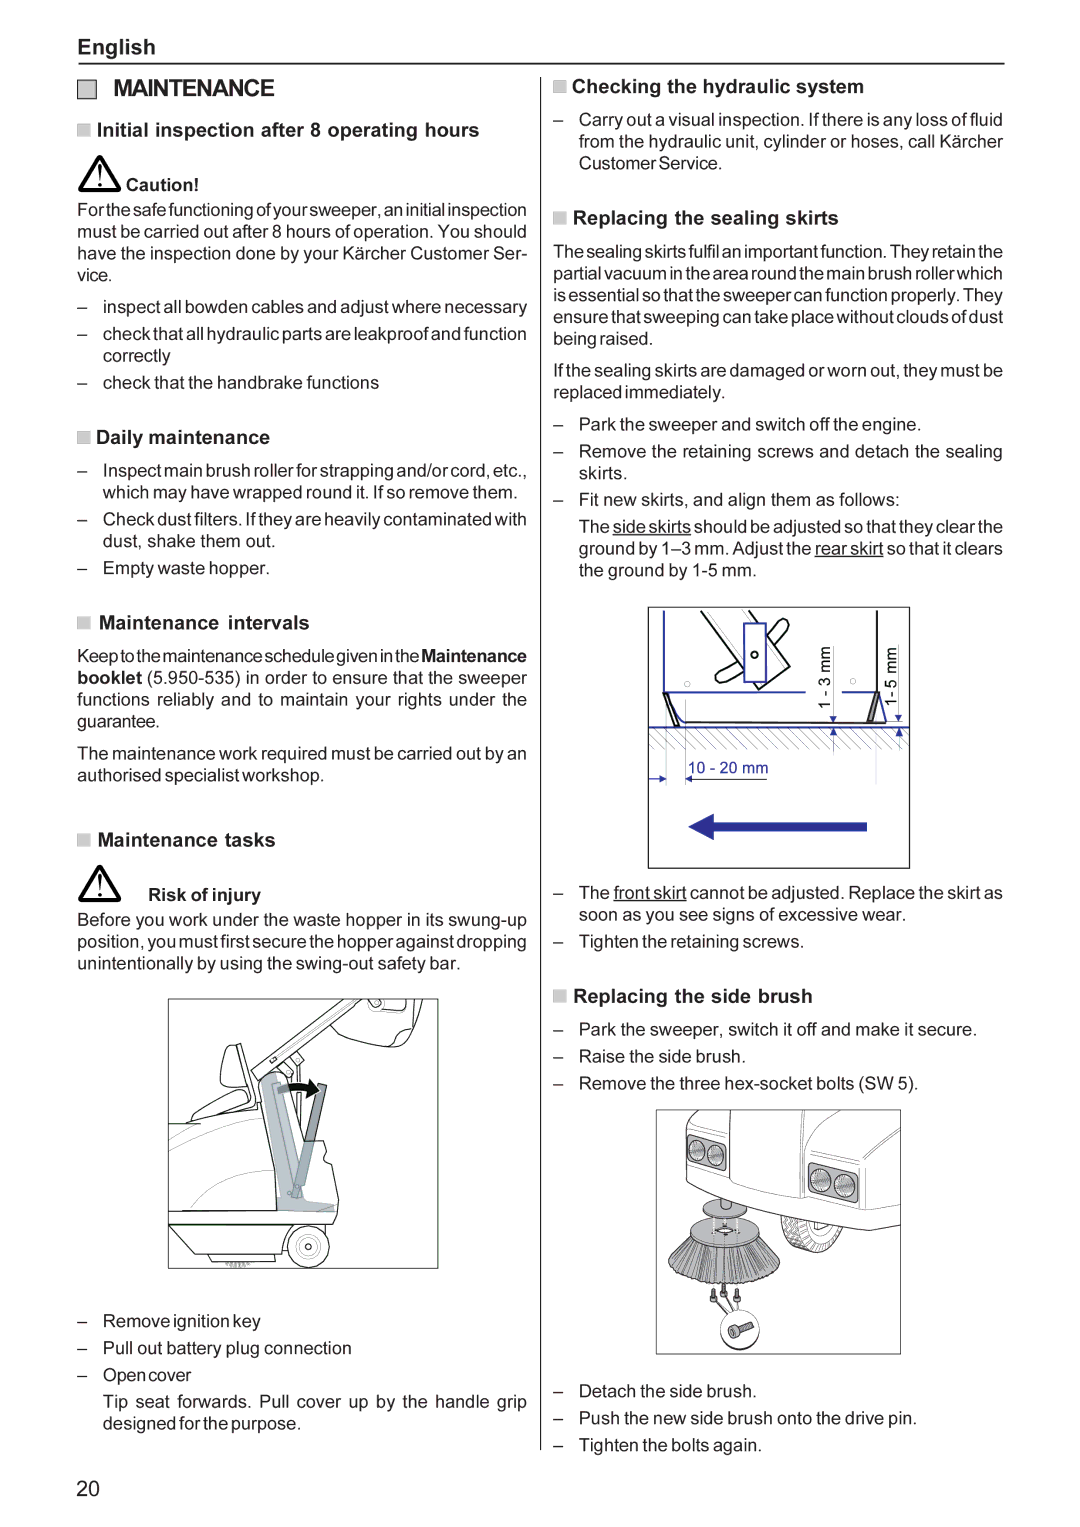
 Replacing the sealing skirts
The sealing skirts fulfil an important function. They retain the partial vacuum in the area round the main brush roller which is essential so that the sweeper can function properly. They ensure that sweeping can take place without clouds of dust being raised.
If the sealing skirts are damaged or worn out, they must be replaced immediately.
–Park the sweeper and switch off the engine.
–Remove the retaining screws and detach the sealing skirts.
–Fit new skirts, and align them as follows:
The side skirts should be adjusted so that they clear the ground by
–The front skirt cannot be adjusted. Replace the skirt as soon as you see signs of excessive wear.
–Tighten the retaining screws.
 Replacing the side brush
–Park the sweeper, switch it off and make it secure.
–Raise the side brush.
–Remove the three
–Detach the side brush.
–Push the new side brush onto the drive pin.
–Tighten the bolts again.
20