*) On buildings higher than 20 stories, a dynamic pressure of 1100 Nm ≤ is considered.
Installing several antennas on one mast
Never exeed the maximum load capacity of the mast or clamps when mounting several antennas on the mast.
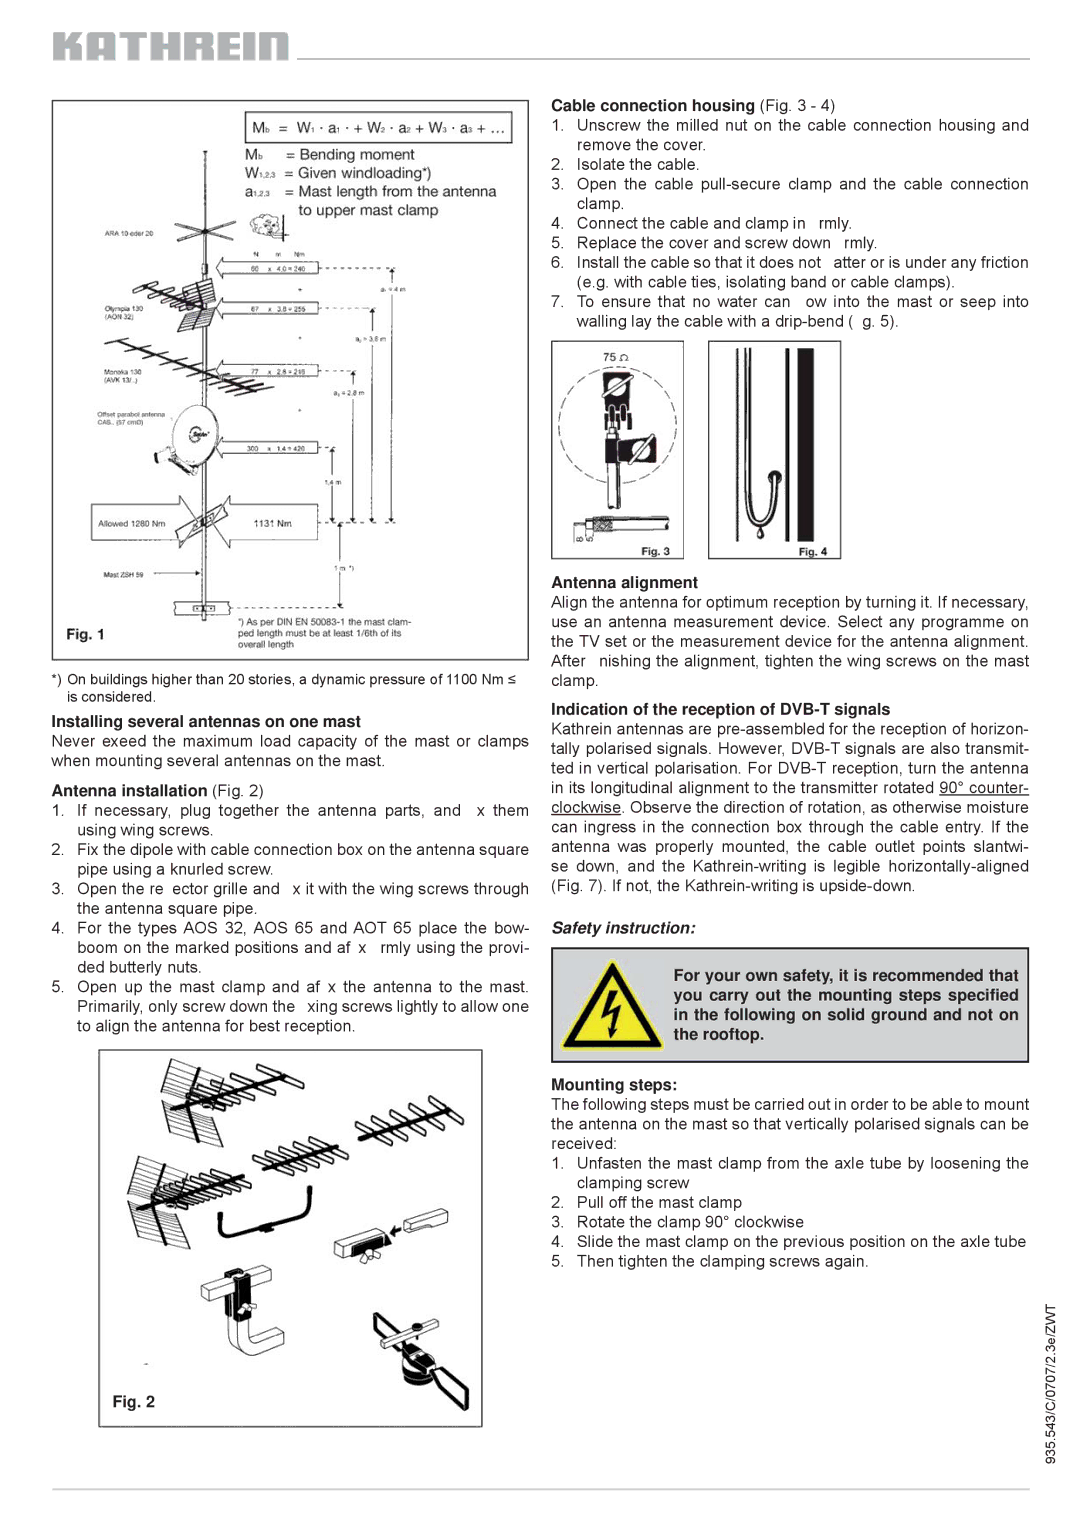
Antenna installation (Fig. 2)
1.If necessary, plug together the antenna parts, and x them using wing screws.
2.Fix the dipole with cable connection box on the antenna square pipe using a knurled screw.
3.Open the re ector grille and x it with the wing screws through the antenna square pipe.
4.For the types AOS 32, AOS 65 and AOT 65 place the bow- boom on the marked positions and af x rmly using the provi- ded butterly nuts.
5.Open up the mast clamp and af x the antenna to the mast.
Primarily, only screw down the xing screws lightly to allow one to align the antenna for best reception.
Cable connection housing (Fig. 3 - 4)
1.Unscrew the milled nut on the cable connection housing and remove the cover.
2.Isolate the cable.
3.Open the cable
4.Connect the cable and clamp in rmly.
5.Replace the cover and screw down rmly.
6. Install the cable so that it does not atter or is under any friction (e.g. with cable ties, isolating band or cable clamps).
7.To ensure that no water can ow into the mast or seep into walling lay the cable with a
Antenna alignment
Align the antenna for optimum reception by turning it. If necessary, use an antenna measurement device. Select any programme on the TV set or the measurement device for the antenna alignment. After nishing the alignment, tighten the wing screws on the mast clamp.
Indication of the reception of DVB-T signals
Kathrein antennas are
Safety instruction:
For your own safety, it is recommended that you carry out the mounting steps specified in the following on solid ground and not on the rooftop.
Mounting steps:
The following steps must be carried out in order to be able to mount the antenna on the mast so that vertically polarised signals can be received:
1.Unfasten the mast clamp from the axle tube by loosening the clamping screw
2.Pull off the mast clamp
3.Rotate the clamp 90° clockwise
4.Slide the mast clamp on the previous position on the axle tube
5.Then tighten the clamping screws again.
Fig. 2
935.543/C/0707/2.3e/ZWT