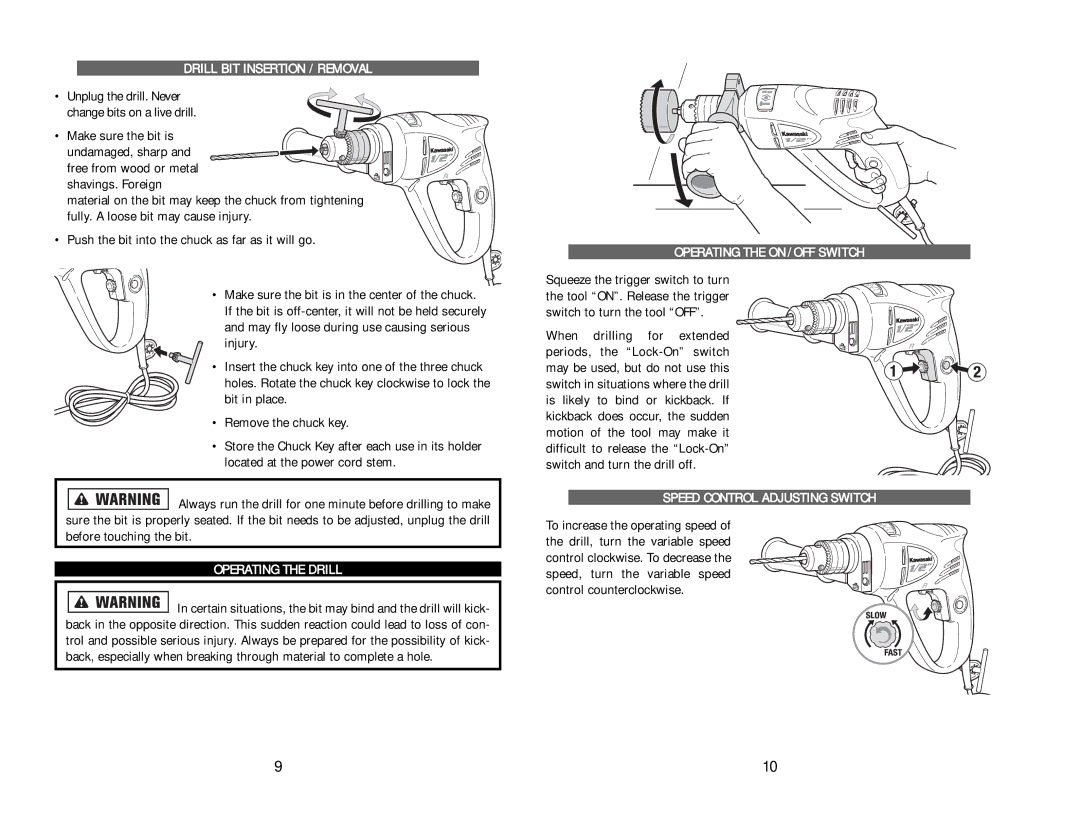
DRILL BIT INSERTION / REMOVAL
• Unplug the drill. Never change bits on a live drill.
• Make sure the bit is undamaged, sharp and
free from wood or metal shavings. Foreign
material on the bit may keep the chuck from tightening fully. A loose bit may cause injury.
• Push the bit into the chuck as far as it will go.
• Make sure the bit is in the center of the chuck. If the bit is
• Insert the chuck key into one of the three chuck holes. Rotate the chuck key clockwise to lock the bit in place.
•Remove the chuck key.
•Store the Chuck Key after each use in its holder located at the power cord stem.
![]()
![]()
![]()
![]()
![]()
![]()
![]() Always run the drill for one minute before drilling to make sure the bit is properly seated. If the bit needs to be adjusted, unplug the drill before touching the bit.
Always run the drill for one minute before drilling to make sure the bit is properly seated. If the bit needs to be adjusted, unplug the drill before touching the bit.
OPERATING THE DRILL
![]() In certain situations, the bit may bind and the drill will kick- back in the opposite direction. This sudden reaction could lead to loss of con- trol and possible serious injury. Always be prepared for the possibility of kick- back, especially when breaking through material to complete a hole.
In certain situations, the bit may bind and the drill will kick- back in the opposite direction. This sudden reaction could lead to loss of con- trol and possible serious injury. Always be prepared for the possibility of kick- back, especially when breaking through material to complete a hole.
OPERATING THE ON / OFF SWITCH
Squeeze the trigger switch to turn the tool “ON”. Release the trigger switch to turn the tool “OFF”.
When drilling for extended periods, the
SPEED CONTROL ADJUSTING SWITCH
To increase the operating speed of the drill, turn the variable speed control clockwise. To decrease the speed, turn the variable speed control counterclockwise.
9 | 10 |