840844 specifications
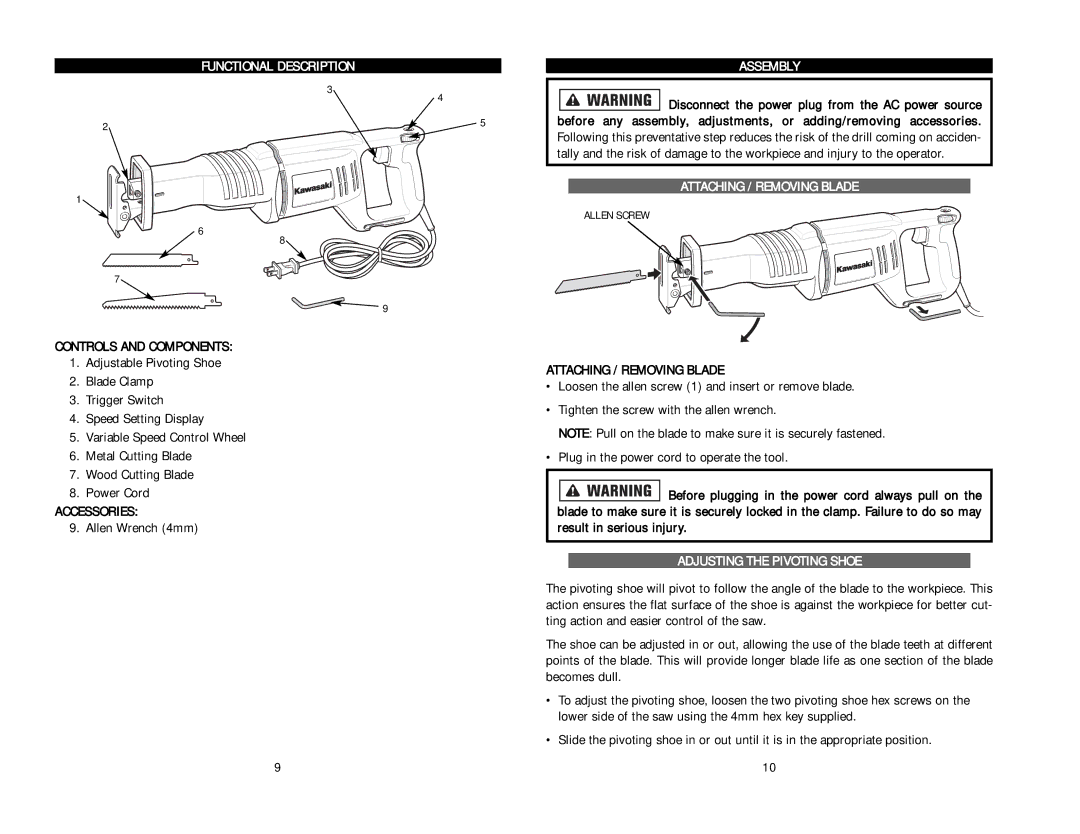
The Kawasaki 840844 is a cutting-edge addition to the realm of high-performance power equipment, designed to cater to both enthusiasts and professionals alike. This model embodies the latest advancements in engineering and technology, making it a standout in its category.At the heart of the Kawasaki 840844 is a robust engine that delivers impressive power and reliability. The engine features advanced cooling systems that ensure optimal performance even under demanding conditions. Its efficiency translates to lower fuel consumption and reduced emissions, making it an environmentally friendly choice. The durability of the components used in the engine construction is indicative of Kawasaki's commitment to quality, ensuring a long-lasting product that can withstand rigorous use.
One of the hallmark features of the Kawasaki 840844 is its ergonomic design. The comfortable grip and well-placed controls enhance user experience, reducing fatigue during extended operation. The equipment's weight distribution is optimized, making it more manageable and easier to maneuver. This aspect is crucial for professionals who require quick and agile equipment in tight spaces or challenging terrains.
The 840844 also incorporates advanced technology for enhanced performance. The model may include features like electronic ignition and automatic choke systems which facilitate easier startups and smoother operation. Some versions might come with adjustable settings, allowing users to tailor performance to specific tasks or environmental conditions, whether it’s for landscaping, construction, or other professional applications.
Safety is a significant consideration in the design of the Kawasaki 840844. The model is equipped with multiple safety mechanisms, including automatic shut-off features and protective guards, ensuring that users can operate the machine with confidence. Additionally, sound dampening technology may be integrated, providing a quieter operational experience, which is particularly beneficial for urban or residential settings.
Overall, the Kawasaki 840844 represents a harmonious blend of power, innovation, and user-friendliness. Its reliable performance, combined with ergonomic design and advanced safety features, makes it an exceptional choice for anyone in need of high-quality power equipment. Enhanced by Kawasaki's legacy of excellence, the 840844 stands as a testament to the brand's dedication to delivering superior solutions in the power equipment industry. Whether for commercial landscaping, efficient maintenance, or heavy-duty tasks, the Kawasaki 840844 is poised to meet and exceed expectations.

