Assembling The Motor Bracket
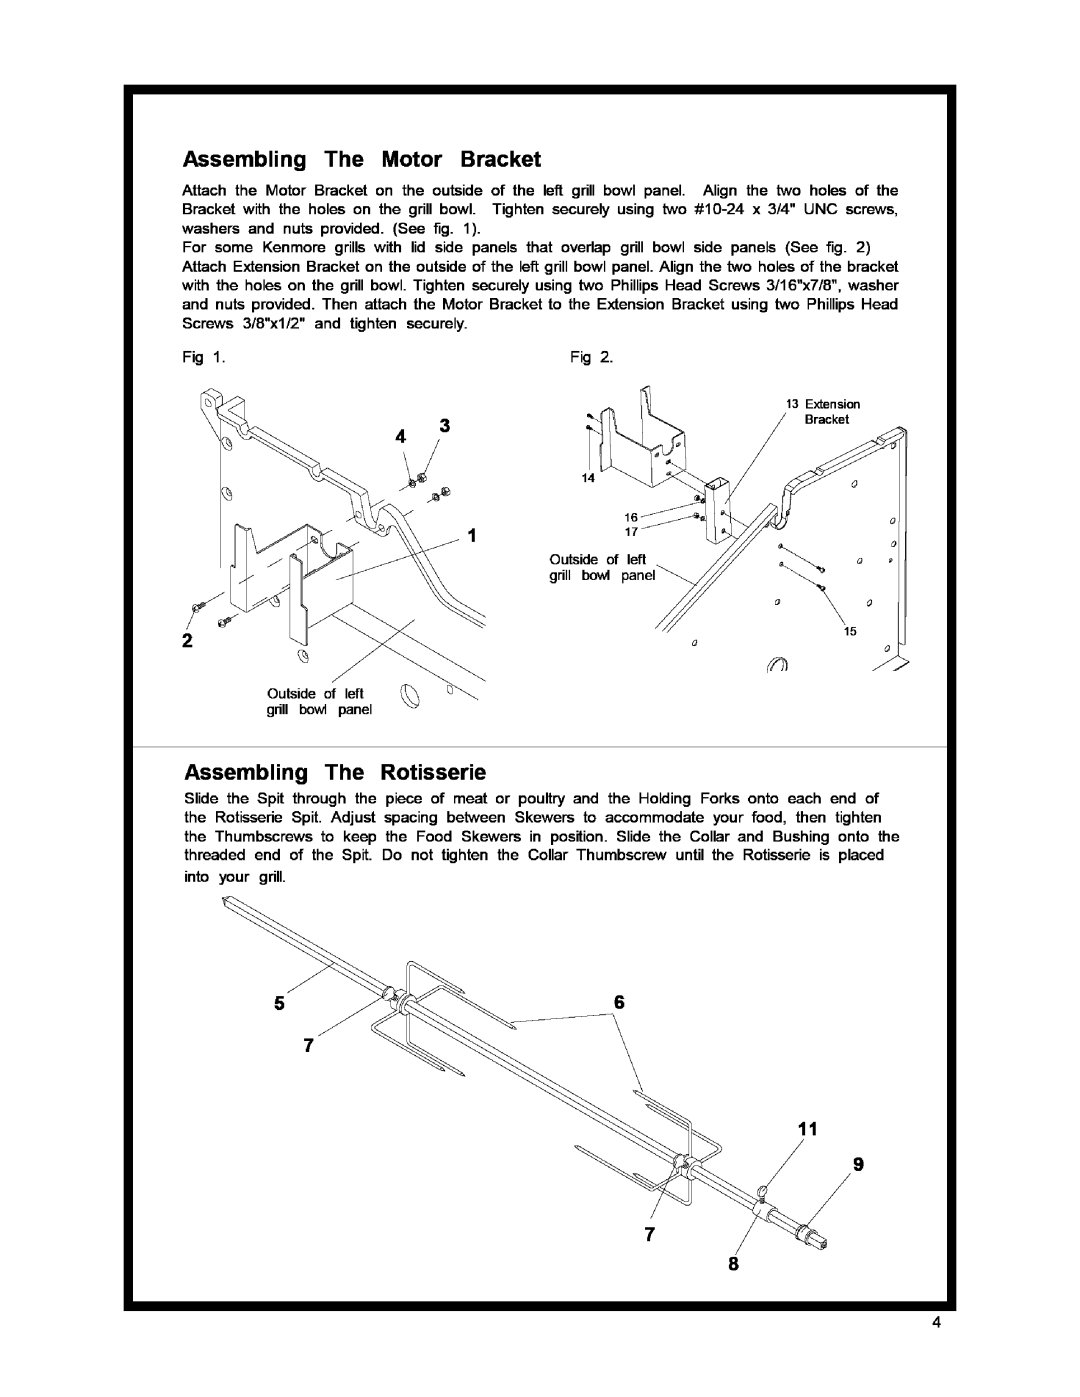
Attach the Motor Bracket on the outside of the left grill bowl panel. Align the two holes of the
Bracket with the holes on the grill bowl. Tighten securely using two
For some Kenmora grills with lid side panels that ovedap grill bowl side panels (See fig. 2) Attach Extension Bracket on the outside of the lef_ grill bowl panel. Align the two holes of the bracket with the holes on the grill bowl. Tighten securely using two Phillips Head Screws 3/16"x7/8", washer and nuts provided. Then attach the Motor Bracket to the Extension Bracket using two Phillips Head
Screws 3/8"xl/2" | and tighten securely. |
Fig 1. | Fig 2. |
| 13 Extension |
| Bracket |
14
1
Outside of left grill bowl panel_
2
15
0
Outside of left
gdll bowl panel
Assembling The Rotisserie
Slide the Spit through the piece of meat or poultry and the Holding Forks onto each end of
the Rotisserie Spit. Adjust spacing between Skewers to accommodate your food, then tighten
the Thumbscrews to keep the Food Skewers in position. Slide the Collar and Bushing onto the
threaded end of the Spit. Do not tighten the Collar Thumbscrew until the Rotisserie is placed into your grill.
5
7
11
9
7
8