Basic Lighting Procedures

Machine oils used in the manufacturing process of stainless steel can cause stainless steel to turn a tan color. Before initial grill use, remove protective PVC film from Control Panel and inside and outside of Grill

Lid. Use a Stainless Steel Cleaner to polish the stainless steel and remove these excess oils from

your grill. Never use abrasive cleaners or scrubbers because they will scratch and damage your grill. For details, see Cleaning Exterior Stainless Steel Surfaces on page 20.

Gas Lighting Instructions

Familiarize yourself with the safety guidelines at the front of this manual. Do not smoke while lighting grill or checking gas supply connections.

1.If you have a LPgas grill be sure the LP gas tank is filled, or if you have a NG grill be sure that the locking shut off valve is open.

2.Check that the end of each Burner Tube is properly located over each Valve Orifice.

3.Be sure all gas connections are securely tightened.

4.Open the Grill Lid or Side Burner Lid, depending on the Burner you are lighting.

WARNING

Failure to open Grill Lid during the lighting procedures could result in a fire or explosion that could cause serious bodily injury, death, or property damage,

5.Set ALL Control Knobs to OFF, and for LP Models, open gas tank valve slowly until 1/4 to 1/2 open.

Open LP gas tank

OFF

©

\

6.Push and turn the LEFT Control Knob to HIGH.

HIGH

OFF

7.Immediately press the Electric Ignitor for 3-4 seconds to light the Burner.

PRESS

©

8.If the burner does not light, turn the Control Knob to OFF, wait 5 minutes for gas to clear, then retry.

9.Once the left grill burner is ignited, the adjacent

burner can be lit by simply turning its Control Knob to HIGH.

10.Adjust Control Knobs to your desired cooking temperature.

Side Burner Lighting Instructions

1.Follow steps 1 through 5 of the Gas Lighting Instructions.

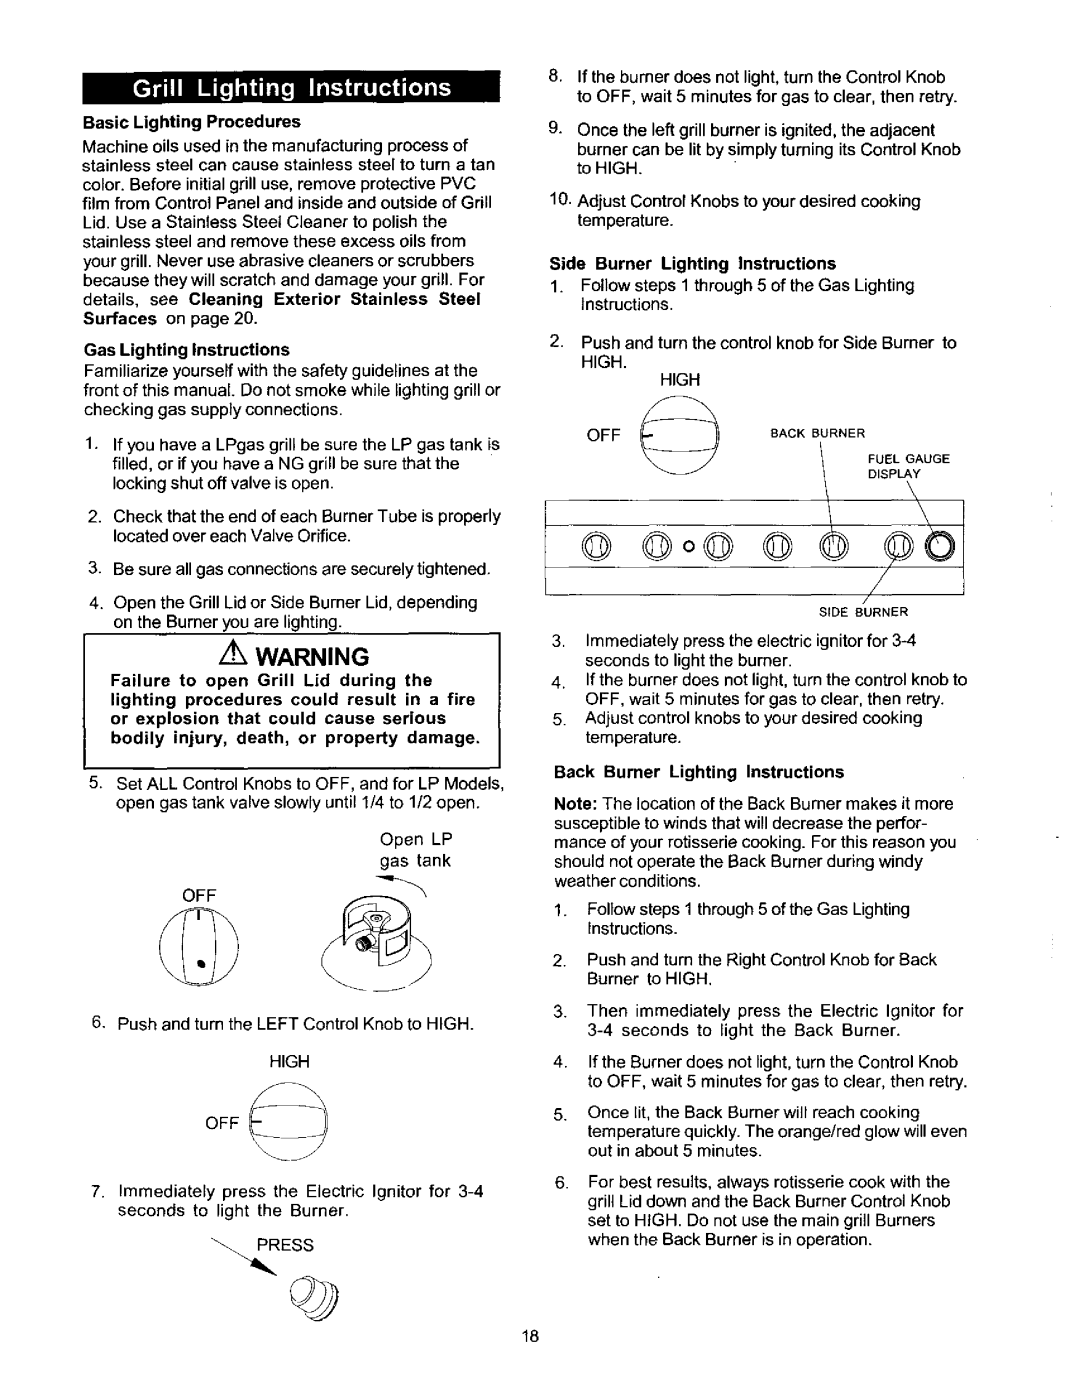
. Push and turn the control knob for Side Burner to HIGH.

HIGH

OFF ©

BACK BURNER

@ @o@ @

/

SIDE BURNER

3.Immediately press the electric ignitor for 3-4 seconds to light the burner.

4.If the burner does not light, turn the control knob to OFF, wait 5 minutes for gas to clear, then retry.

5.Adjust control knobs to your desired cooking temperature.

Back Burner Lighting Instructions

Note: The location of the Back Burner makes it more susceptible to winds that will decrease the perfor- mance of your rotisserie cooking. For this reason you should not operate the Back Burner during windy weather conditions.

1.Follow steps 1 through 5 of the Gas Lighting Instructions.

2.Push and turn the Right Control Knob for Back Burner to HIGH.

3.Then immediately press the Electric Ignitor for 3-4 seconds to light the Back Burner.

4.If the Burner does not light, turn the Control Knob to OFF, wait 5 minutes for gas to clear, then retry.

5.Once lit, the Back Burnerwill reach cooking temperature quickly. The orange/red glow will even out in about 5 minutes.

6.For best results, always rotisserie cook with the grill Lid down and the Back Burner Control Knob set to HIGH. Do not use the main grill Burners when the Back Burner is in operation.

18

Page 18
Image 18
Kenmore 141.1668 Gas Lighting Instructions, Side Burner Lighting Instructions, Back Burner Lighting Instructions

141.1668 specifications

The Kenmore 141.1668 stands out as a versatile and reliable washing machine designed to cater to modern laundry needs. Combining functionality with user-friendly features, this appliance makes laundry day more efficient and effective. One of its main characteristics is its large capacity, allowing users to wash sizable loads in one cycle, which is ideal for families or those with hefty laundry demands.

The Kenmore 141.1668 incorporates various wash cycles tailored to different types of fabrics and soil levels. With options such as normal, heavy-duty, delicate, and quick wash, it ensures that every garment is treated accordingly, preserving their fabric integrity. This level of customization is integral in providing optimal cleaning while minimizing wear and tear on clothing.

One of the standout technologies in the Kenmore 141.1668 is its advanced spin cycle, which not only accelerates drying time but also reduces the amount of moisture left in clothes after washing. This spin efficiency means less time in the dryer, leading to energy savings and faster turnover for laundry tasks. Alongside this is its energy-efficient design, which meets strict energy standards, making it an eco-friendly choice for environmentally conscious users.

Additionally, the Kenmore 141.1668 comes equipped with a variety of temperature settings, allowing consumers to choose the appropriate heat for their laundry needs. By offering options like cold, warm, and hot water washing, it provides flexibility and ensures that both tough stains and delicate fabrics are managed effectively.

Ease of use is another key characteristic of the Kenmore 141.1668. The intuitive control panel simplifies the process of selecting wash cycles and other settings, making it accessible for users of all experience levels. This model often features a delay start option, useful for planning laundry during off-peak hours or when more convenience is needed.

Furthermore, its durable construction indicates the longevity of the machine, with high-quality materials designed to withstand regular use. Noise-reduction technology is frequently integrated, allowing for quieter operation, which is an appealing aspect for those living in close quarters.

In summary, the Kenmore 141.1668 combines significant load capacity with diverse washing options, energy efficiency, and ease of use, making it a well-rounded choice for anyone in the market for a dependable washing machine.