I'r!l
11WE'REREADY TO MAKE THE ELECTRICAL CONNECTIONS.
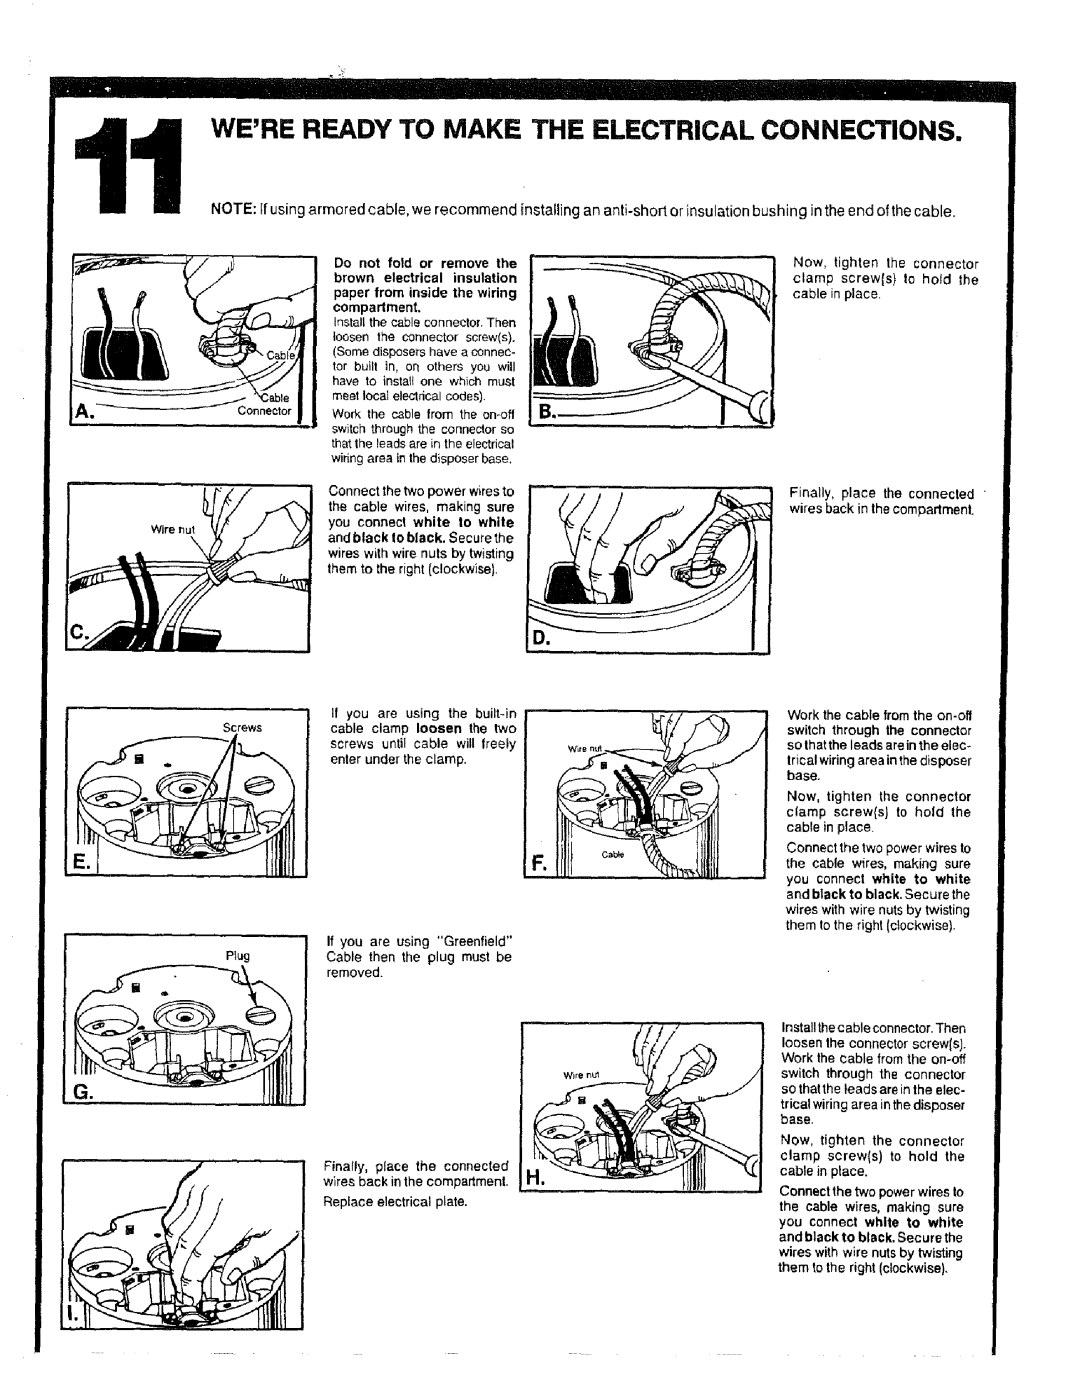
NOTE: Ifusing armored cable, we recommend installing an
A_onnector
Wire nut
Do not fold or remove the ! brown electrical insulation paper from inside the wiring compartment,
Install the cable connector. Then
loosen the connector screw(s). (Some disposers have a connec- tor built in, on ethers you will have to instalt one which must meet local electrical codes).
Work the cable from the
switch through the connector so that the leads are in the electrical
widng area in the disposer base.
Connect the two power wires to the cable wires, making sure
you connect white to white and black to black, Secure the
wires with wire nuts by twisting them to the right (clockwise).
Now, tighten the connector clamp screw{s) to hold the cable in place.
Finally, place the connected " wires back in the compartment.
| If you are using the |
| ||
Screws | cable | clamp | loosen the two |
|
| screws until cable will freely | W=re nut | ||
| enter | under | the clamp. | |
|
| |||
F.
Plug | If you | are using "Greenfield" |
| Cable | then the plug must be |
removed.
Wire nul
Finally, place the connected wires back in the compartment.
Replace electrical plate.
Work the cable from the
trical wiring area in the disposer base.
Now, tighten the connector clamp screw{s) to hold the cable in place.
Connect the two power wires to the cable wires, making sure you connect white to white and black to black. Secure the wires with wire nuts by twisting them to the right (clockwise).
Install the cable connector. Then
loosen the connector screwls I. Work the cable from the
trical wiring area in the disposer base.
Now, tighten the connector clamp screw(s) to hold the cable in place.
Connect the two power wires to the cable wires, making sure you connect white to white and black to black, Secure the
wires with wire nuts by twisting them to the right (clockwise).