Other Features
Drying Rack
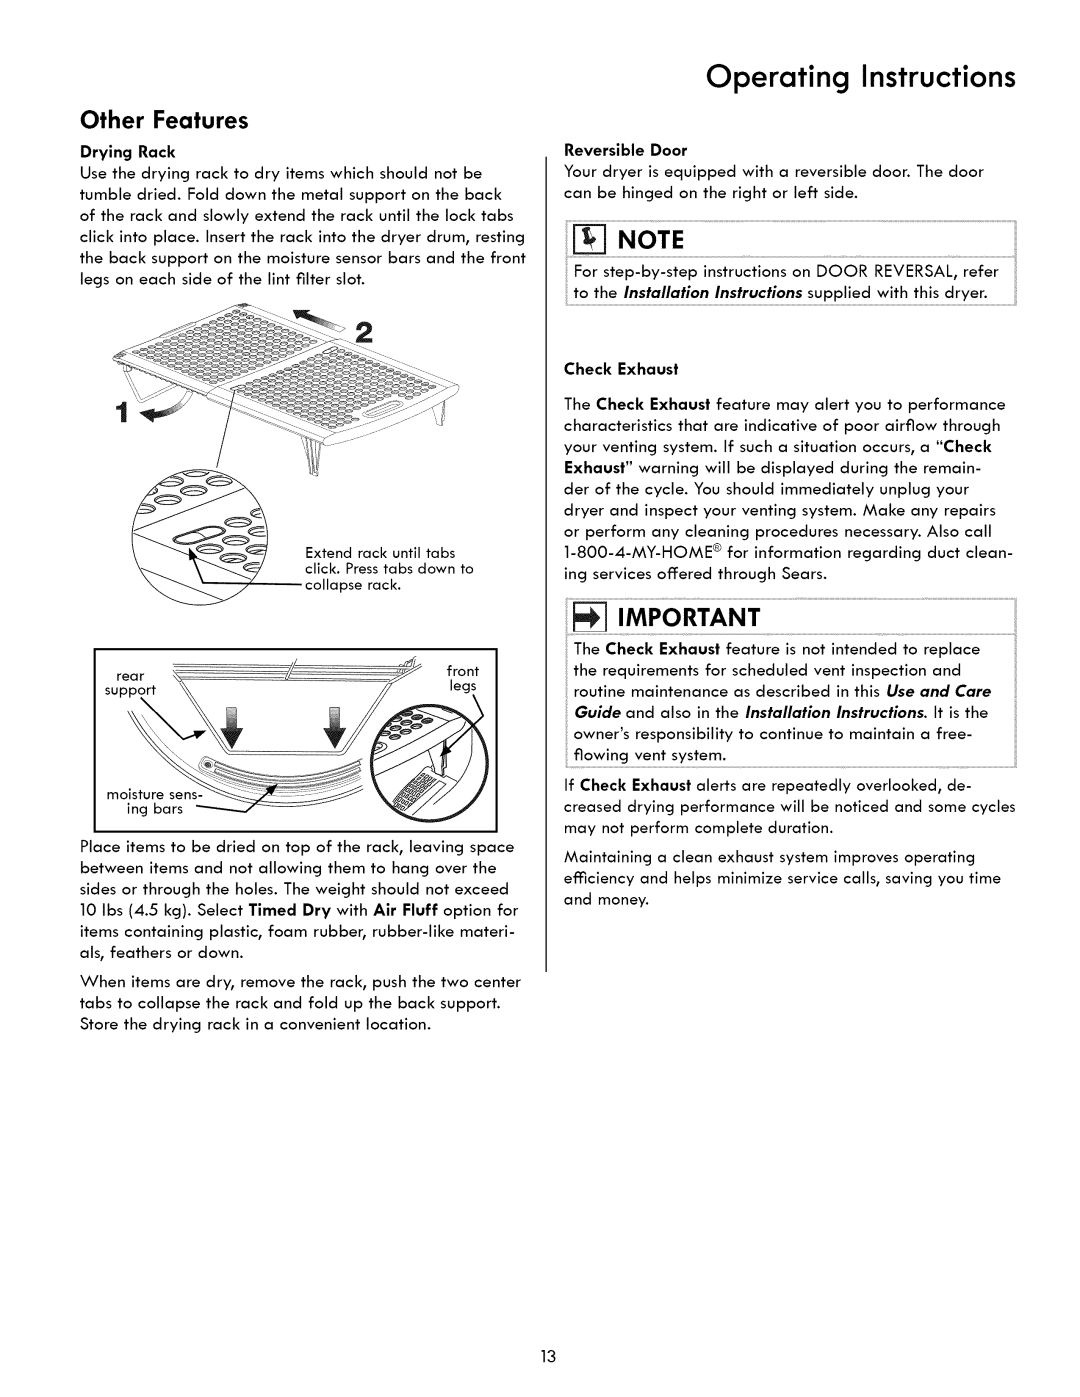
Use the drying rack to dry items which should not be tumble dried. Fold down the metal support on the back of the rack and slowly extend the rack until the lock tabs click into place. Insert the rack into the dryer drum, resting the back support on the moisture sensor bars and the front legs on each side of the lint filter slot.
Extend rack until tabs click. Press tabs down to
collapse rack.
rea r | front | |
legs | ||
|
moisture sens-
ing bars
Place items to be dried on top of the rack, leaving space between items and not allowing them to hang over the sides or through the holes. The weight should not exceed 10 Ibs (4.5 kg). Select Timed Dry with Air Fluff option for items containing plastic, foam rubber,
When items are dry, remove the rack, push the two center tabs to collapse the rack and fold up the back support. Store the drying rack in a convenient location.
Operating Instructions
Reversible Door
Your dryer is equipped with a reversible door. The door can be hinged on the right or left side.
to the Installation Instructions supplied with this dryer.
Check Exhaust
The Check Exhaust feature may alert you to performance characteristics that are indicative of poor airflow through your venting system. If such a situation occurs, a "Check Exhaust" warning will be displayed during the remain- der of the cycle. You should immediately unplug your dryer and inspect your venting system. Make any repairs or perform any cleaning procedures necessary. Also call
IMPORTANT
The Check Exhaust feature is not intended to replace the requirements for scheduled vent inspection and routine maintenance as described in this Use and Care Guide and also in the Installation Instructions. It is the owner's responsibility to continue to maintain a free-
If Check Exhaust alerts are repeatedly overlooked, de- creased drying performance will be noticed and some cycles may not perform complete duration.
Maintaining a clean exhaust system improves operating efficiency and helps minimize service calls, saving you time and money.
13
