PIZZA SHELF (SOME UPRIGHT MODELS)
Here is the place to store up to four
Next, locate the pizza shelf beneath the shelf nearest your desired location and snap each tab upwards between the wire or glass shelf and liner until the tab has snapped into place and is resting on top of the supporting shelf. Repeat for each tab until all four are firmly in place and then load with desired items.
CHEST DIVIDER (SOME CHEST MODELS)
Use these clever dividers to
Examples of Chest Divider Configurations:
_ _ _ i II _
til ii
_Damp | objects stick to |
cold metal surfaces. Do not touch interior metal surfaces with wet or
damp hands.
Some upright freezers are
BETWEEN DEFROSTINGS
To avoid frequent defrosting, occasionally use a plastic scraper to remove frost. Scrape with a pulling motion. Never use a metal instrument to remove frost.
DEFROSTING
Freezer must be
unplugged (to avoid electrical hazard) from power source when defrosting unit.
It is important to defrost and clean the freezer when 1Ato 1/2 inch of frost has accumulated. Frost may tend to accumu- late faster on the upper part of the freezer due to warm, moist air entering the freezer when the door is opened.
Remove food and leave the door open when defrosting the freezer.
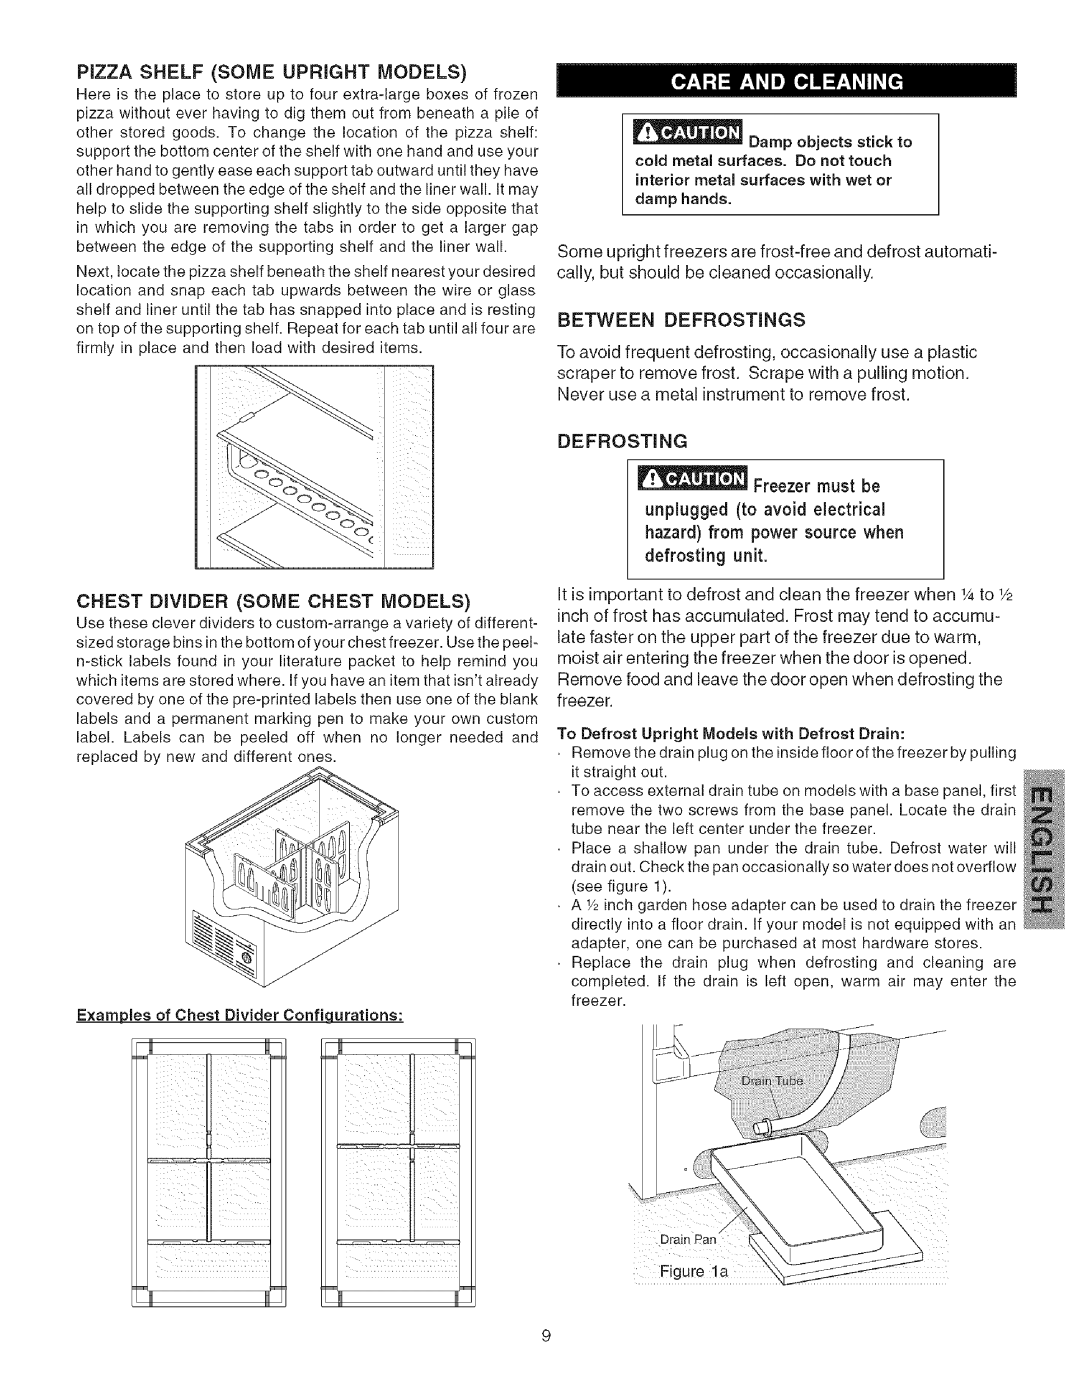
To Defrost Upright Models with Defrost Drain:
Remove the drain plug on the inside floor of the freezer by pulling it straight out.
To access external drain tube on models with a base panel, first remove the two screws from the base panel. Locate the drain tube near the left center under the freezer.
Place a shallow pan under the drain tube. Defrost water will drain out. Check the pan occasionally so water does not overflow (see figure 1).
A V2inch garden hose adapter can be used to drain the freezer directly into a floor drain. If your model is not equipped with an adapter, one can be purchased at most hardware stores.
Replace the drain plug when defrosting and cleaning are
completed. If the drain is left open, warm air may enter the freezer.
Drain Pan [
_i iiiiii