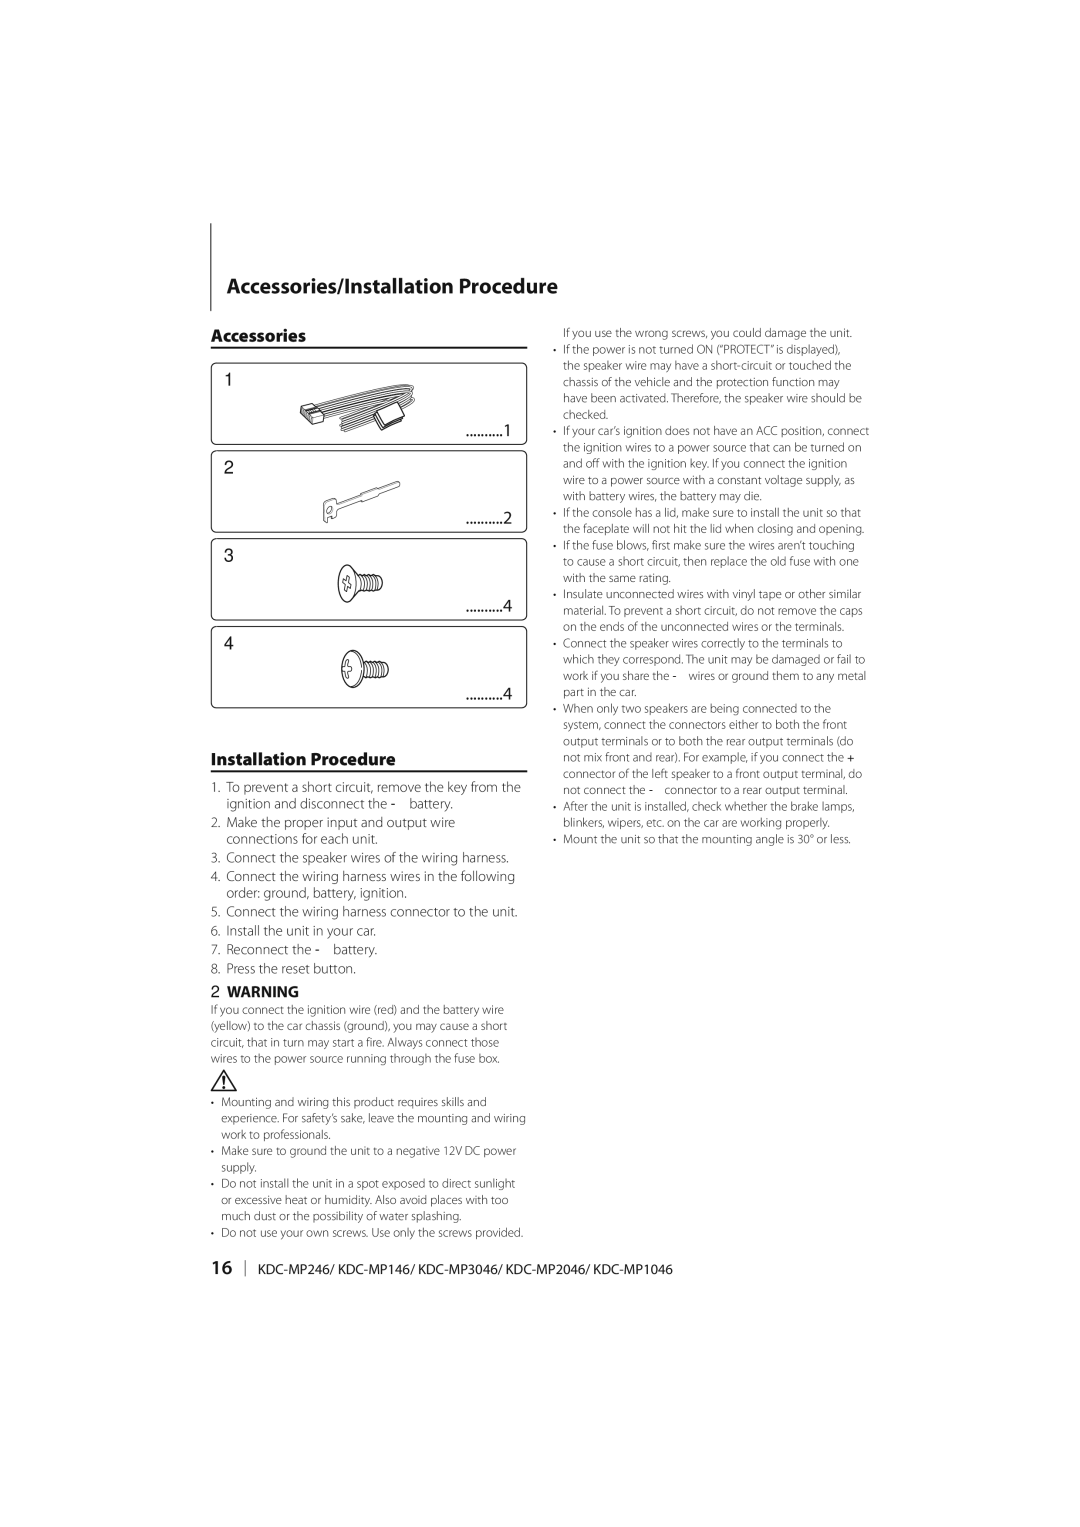
Accessories/Installation Procedure

Accessories

1

..........1

2

..........2

3

..........4

4

..........4

Installation Procedure

1.To prevent a short circuit, remove the key from the ignition and disconnect the - battery.

2.Make the proper input and output wire connections for each unit.

3.Connect the speaker wires of the wiring harness.

4.Connect the wiring harness wires in the following order: ground, battery, ignition.

5.Connect the wiring harness connector to the unit.

6.Install the unit in your car.

7.Reconnect the - battery.

8.Press the reset button.

2WARNING

If you connect the ignition wire (red) and the battery wire (yellow) to the car chassis (ground), you may cause a short circuit, that in turn may start a fire. Always connect those wires to the power source running through the fuse box.

¤

Mounting and wiring this product requires skills and experience. For safety’s sake, leave the mounting and wiring work to professionals.

Make sure to ground the unit to a negative 12V DC power supply.

Do not install the unit in a spot exposed to direct sunlight or excessive heat or humidity. Also avoid places with too much dust or the possibility of water splashing.

Do not use your own screws. Use only the screws provided.

If you use the wrong screws, you could damage the unit.

If the power is not turned ON (“PROTECT” is displayed), the speaker wire may have a short-circuit or touched the chassis of the vehicle and the protection function may have been activated. Therefore, the speaker wire should be checked.

If your car’s ignition does not have an ACC position, connect the ignition wires to a power source that can be turned on and off with the ignition key. If you connect the ignition wire to a power source with a constant voltage supply, as with battery wires, the battery may die.

If the console has a lid, make sure to install the unit so that the faceplate will not hit the lid when closing and opening.

If the fuse blows, first make sure the wires aren’t touching to cause a short circuit, then replace the old fuse with one with the same rating.

Insulate unconnected wires with vinyl tape or other similar material. To prevent a short circuit, do not remove the caps on the ends of the unconnected wires or the terminals.

Connect the speaker wires correctly to the terminals to which they correspond. The unit may be damaged or fail to work if you share the - wires or ground them to any metal part in the car.

When only two speakers are being connected to the system, connect the connectors either to both the front output terminals or to both the rear output terminals (do not mix front and rear). For example, if you connect the + connector of the left speaker to a front output terminal, do not connect the - connector to a rear output terminal.

After the unit is installed, check whether the brake lamps, blinkers, wipers, etc. on the car are working properly.

Mount the unit so that the mounting angle is 30° or less.

16 KDC-MP246/ KDC-MP146/ KDC-MP3046/ KDC-MP2046/ KDC-MP1046

Page 16
Image 16
Kenwood KDC-MP146, KDC-MP1046, KDC-MP3046, KDC-MP246 Accessories/Installation Procedure, Accessories Installation Procedure

KDC-MP1046, KDC-MP3046, KDC-MP246, KDC-MP2046, KDC-MP146 specifications

Kenwood has been a trusted name in car audio systems for decades, and their KDC series of head units, including the KDC-MP146, KDC-MP2046, KDC-MP246, KDC-MP3046, and KDC-MP1046, reflects their commitment to quality and innovation. Each model within this range is designed to enhance your driving experience by delivering exceptional sound quality, robust features, and advanced technologies.

The KDC-MP146 is a compact yet powerful unit that offers a clean interface with a 1-line display. It supports MP3, WMA, and WAV file formats, ensuring that users can enjoy their favorite music without compatibility issues. One of its standout features is the built-in MOSFET amplifier, delivering 50 watts of power to each of its four channels. This results in rich, clear sound that can fill any vehicle.

Moving up the line, the KDC-MP2046 introduces additional connectivity options, including front USB and auxiliary inputs. This allows users to easily connect their smartphones or MP3 players for seamless audio playback. The model also features a 2-line LCD display, which improves navigation through menus and makes selecting tracks straightforward.

The KDC-MP246 takes things a step further with enhanced sound customization options. This unit includes a 3-band parametric equalizer, allowing users to tailor the audio output to their preferences. Additionally, it supports Bluetooth connectivity, enabling hands-free calls and audio streaming from compatible devices.

The KDC-MP3046 features an even more comprehensive interface, boasting a larger display and advanced multimedia compatibility, including support for FLAC files. Its SiriusXM ready feature ensures users can access satellite radio, enhancing their listening options while on the road. Along with customizable sound settings, it also supports Kenwood's wireless remote app for easier control from anywhere in the vehicle.

Lastly, the KDC-MP1046 is designed for those looking for a balance of features and functionality. With its user-friendly design and essential features like USB input and a built-in amplifier, this model is perfect for those who want an upgrade without overwhelming complexity.

In summary, the Kenwood KDC series exemplifies innovation in car audio technology. With each model building on the strengths of its predecessor, users can find the perfect fit for their audio needs while enjoying advanced features, superior sound quality, and convenient connectivity options. Whether you opt for the entry-level KDC-MP146 or the feature-rich KDC-MP3046, you're sure to enhance your driving experience with Kenwood's exceptional audio solutions.