7Assembly Instructions
The CLUB HR T Treadmill is shipped in four pieces and the ELITE MAX Treadmill is shipped in two pieces to make assembly easy. After opening the box, remove any packing materials from the treadmill. You should find a rear endcap (large plastic piece that fits over the rear roller area), and owner’s manual packet with bolts and screws for assembly. Do not throw away any packing materials until the unit is working properly. Place the base on a clean, level surface. Make sure the electrical cord will easily reach an electrical outlet.
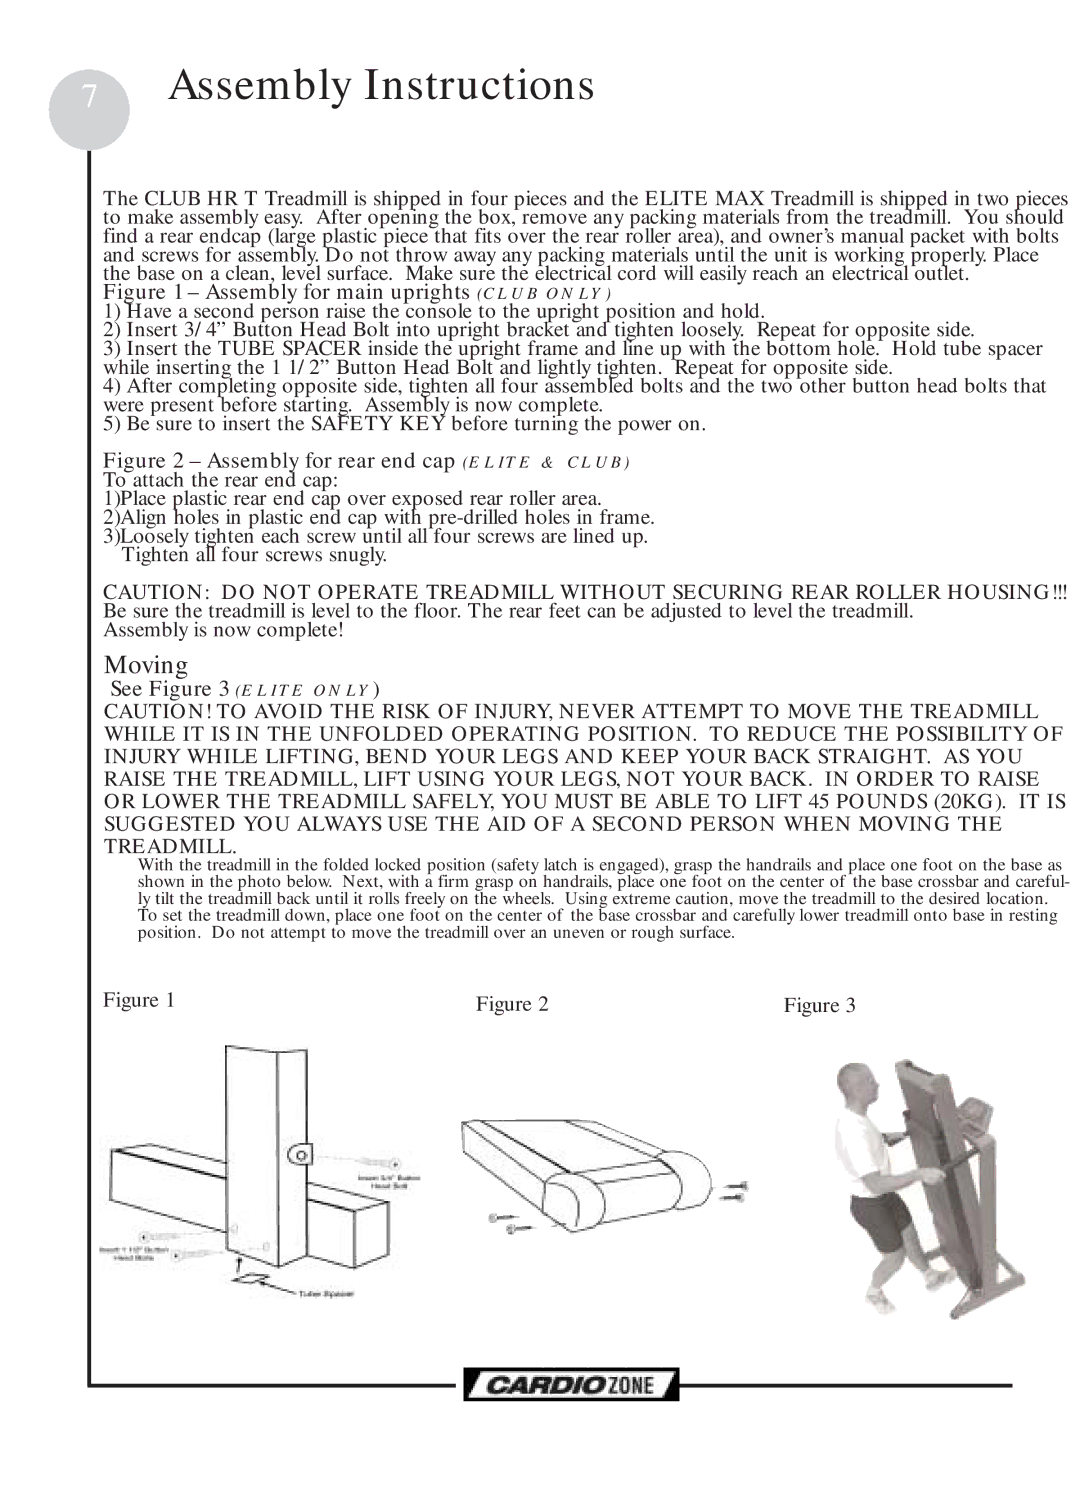
Figure 1 – Assembly for main uprights (CLUB ONLY)
1) Have a second person raise the console to the upright position and hold.
2) Insert 3/4” Button Head Bolt into upright bracket and tighten loosely. Repeat for opposite side.
3) Insert the TUBE SPACER inside the upright frame and line up with the bottom hole. Hold tube spacer while inserting the 1 1/2” Button Head Bolt and lightly tighten. Repeat for opposite side.
4) After completing opposite side, tighten all four assembled bolts and the two other button head bolts that were present before starting. Assembly is now complete.
5) Be sure to insert the SAFETY KEY before turning the power on.
Figure 2 – Assembly for rear end cap (ELITE & CLUB)
To attach the rear end cap:
1)Place plastic rear end cap over exposed rear roller area. 2)Align holes in plastic end cap with
Tighten all four screws snugly.
CAUTION: DO NOT OPERATE TREADMILL WITHOUT SECURING REAR ROLLER HOUSING!!! Be sure the treadmill is level to the floor. The rear feet can be adjusted to level the treadmill.
Assembly is now complete!
Moving
See Figure 3 (ELITE ONLY)
CAUTION! TO AVOID THE RISK OF INJURY, NEVER ATTEMPT TO MOVE THE TREADMILL WHILE IT IS IN THE UNFOLDED OPERATING POSITION. TO REDUCE THE POSSIBILITY OF INJURY WHILE LIFTING, BEND YOUR LEGS AND KEEP YOUR BACK STRAIGHT. AS YOU RAISE THE TREADMILL, LIFT USING YOUR LEGS, NOT YOUR BACK. IN ORDER TO RAISE OR LOWER THE TREADMILL SAFELY, YOU MUST BE ABLE TO LIFT 45 POUNDS (20KG). IT IS SUGGESTED YOU ALWAYS USE THE AID OF A SECOND PERSON WHEN MOVING THE TREADMILL.
With the treadmill in the folded locked position (safety latch is engaged), grasp the handrails and place one foot on the base as shown in the photo below. Next, with a firm grasp on handrails, place one foot on the center of the base crossbar and careful- ly tilt the treadmill back until it rolls freely on the wheels. Using extreme caution, move the treadmill to the desired location.
To set the treadmill down, place one foot on the center of the base crossbar and carefully lower treadmill onto base in resting position. Do not attempt to move the treadmill over an uneven or rough surface.
|
|
|
| |
Figure 1 | Figure 3 | |||
| Figure 2 | |||
|
|
|
|