Assembly
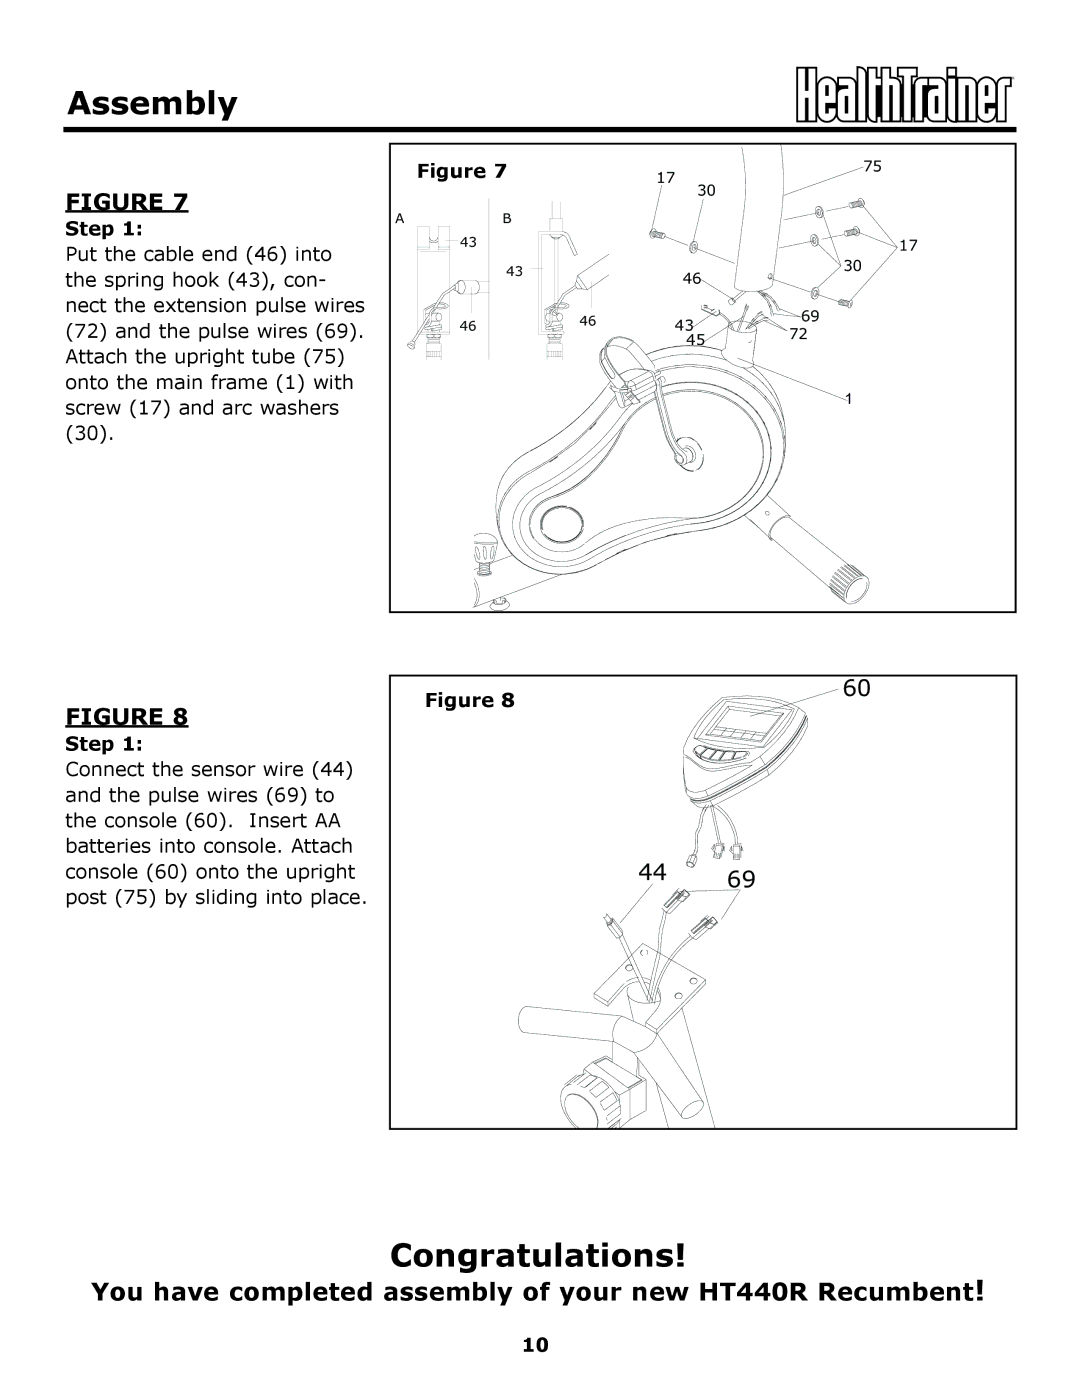
FIGURE 7
Step 1:
Put the cable end (46) into the spring hook (43), con- nect the extension pulse wires
(72)and the pulse wires (69). Attach the upright tube (75) onto the main frame (1) with screw (17) and arc washers
|
| 75 | |
Figure 7 | 17 | ||
30 | |||
|
|
AB
43 |
|
| 17 | |
| 43 | 46 | 30 | |
|
| |||
|
|
| ||
46 | 46 | 43 | 69 | |
72 | ||||
|
| 45 | ||
|
|
|
1
FIGURE 8
Step 1:
Connect the sensor wire (44) and the pulse wires (69) to the console (60). Insert AA batteries into console. Attach console (60) onto the upright post (75) by sliding into place.
Figure 8 | 60 |
|
44 69
Congratulations!
You have completed assembly of your new HT440R Recumbent!
10
