Close
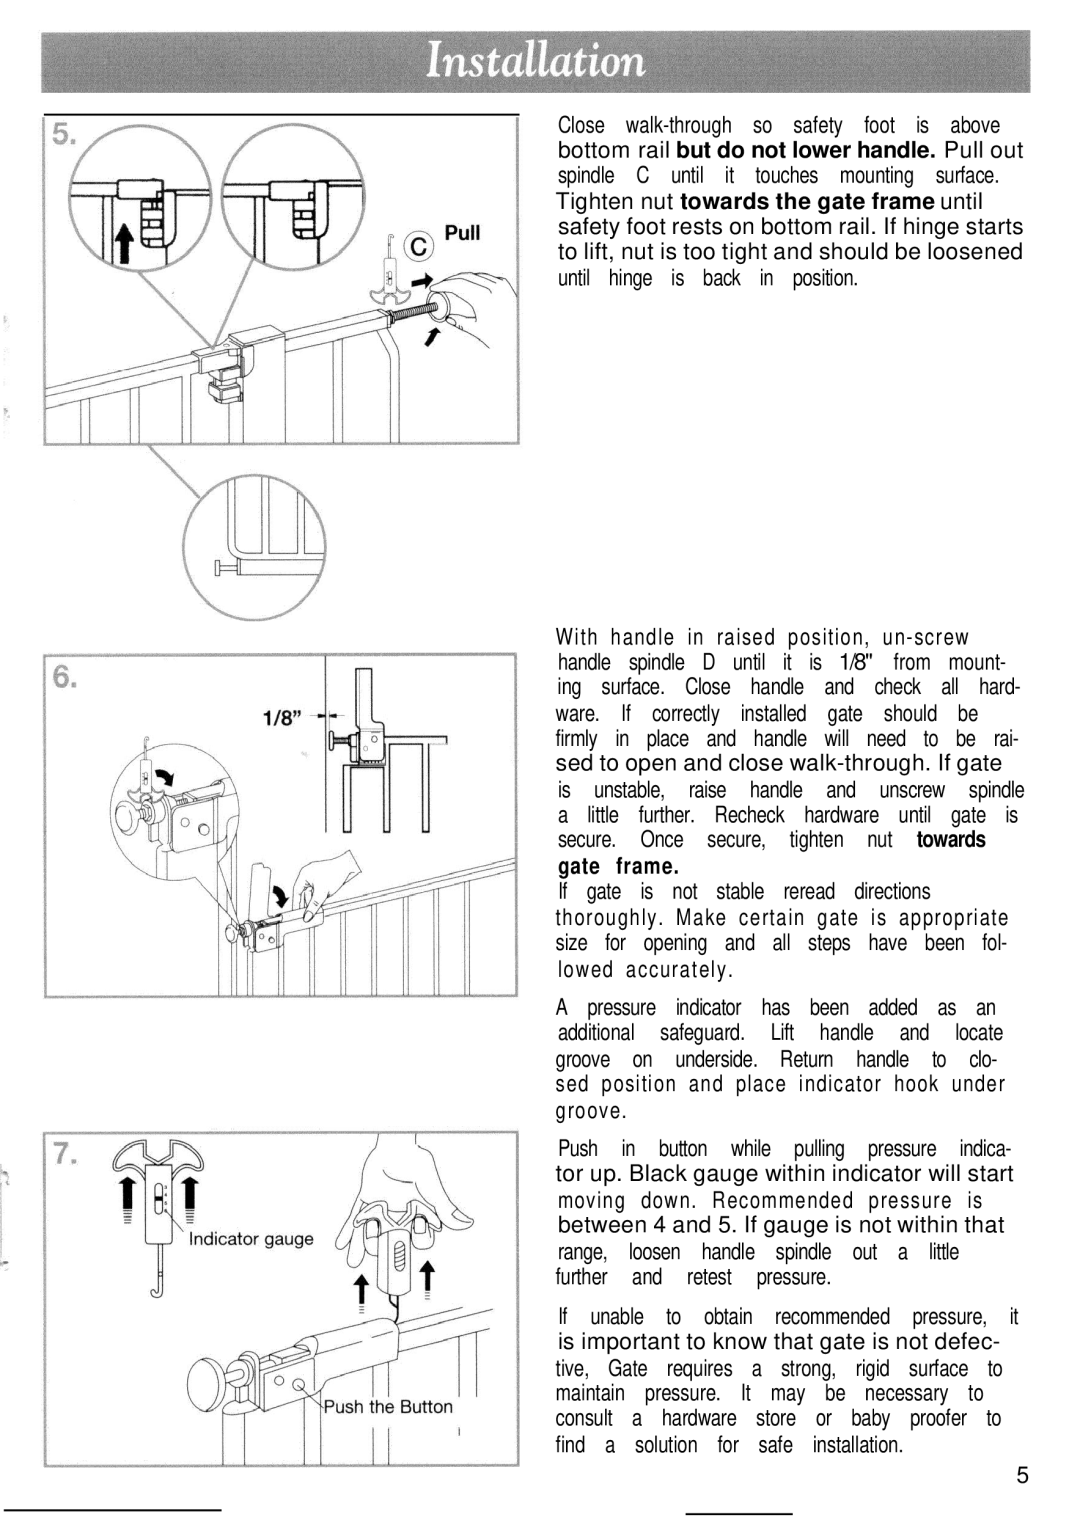
With handle in raised position, un - screw
handle spindle | D until it | is 1/8" from | mount- | ||||
ing | surface. | Close | handle | and check all hard- | |||
ware. | If | correctly | installed | gate | should | be | |
firmly | in | place and | handle | will | need to | be rai- | |
sed to open and close
is | unstable, | raise handle and unscrew spindle | ||||
a | little | further. | Recheck hardware until gate is | |||
secure. | Once | secure, | tighten | nut towards | ||
gate frame. |
|
|
| |||
If | gate | is | not | stable | reread | directions |
thoroughly . Make certain gate is appropriate size for opening and all steps have been fol- lowed accurately .
A pressure indicator has been added as an additional safeguard. Lift handle and locate groove on underside. Return handle to clo- sed position and place indicator hook under groove .
Push in button while pulling pressure indica- tor up. Black gauge within indicator will start moving down . Recommended pressure is between 4 and 5. If gauge is not within that
range, | loosen | handle | spindle | out | a little |
further | and | retest | pressure. |
|
|
If unable to | obtain | recommended | pressure, it | ||
is important to know that gate is not defec- tive, Gate requires a strong, rigid surface to maintain pressure. It may be necessary to
consult | a hardware | store | or baby proofer to |
find a | solution for | safe | installation. |
5