Free Floating Finishing Mower specifications
The King Kutter Free Floating Finishing Mower stands as a reliable choice for both residential and commercial applications, delivering precision cutting and enhanced performance for maintaining lawns and fields. Engineered for versatility, this mower is ideal for homeowners, landscapers, and professionals seeking an efficient machine that can handle a variety of terrains.One of the main features of the King Kutter Free Floating Finishing Mower is its free-floating design, which allows for flexibility over uneven ground, ensuring a consistently smooth cut. This innovative design allows the mower to adapt to the contours of the landscape, eliminating scalping and maintaining an even height across the cutting area.
The mower comes equipped with a robust, reinforced steel frame that provides durability and stability, making it capable of withstanding the rigors of regular use. Its heavy-duty construction ensures longevity, even in challenging conditions. The mower is available in various widths, ranging from 48 inches to 72 inches, allowing users to choose the model that best suits their needs.
Another significant characteristic of the King Kutter Finishing Mower is its cutting blade system. The mower features twin blades that are strategically positioned to provide a clean and effective cut. The high-velocity blades work in unison to disperse clippings finely, resulting in a well-manicured lawn without the hassle of bulky discharge.
The mower's adjustable cutting height, ranging from 1 to 4 inches, offers users the flexibility to achieve their desired grass length. This feature is particularly beneficial for those maintaining a diverse range of grass types, as it allows for tailored mowing settings that promote healthy growth.
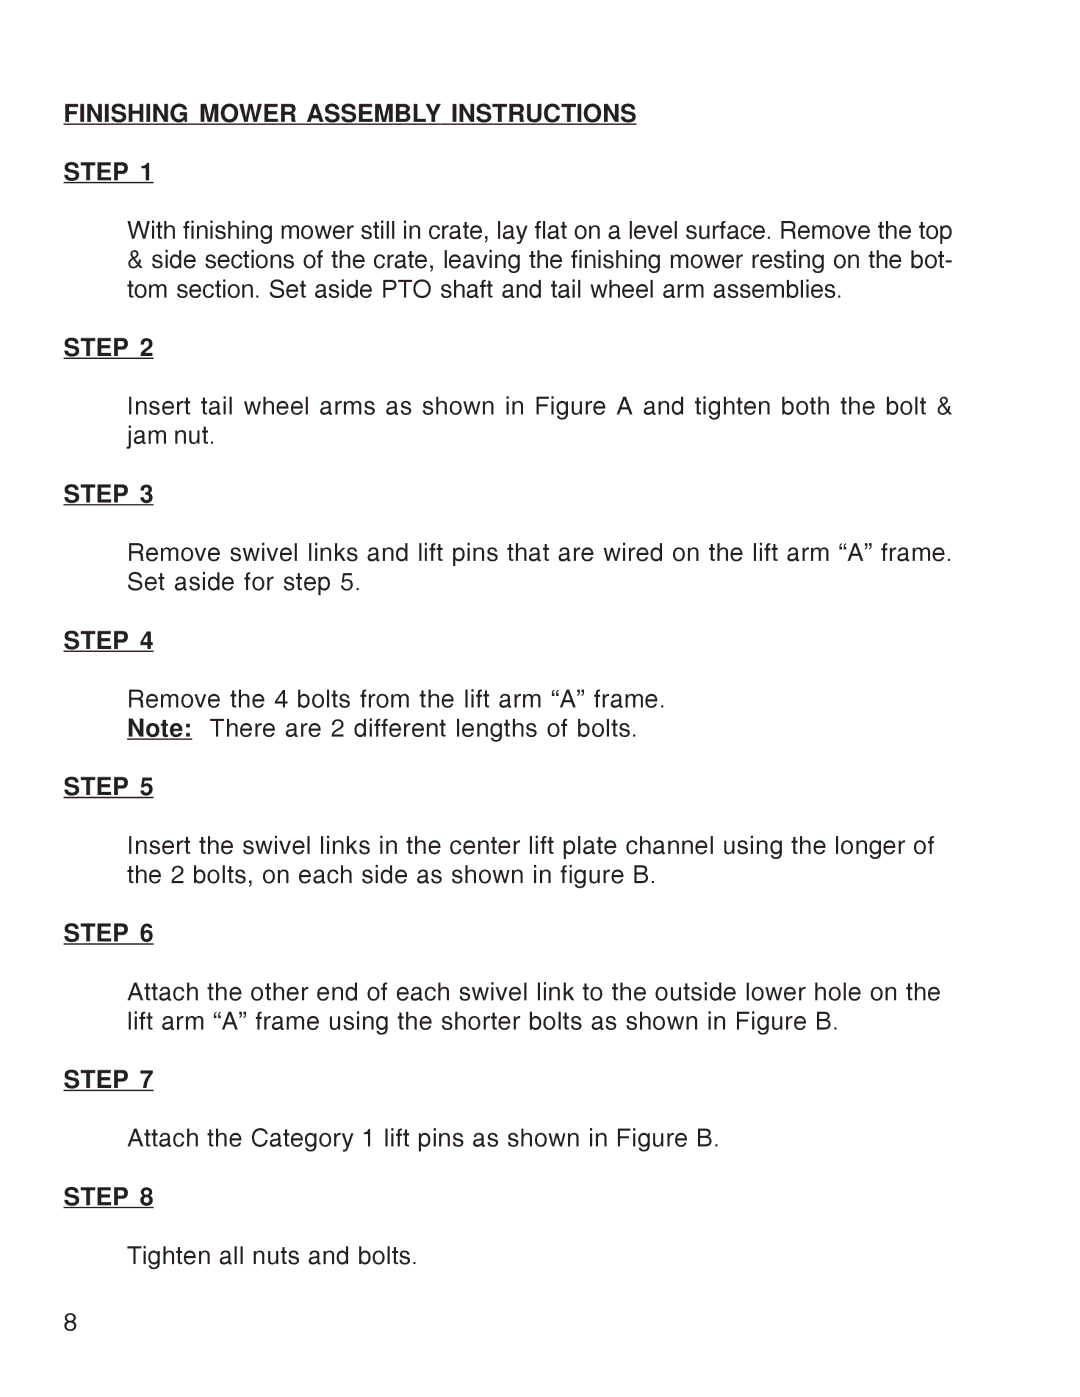
In terms of technology, the King Kutter Free Floating Finishing Mower boasts a simple and efficient attachment system, allowing for easy connection and disconnection from compatible tractors. Its compatibility with various models ensures that it can fit seamlessly into existing landscaping operations.
Another noteworthy aspect is its maintenance-friendly design. The mower's components are easily accessible, making routine maintenance tasks, such as blade sharpening and greasing, straightforward and hassle-free.
In conclusion, the King Kutter Free Floating Finishing Mower combines robust construction, innovative features, and user-friendly technology, making it an excellent investment for anyone looking to achieve a well-groomed lawn or landscape. Its adaptability to different terrains and ease of use positions it as a top choice among finishing mowers in the market today.